Opening Translation Designer
Translation Designer shows all the translatable definitions in your current Application Designer project, along with their base language and translated text.
The grid contents are based on the Application Designer project that is open when Translation Designer is started. This association with Application Designer projects is a handy mechanism for organizing your translation effort. However, it also means that, to use Translation Designer, you must have a project open, and it must contain one or more pages. If you modify the project, Translation Designer won’t pick up the new objects in the project until you save the changes and refresh.
This example illustrates the fields and controls on the Translating Page Definitions in Translation Designer.
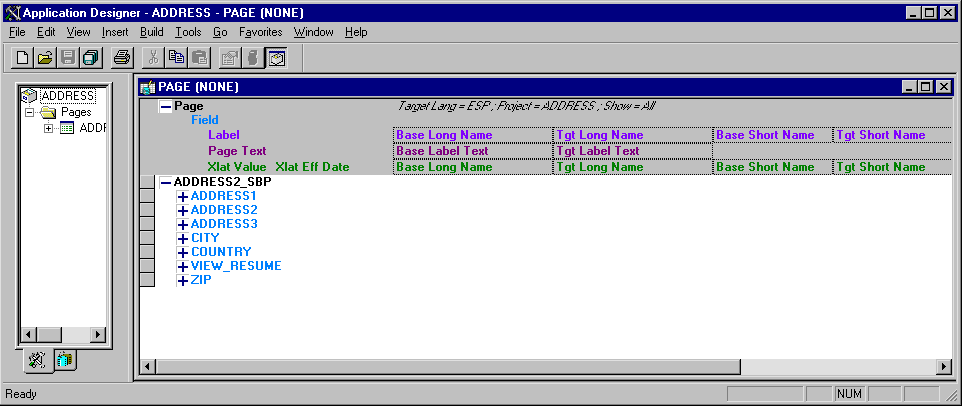
To open Translation Designer:
-
Set your language preference to the target language.
Because you use the Application Designer to access Translation Designer, set your language preference using PeopleSoft Configuration Manager.
-
Open Application Designer.
-
Create or open the project containing the definitions to be translated.
It makes sense to use projects with the non-base language versions of any pages. That way you’re sure to include all definitions on the pages. If you are creating a new project, you must save it before opening Translation Designer. Keep the number of pages in the project being translated to a minimum, as all the fields and other translatable definitions on each page in the project are loaded into memory when Translation Designer starts. A project with a lot of pages may take some time to open due to the sheer volume of fields on the page. Try to keep the number of pages in a project to be translated using Translation Designer under 20.
-
Open Translation Designer.
-
To translate the pages in your project, from the Tools menu select Translate and choose Translate Page Definitions.
This is the most versatile option because it shows you all translatable definitions that are associated with a page. You can use it to translate field labels, panel text (not derived from field labels), and translate values—all in one grid.
-
To translate only the fields in your project, from the Tools menu select Translate and choose Translate Fields.
This option lets you translate fields that are directly included as definitions in your project. Fields that are part of records or pages in your project are not included unless they are also explicitly included in your project as fields.
-
To translate only the translate values in your project, from the Tools menu select Translate and choose Translate Xlats.
You can also access all of these commands in the popup menu that appears when you right-click in the project workspace.
After you select one of the translate options, Translation Designer appears in the object workspace.
Depending on which translation grid you opened, different translatable definitions from the active project appear in the grid. All definitions are arranged hierarchically: pages (if included) are at the top level; fields are at the next level; and field labels, panel text, and translate (xlat) values are at the lowest level.
Use standard tree controls to expand and collapse the view in order to display definitions at different levels. You can also collapse or expand all levels of the tree by right-clicking on the tree node and selecting the appropriate option from the popup menu.
-
-
(Optional) Arrange the window to maximize Translation Designer.
If you want more space for the translation grid, maximize the Application Designer window and then maximize Translation Designer within the window. For even more space, hide the other frames in the Application Designer window. To toggle the display of the project workspace, from the View menu select Project Workspace, or press Alt+0 (zero). To toggle the display of the output window, from the View menu select Output Window, or press Alt+1.