Using the Project Work Space
When you open Send Master, the system displays the Project work space. You use the Project work space to define, modify, and test a Send Master project.
This example illustrates the fields and controls on the Project work space. You can find definitions for the fields and controls later on this page.
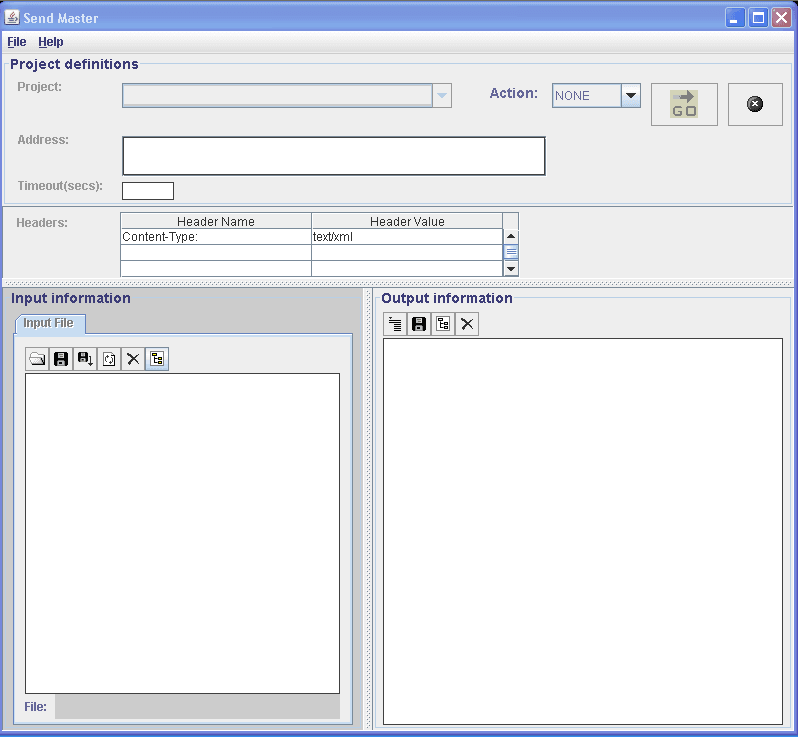
The Send Master Project work space features the Project Definitions section, the Input Information section, and the Output Information section. No fields or buttons are enabled until you define or select a project.
Project Definition Section
Use the Project Definition section to add and define a new Send Master project. The information that you specify in this section includes the web server URL used in conjunction with the selected HTTP action (method) to work with service operations.
This section features the following fields and controls:
| Field or Control | Description |
|---|---|
|
Project |
After you create or open a project, the Project field displays the project name and project type. |
|
Address |
Enter the web server URL to use in conjunction with the test. |
|
Timeout (secs) |
Enter the timeout interval in seconds. |
|
Action |
From the Action drop-down list, select the HTTP method to employ for the test. The options are:
|
|
|
Click the Go button to launch the test. |
|
|
Click the Stop button to stop test processing. |


Input Information Section
Depending on the type of task that you are performing with Send Master, the Input Information section enables you to create and format MIME messages, as well as specify input files, destination nodes and more.
You need to know the service operation format that the connectors, application servers, and so forth are expecting, and then incorporate the appropriate tags and components into the service operation transaction content. For example, to communicate with PeopleSoft systems, you must specify the service operation name with the version and requesting node.
This section features a toolbar with the following buttons:
| Field or Control | Description |
|---|---|
|
|
Click the Open File button to open an existing file and display it in the Input Information area. |
|
|
Click the Save File button to save the contents displayed in the Input Information area, using a filename and location that you specify. |
|
|
Click the Save File As button to save the currently displayed file, using another name, location, or both, that you specify. |
|
|
Click the Refresh the Current File button to reload and display the last saved version of the current file. |
|
|
Click the Remove File Reference button to delete the contents of the Input Information area. |
|
|
Click the If Valid XML, Format button to format the code displayed in the section to make it more readable. This button is valid only if the file displayed is an XML file. |


Output Information Section
The Output Information section displays information that the system returns when you perform a GET or POST on a web server.
When you work with MIME messages, you can use the provided View drop-down list and choose whether to view the entire raw message response, message metadata, or individual sections of the response.
When you work with message types other than MIME, you can view the raw message response only.
This section features a toolbar with the following buttons:
| Field or Control | Description |
|---|---|
|
|
Click the View Header Information button to display the HTTP headers returned during a POST or GET. |
|
|
Click the Save Output button to save the information in the Output Information section using a filename and location that you specify. |
|
|
Click the If Valid XML, Format button to format the code displayed in the section to make it more readable. This button is valid only if the file displayed is an XML file. |
|
|
Click the Clear Output button to delete the contents of the Output Information area. |


