Defining Macro Sets and Macros
Use the Macro Set page to copy and manage macro sets.
Navigation:
This example illustrates the fields and controls on the Macro Set page.
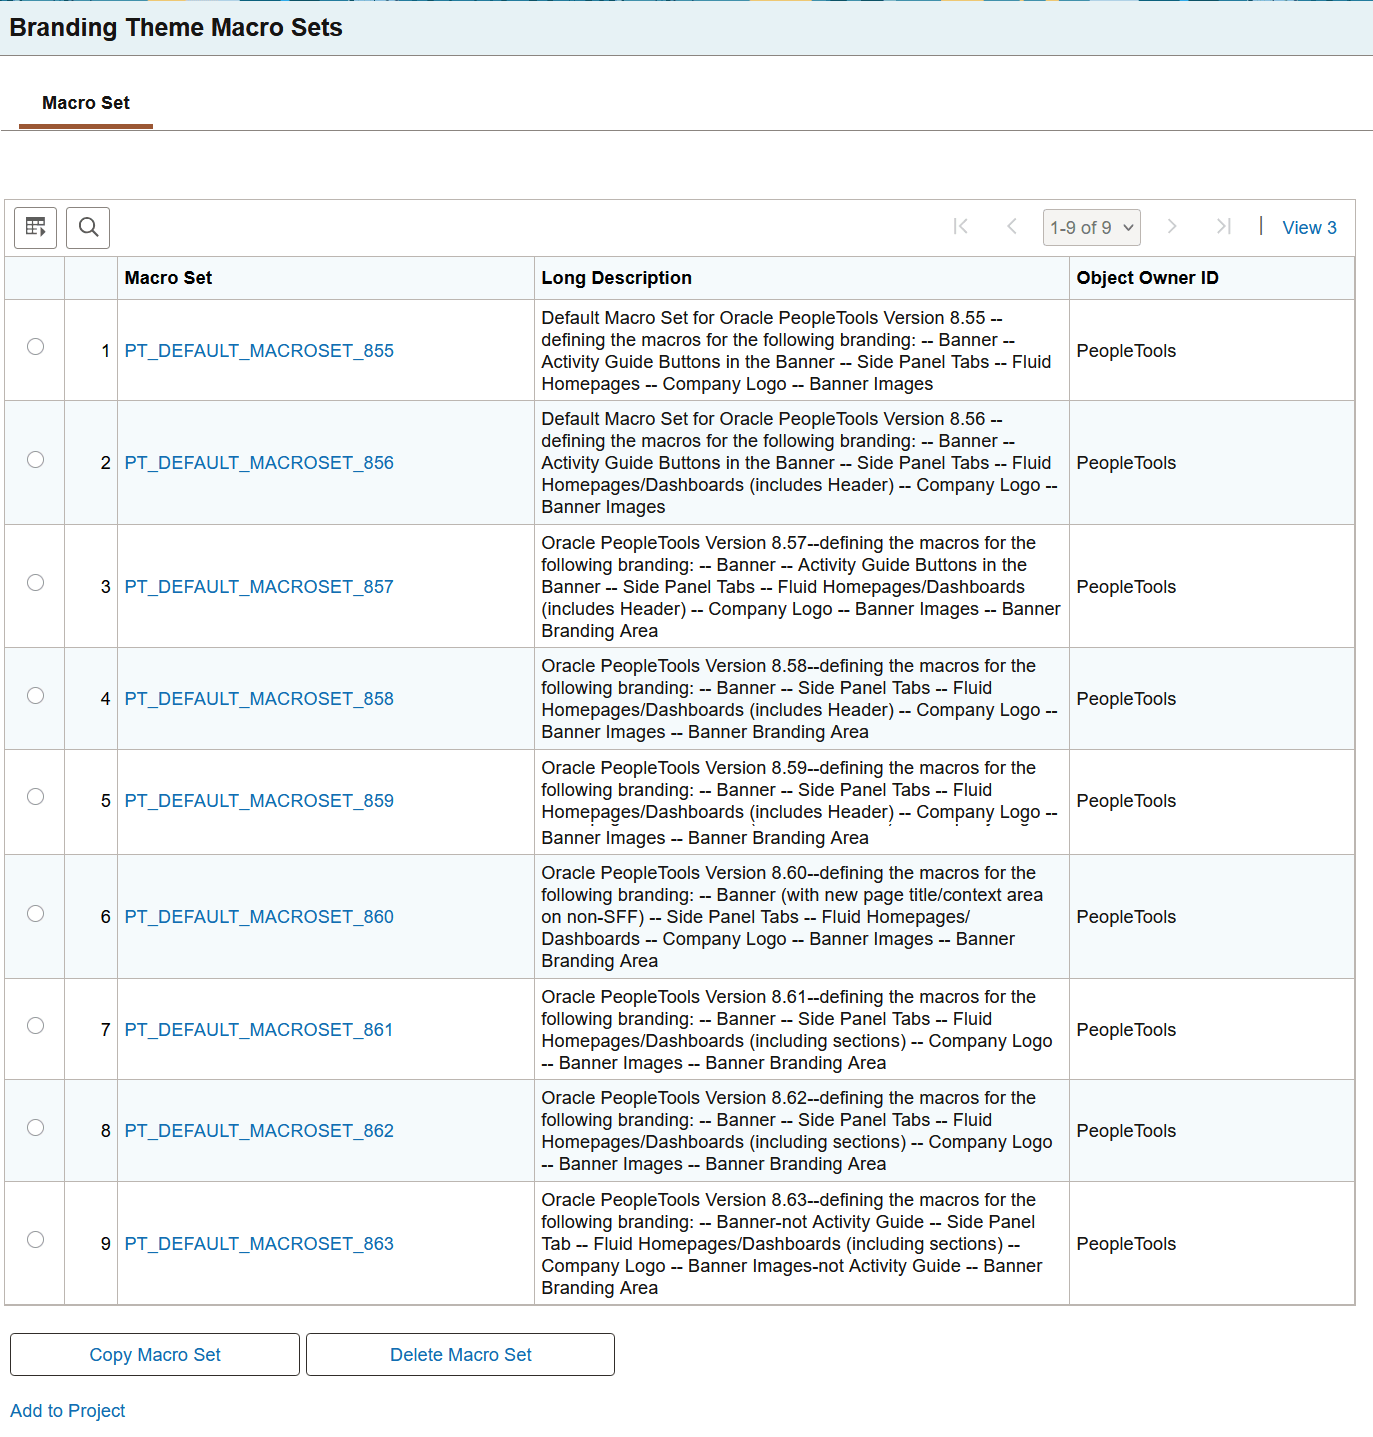
To create a new macro set that you can customize, select and copy a sample macro set—for example, PT_DEFAULT_MACROSET_858.
WARNING:
Do not modify or delete any PeopleTools-delivered macro sets.
Defining Macros
Use the Macro page to specify custom values for delivered macros.
Navigation:
On the Macro Set page, click the link for a macro set.
This example illustrates the fields and controls on the Macro page.
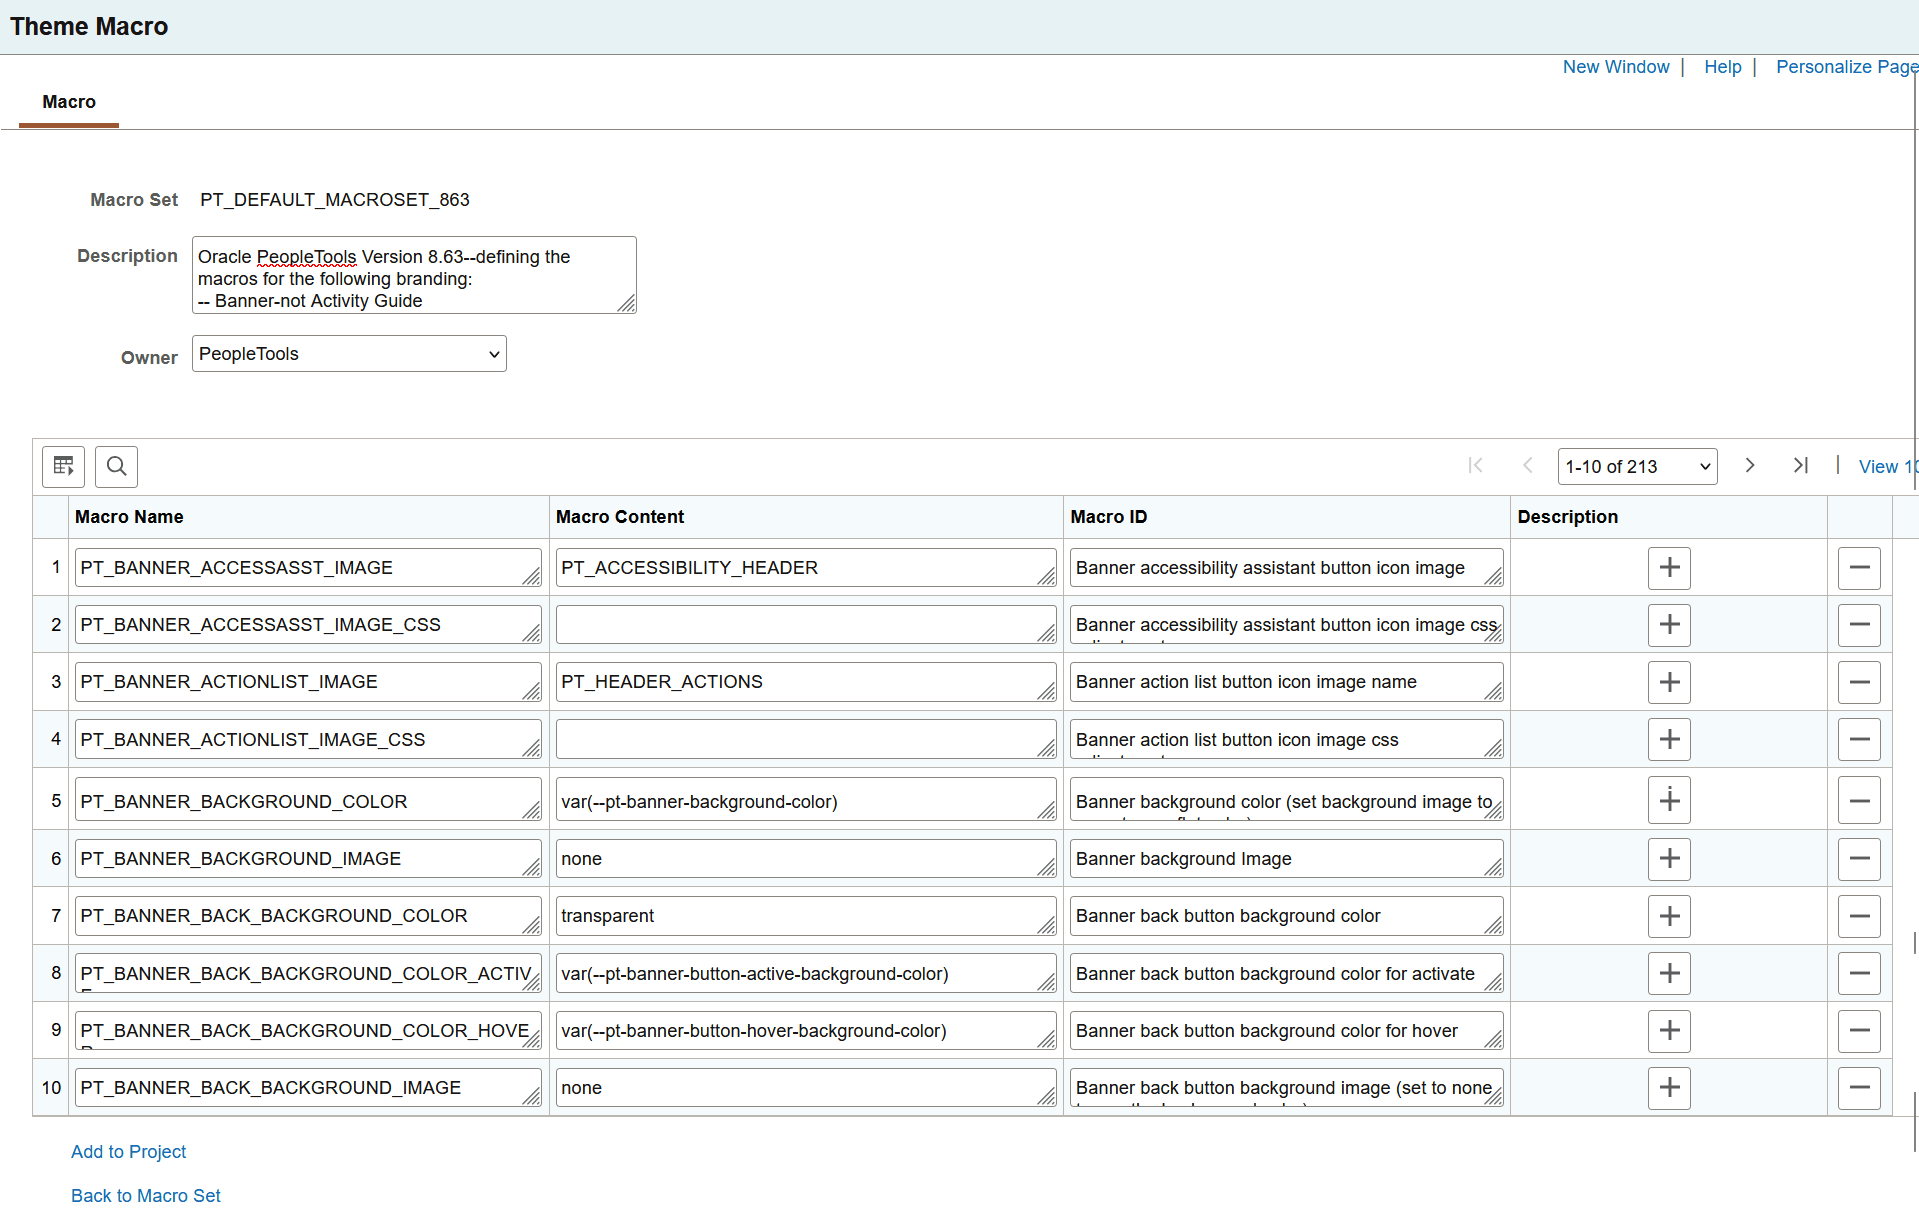
Some macros are used in the fluid banner only (displayed on fluid pages only) while other macros are used in both the fluid banner and in the header for classic pages. Therefore, when you make an update to a macro that is shared both by the fluid banner and by the header for classic pages, you will make updates to the look of all of your pages simultaneously. Prior to updating any macros, you can use the download to Excel button on the grid to export the grid contents to an Excel spreadsheet. You can examine and analyze the macros to determine which ones to modify.
Note:
Because activity guide buttons were moved from the fluid banner into an activity guide sub-banner in PeopleTools 8.57, you can no longer brand these buttons. Ignore macros beginning with PT_BANNER_AG. If you previously branded these items, your customized macros will have no effect.
To customize the value for a delivered macro, change the value of the Macro Content field only.
Add to Project
Click the Add to Project link to access the Add Project page to insert one or more macro set definitions into an ADS project. See Lifecycle Management Guide: Adding Data Set Instances from Object Designer Pages and Migrating Branding Data Using ADSs for more information.
Configuring the System to Use a Custom Macro Set
To configure the system to use a custom macro set, you must assemble and apply a custom branding theme. Moreover, your custom branding theme must incorporate:
-
A custom theme style sheet for classic components that has been cloned from PT_BRAND_CLASSIC_TEMPLATE_863.
-
A custom override style sheet for fluid components that has been cloned from either global override style sheet: PT_BRAND_FLUID_NOIMG_TEMPL_863 or PT_BRAND_FLUID_TEMPLATE_863.
-
(Optional) A custom header definition cloned from DEFAULT_HEADER_FLUID.
To enable your custom macro set:
-
In Application Designer, open the PT_BRAND_CLASSIC_TEMPLATE_863 theme style sheet for classic components.
-
Save the classic theme style sheet as a cloned copy with a new name—for example, MY_BRAND_CLASSIC_TEMPLATE_863.
-
In Application Designer, open one of the global override style sheets:
-
If you do not need to brand images, select PT_BRAND_FLUID_NOIMG_TEMPL_863 because it is smaller, and therefore consumes less overhead.
-
If you do need to brand images, select PT_BRAND_FLUID_TEMPLATE_863.
-
-
Save the global override style sheet as a cloned copy with a new name—for example, MY_BRAND_FLUID_NOIMG_TEMPL_863 (or MY_BRAND_FLUID_TEMPLATE_863).
-
In the browser, go to the Theme Macro Set page:
-
Select the PT_DEFAULT_MACROSET_863 macro set.
-
Copy and save the macro set with a new name—for example, MY_MACROSET_863.
-
-
(Optional) In the browser, go to the Define Headers and Footers page:
-
Open the DEFAULT_HEADER_FLUID definition.
-
Save the header as a cloned copy with a new name—for example, MY_HEADER_FLUID.
-
-
In the browser, go to the Assemble Themes page:
-
Open the DEFAULT_THEME_FLUID theme definition.
-
Save the branding theme as a cloned copy with a new name—for example, MY_THEME_FLUID.
-
-
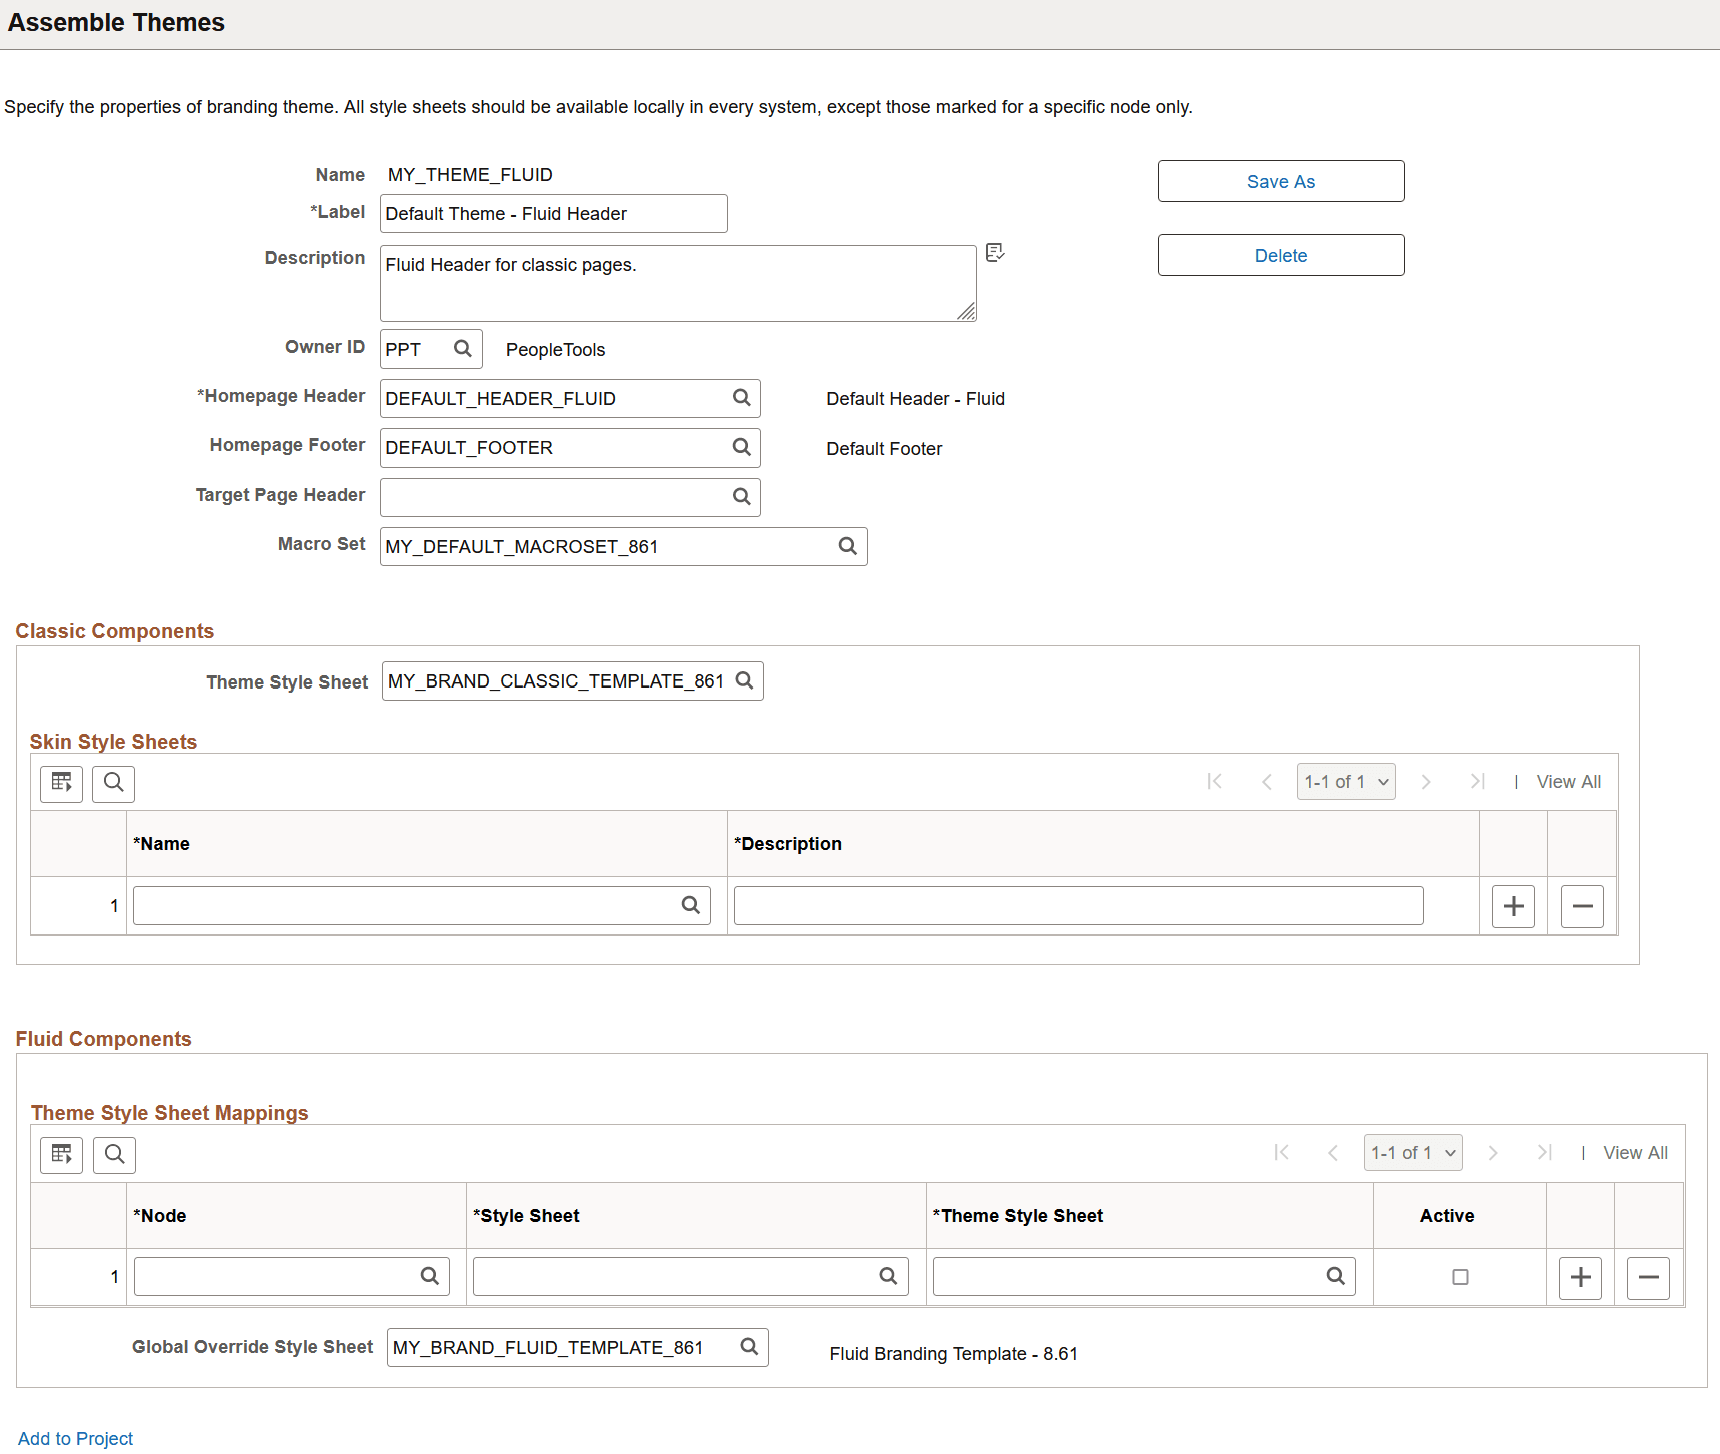
Update this custom branding theme to include the following:
-
(Optional) Homepage Header: Your custom header definition.
-
Macro Set: Your custom macro set.
-
Classic Components – Theme Style Sheet: Your custom style sheet for classic components.
-
Fluid Components – Global Override Style Sheet: Your custom style sheet for fluid components.
This example illustrates the fields and controls on the Assemble Themes page for a custom branding theme.
-
-
Apply your custom branding theme either system-wide on the Branding System Options page or selectively by portal or by user attribute on the Assign Branding Themes page.
Note:
PeopleSoft Interaction Hub provides a theme builder feature that simplifies the customization of macros. See PeopleSoft Interaction Hub: Branding, “PeopleSoft Fluid User Interface for Branding in PeopleSoft Interaction Hub” for more information.