Defining String Criteria
Layouts typically contain a considerable amount of constant text, such as the column headings “Last Year to Date” or “Current Budget.” With PS/nVision, you can build multilingual layouts where these text strings are replaced by specially formatted strings whose user-language equivalent is retrieved from a table in the database. These string names are somewhat like user-defined PS/nVision variables.
You insert string criteria into layout cells with the following format:
%.<name>,R<program>%Name is the string name as described in the following table and program is the program ID group that contains the string definition. In this example
%.STDHDG_PAGE_NO,RSTDHDGTR%the string name is STDHDG_PAGE_NO and the program ID is STDHDGTR.
When you select a string to insert, you can select from strings created specifically for use with PS/nVision—that is, strings with a program ID of NVISION. If you insert one of these strings, the program name does not appear in the string. For example:
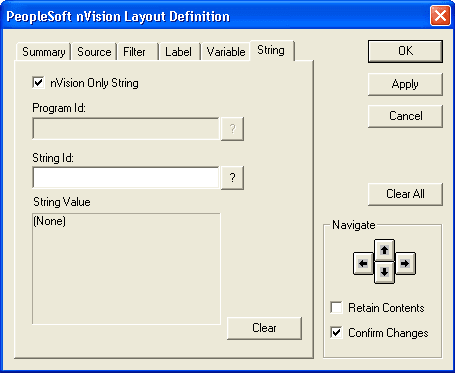
%.DATE_LABEL%This example illustrates the fields and controls on the PeopleSoft nVision Layout Definition dialog box: String tab.
To define string criteria in PS/nVision:
-
Open any existing layout or create a new one.
-
Select from the menu.
-
On the PeopleSoft nVision Layout Definition dialog box, select the cell to which you want to apply string criteria.
-
Select the String tab.
-
Clear the nVision Only String option if appropriate.
By default, the String tab displays only strings that were created for use with PS/nVision—those with a program ID of NVISION.
To select from all available strings, clear the nVision Only String option.
-
If the nVision Only String option is cleared, select a program ID.
-
Select the String ID of the string you want to insert.
You can select from the strings assigned to the program ID that you specified.
Note:
If the nVision Only String option is selected, the program ID is NVISION.
-
Click the Apply button to save your changes and define string criteria for a different cell.
Alternatively, click the OK button to save your changes and close the dialog box.