Step 5: Preview a Connected Query
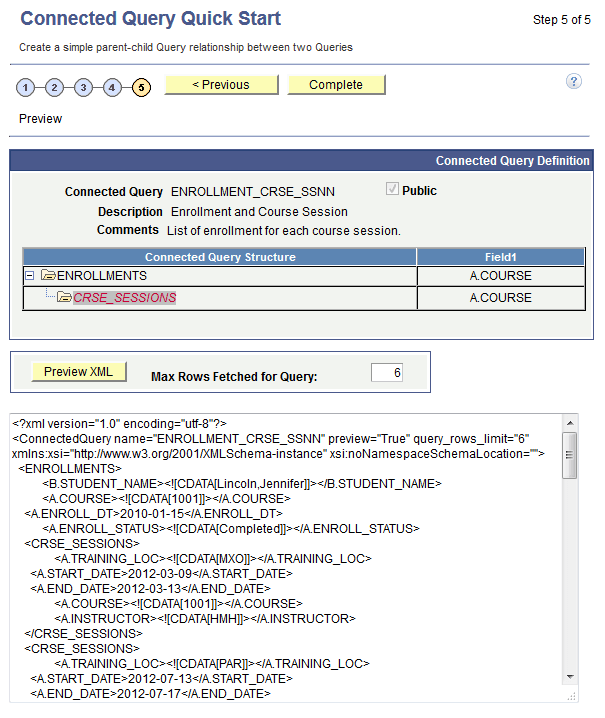
Report developers use the Connected Query Quick Start - Step 5 (CQ_WZ_PREVIEW) to review a new connected query and preview the results by running it in a preview mode with a limited number of rows returned from each query.
Navigation:
-
Select
-
Enter a connected query and descriptive information, and click the Next button.
-
Select an existing query to use as the parent query, and click the Next button.
-
Select an existing query to use as the child query, and click the Next button.
-
Map query fields from a child query to corresponding fields from a parent query, and click the Next button.
This example illustrates the fields and controls on the Connected Query Quick Start - Step 5. Definitions for the fields and controls appear following the example.
| Field or Control | Description |
|---|---|
|
Preview XML |
Click to display the formatted XML output for this connected query. XML output appears in a Preview mode, in the lower section of the Preview page. |
|
Max Rows Fetched For Query |
Enter the maximum number of rows to display in Preview mode by each member query. Note: You should limit the number of rows that are being fetched. The default value is 6. If you enter 0 or clear this text box, no row limits are imposed for a resulting XML, which can cause significant delay in getting results; and because the application runs in synchronized mode using the application server, you may get browser time-out or tuxedo time-out. |
|
Complete |
Click to transfer to Connected Query Manager page, where you can perform enhancements and save the connected query. Note: While working with a Connected Query Quick Start, you can modify your previous selections at any step by clicking the step number (in yellow or gray) icons. Changes in your selection could change a connection query structure. |
Note:
In the Connected Query
Quick Start - Preview page, when XML that contains CDATA sections
is displayed at runtime, application users will see <![CDATA* and *]> in places
of <![CDATA[ and ]]>.