Submitting Process Requests
A process request enables you to submit a job or process to run. The Schedule Query page submits a process request and brings up the Process Request page, which enables you to specify such variables as where to run the process and in what format to generate the output based on a run control ID.
This example illustrates the fields and controls on the Schedule Query page.
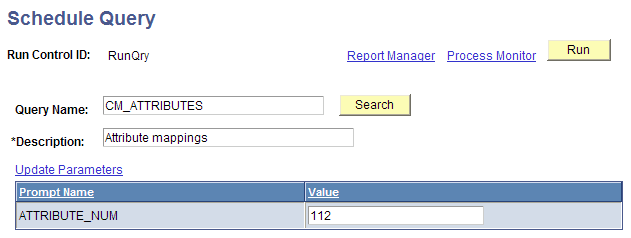
To submit a process request:
-
Select
-
Search for and select an existing run control ID, or select the Add New Value tab to enter a new ID.
-
Select the query for which you want to schedule and update any prompt parameters.
-
Optionally, select an option in the Asian Font field.
The Asian Font field is available if the output format is set to PDF with Asian fonts.
If the output format is set to PDF, you are able to run queries to PDF outputs with all Western European fonts, Korean font, Japanese font, Traditional Chinese font, and Simplified Chinese font. Alternatively, use BI Publisher to run queries to PDF outputs with Eastern European fonts, Thai fonts, Russian fonts, and so on; or change the output to another format.
-
Use the Update Parameters link to select or change the value that is required for each available prompt. When values have been selected, they appear in the Prompt Name and Value fields.
Note:
If the query does not have any prompt, the Update Parameters link does not appear.
If you have one or more Asian languages installed, select the language that you want from the Asian Font drop-down list. This drop-down list appears only if you have one or more Asian languages installed.
You are unable to open or schedule a query that has been disabled.
-
Click the Save button to save changes and remain on the Schedule Query page.
-
Click the Run button to submit the query process request and display the Process Scheduler Request page.
When you are scheduling queries from Query Manager or Query Viewer, the Run button is replaced with an OK button.
-
Click the Process Monitor link to view the status of your request; click the Report Manager link to view the output of your request.
Note:
If a query that is used as a data source for BI Publisher is run through the BI Publisher-related prompts do not appear. The normal basic table-formatted query results will be generated.
See Process Scheduler: Understanding Run Control IDs, Process Scheduler: Submitting Process Requests, Process Scheduler: Scheduling Process Requests, Process Scheduler: Using Process Status Notifications, BI Publisher for PeopleSoft: Scheduling Reports in Query Report Scheduler.
Schedule Query with Tree Prompt
You can schedule queries that have tree prompts using the Schedule Query component or using the Schedule links in the Query Manager and Query Viewer. While scheduling these queries, you are prompted for selecting the tree for the specified field and its node list. After the successful selection of values for the tree prompts, other prompts are available for your input. These queries can either be saved and used in the future or can be scheduled and run immediately by clicking the Run button.
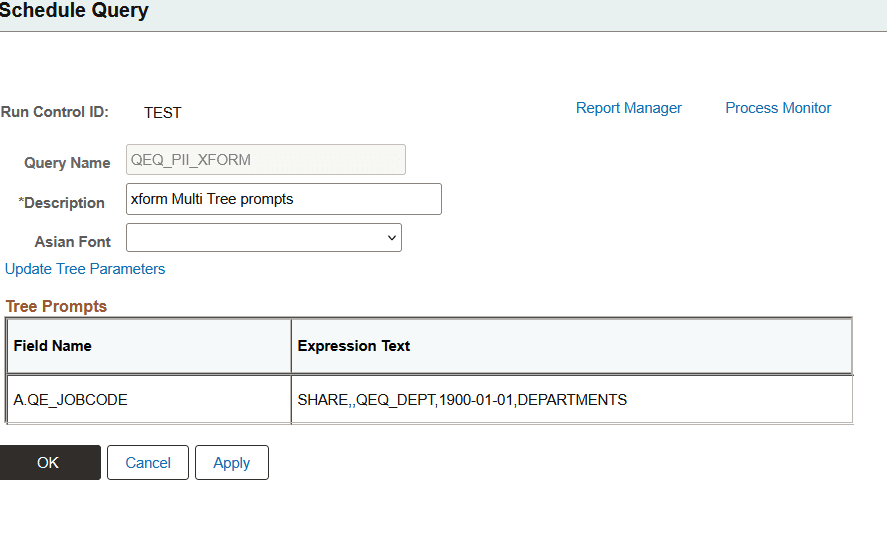
This example illustrates the fields and controls on the Schedule Query page with query that has In Tree prompts. Definitions for the fields and controls appear following the example.
| Field or Control | Description |
|---|---|
|
Update Tree Parameters |
The Update Tree Parameters link is available if you are running queries that have tree prompts. Click this link to access the Select a Tree page and the Select Tree Node page, where you can select a tree and its node list. |
|
Tree Prompts |
The Tree Prompts section displays the field names and expression texts, which will be used in forming the SQL before running the query. |
Note:
In Windows query application psqed.exe, you also can create tree prompts and use that prompts to enter input at runtime. Execution of the query is similar to PIA Query Manager, where you select the tree node to run the query.
Scheduling and Distributing Query and Connected Query Results with Transformation
In PSQuery, the available user-defined output formats are HTM, PDF, TXT, XFORM, XLS, XML, and XMLP. You select the XFORM format to trigger a transformation (XSLT). Note that you must provide the XSLT to define the desired transformation of the extracted data.
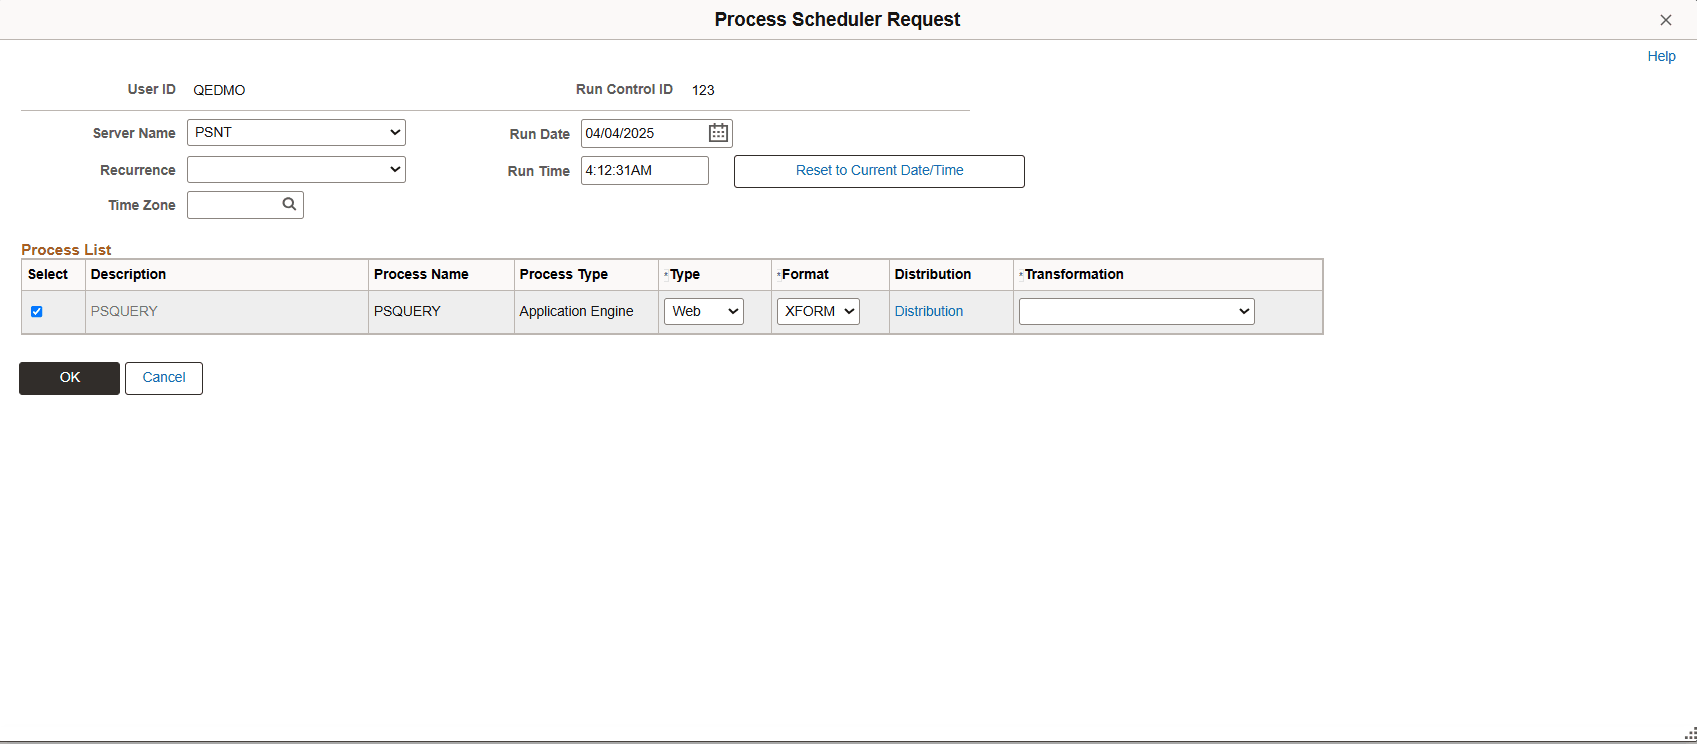
To generate the query results with transformation and distribute that resulting data, you schedule the query process to run using the Process Scheduler Request page and select XFORM as the output format.
The following example shows the fields and controls on the Process Scheduler Request page when you generate the query results with transformation.
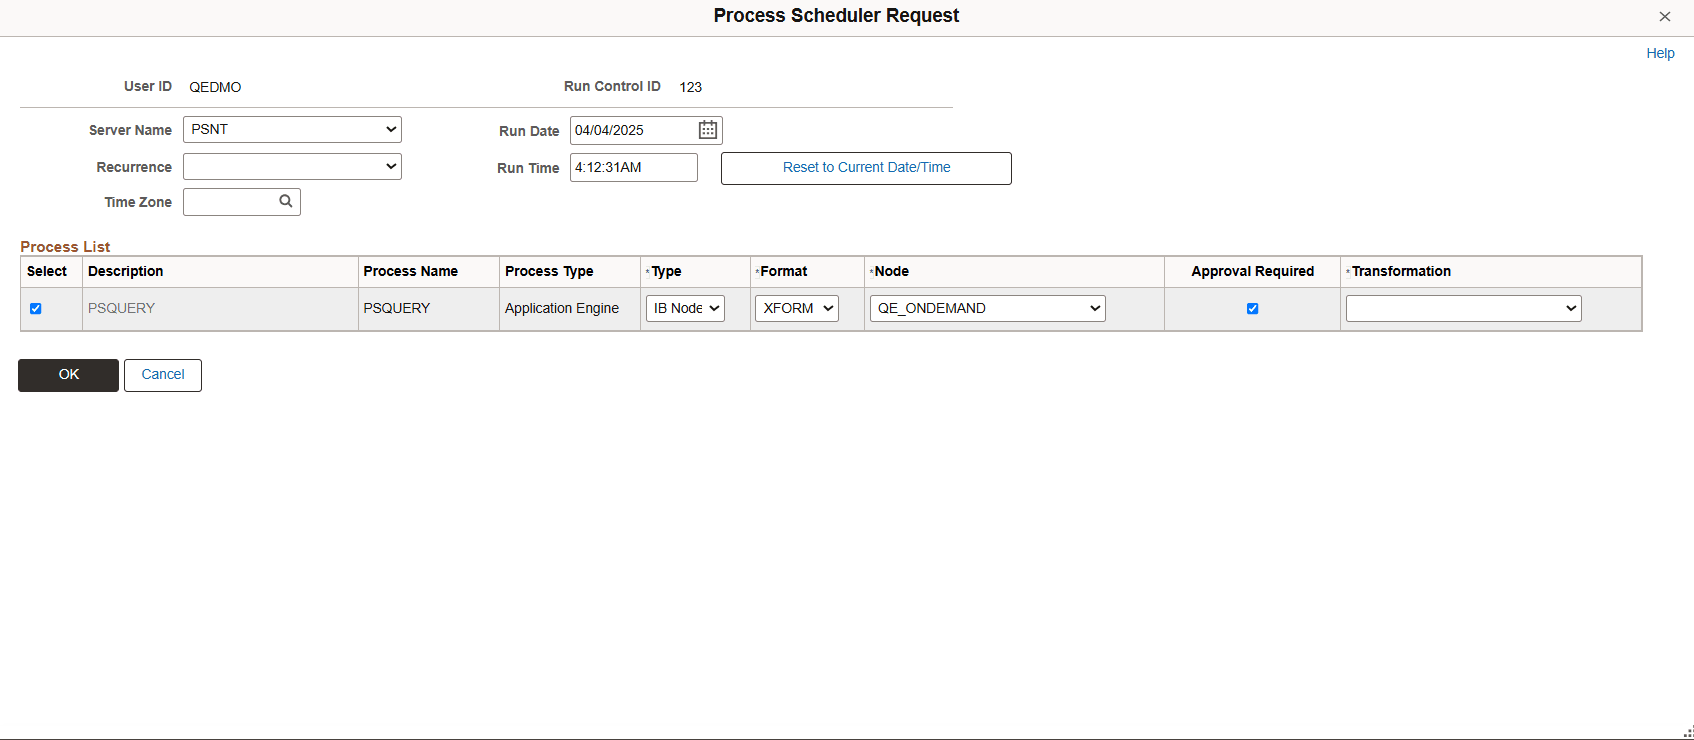
To generate the query results with transformation and distribute that resulting data to an external IB node using the Integration Broker framework, you schedule the query process to run using the Process Scheduler Request page, set the output type to IB Node, and set the output format to XFORM. The page also includes the Approval Required option that enables you to review and approve the transformed output before distributing it.
The following example shows the fields and controls on the Process Scheduler Request page when you generate the query results with transformation and distribute that resulting data to an external IB node using the Integration Broker framework. Definitions for the fields and controls follow the example.
| Field or Control | Description |
|---|---|
|
Type |
The available options are:
|
|
Format |
The available options are HTM, PDF, TXT, XFORM, XLS, XML, and XMLP. Note: If the output type is set to Feed, the only available format is ATOM and the Transformation drop-down list is not available. ScheduledQuery-CSVUnicodeEncoding setting applies only when OutputUnicode property of query class is set to True and scheduled query is set to ‘TXT’ format. It is not a required setting. If it is not set, the CSV output encoding will be UCS2 with BOM. See Process Scheduler: PSTools Section If the output type is set to IB Node:
|
|
Node |
This option is available when the Type column is set to IB Node. Select an IB node from the list of the external IB nodes, which were enabled to receive the transformation output with the routing added to receive the delivered Query Transform Server Operation. Note: To enable an IB Node to receive the query and connected query transformed outputs, you must add a routing for Service Operation PRCS_OUTPUT_IB_OPER. This routing enables the node to be an output destination for the transformed outputs. |
|
Approval Required |
This option is available when the Type column is set to IB Node. Select to request that the transformed output file be reviewed and approved before you distribute its output data to external destinations. If the Approval Required option is selected, then at report runtime:
If the Approval Required option is not selected, then at report runtime:
|
|
Transformation |
This option is available when the Format column is set to XFORM. This option is required for generating customized output. Select a transformation option from the list of valid XSLTs that were previously defined for the selected query. The selected transformation will determine the XSLT to be applied to the query XML data. |
Reviewing and Publishing the Transformed Output
If the Approval Required check box in the Process Scheduler Request page is selected, the query owner who submits the process can access the Process Monitor to review the output and then publish the output to the external destinations after it is approved.
Note:
In general, the available distribution statuses are N/A (not available), Generated, Posting, and Posted. You can view the output from a web browser when the process displays the distribution status of Posted. If the process runs with the output type set to IB Node and the output format set to XFORM, then the Pending distribution status is also available. The Pending status indicates that the transformed output files were transferred to the report repository and must be reviewed and published.
To review and publish the transformed output files:
-
Access the Process Monitor page.
-
Click the Details link to access the Process Detail page.
-
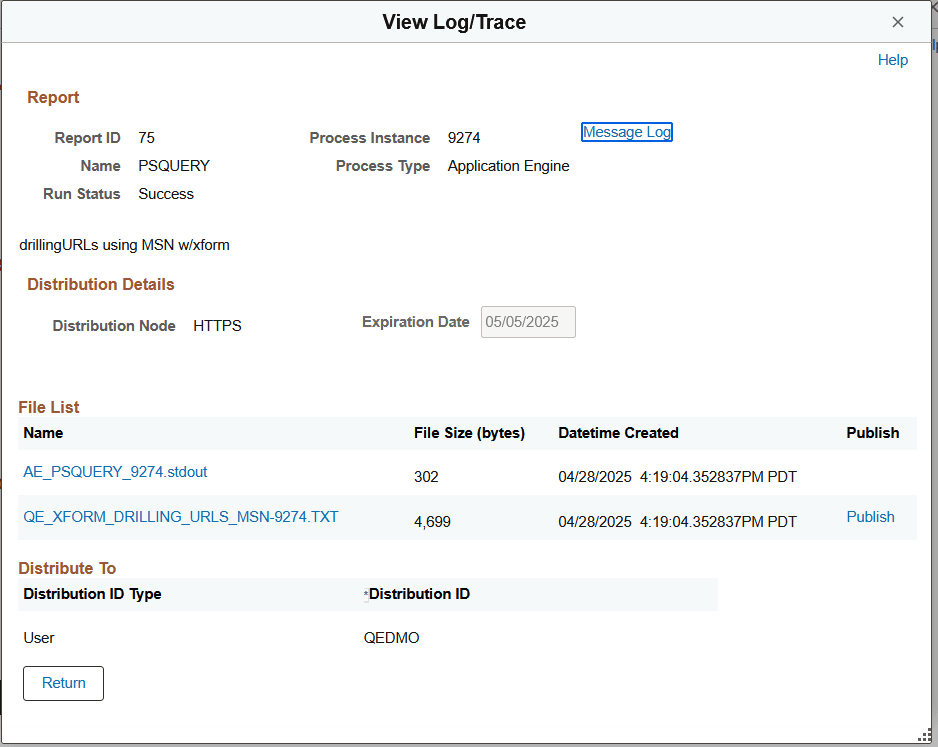
Click the View Log/Trace link to access the View Log/Trace page.
If the process has the run status of Success and the distribution status of Pending, then the Publish link appears next to the request output.
This example shows the View Log/Trace page with a list of the output files and the Publish link.
-
Optionally, review the output file by clicking the Name link in the file List section.
-
Click the Publish link to send the output to the request Integration Broker node, which is defined in the Process Scheduler Request page.