Step 1 of 4: Manual Tasks
The tasks for Step 1 only to be run once for the change project.
The first step in creating a test maintenance report is comprised of five manual tasks that you will complete in Application Designer to create a compare report that PTF will use as a basis for the maintenance report.
Perform these tasks to create a compare report from a project file.
Access the Create Test Maintenance Report wizard (PeopleTools, Lifecycle Tools, Test Framework, Create Test Maintenance Report).
This example illustrates the fields and controls on the Create Test Maintenance Report Wizard: Step 1 of 4.
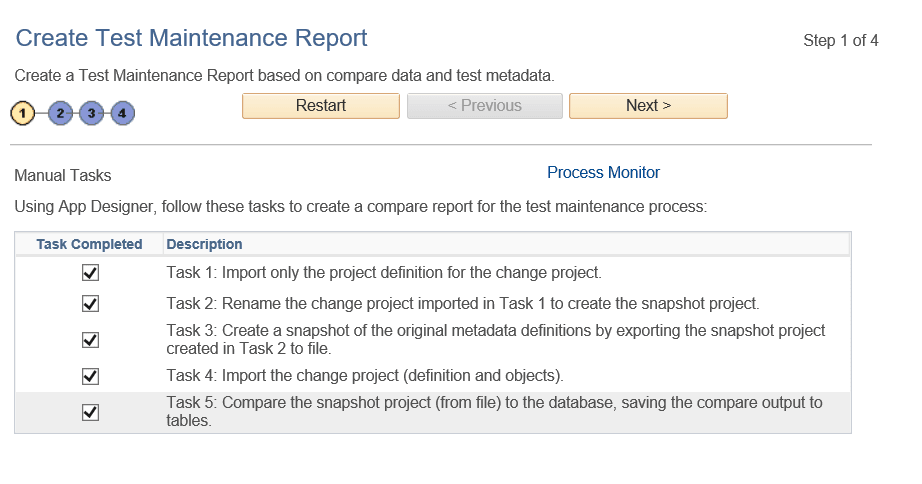
As you progress through the Test Maintenance wizard the wizard tracks which tasks you have completed and which page you are on. When you exit the wizard and then return to the wizard again, the wizard sends you to the last visited page.
This tracking is done according to user ID. This means that if two users share the same user ID, the second user might not enter the first page when accessing the wizard. The wizard will take the second user to where the previous user left the wizard.
If two users with different user IDs work on the same project, the wizard does not track the state for the second user. For instance, if the first user completed the tasks for Step 1, the second user needs to check the five tasks on Step 1 to bypass that step.
Task 1: Import only the project definition for the change project.
Suppose you are about to apply a change project named SA_PROJ_ UPGD. Before the change project is applied, import the change project, SA_PROJ_ UPGD, as a project definition only.
-
In Application Designer, select .
-
In the selection box, highlight the change project, SA_PROJ_UPGD.
-
Click Select.
The Copy From File dialog box appears.
-
Click the Deselect All button to deselect all of the definition types so that only the empty project structure is imported.
At this point, you are importing only the names of the definitions into the project. None of the actual definitions in the upgrade project are copied.
If a definition exists in the original database with the same name as a definition in the upgrade project, the upgrade project in the database will (correctly) contain the original, unmodified definition of the object.
-
Click Copy.
Task 2: Rename the change project imported in Task 1 to create the snapshot project.
Create a copy of the change project, SA_PROJ_UPGD.
Select and name the new project SA_PROJ_SNAP.
Note:
Creating the Snapshot Project is required to avoid naming conflicts later in the process.
Task 3: Create a snapshot of the original metadata definitions by exporting the snapshot project created in Task 2 to file.
Export the snapshot project, SA_PROJ_SNAP, to file:
-
Select .
-
If this project is large, as upgrades often are, you can save time during the compare process by deselecting all definitions in the Copy Options window, except for the five definitions that are referenced by PTF tests:
-
Menus
-
Components
-
Pages
-
Records
-
Fields
-
-
Accept the defaults and click OK.
Task 4: Import the change project (definition and objects).
Import the original change project, SA_PROJ_UPGD, from file:
-
Select .
-
Include all the definition types.
At this point, the database contains the new metadata.
Task 5: Compare the snapshot project (from file) to the database, saving the compare output to tables.
Compare the current (target) database with the pre-change (source) project, SA_PROJ_SNAP:
-
Select .
-
Highlight the snapshot project, SA_PROJ_SNAP, and click the Select button.
The Replace existing SA_PROJ_SNAP? dialog box appears.
-
Click Yes.
The Compare and Report From File dialog box appears.
-
Click Options to access the Upgrade Options dialog box.
-
Select the Report Options tab.
-
Select the Generate Output to Tables check box.
-
Select the Report Filter tab.
-
Click Select All.
-
Click OK.
-
Click Compare.
The wizard will use data from this compare report to create the test maintenance report.