Using the Navigation Bar
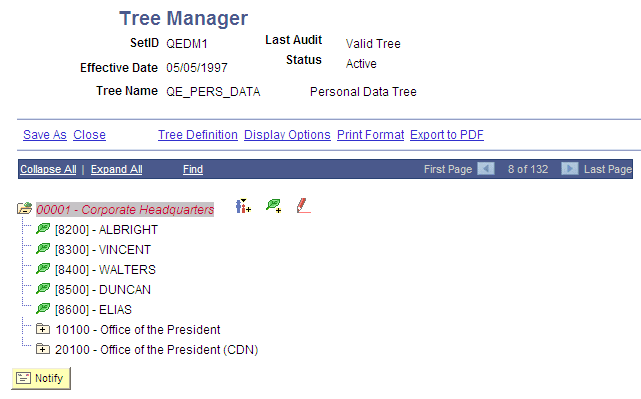
Use the Tree Manager page (PSTREEMGR) to view or modify trees. This page displays the tree with the root node expanded one level.
Navigation:
This example illustrates the fields and controls on the Tree Manager page. Definitions for the fields and controls appear following the example.
Note:
PeopleSoft Tree Manager displays one page of the tree at a time. You can navigate through large trees using First Page, Next Page, Last Page, and so on.
You can perform the following actions on the selected tree by using the links and images on the navigation bar – the horizontal blue bar at the top of the tree.
| Field or Control | Description |
|---|---|
|
Collapse All |
Click to close all of the visible nodes except for the root node. The root node is always expanded. |
|
Expand All |
Click to expand all of the nodes on the tree, so that the entire tree or branch hierarchy is visible. Expands all parent/child relationships, but the tree hierarchy is still presented one page at a time. Use the Next Page and Previous Page arrows to move forward and backward through the tree. |
|
Find |
Click to access the Find Value page and search for nodes and detail values. |
|
Notify |
Click to send an email containing a link to the tree to an individual or group with whom you are currently working. You can attach a message to this email to describe a specific transaction. See Applications User’s Guide: Sending and Receiving Ad Hoc Notifications. Note: PeopleSoft Tree Manager is delivered with the Notify button enabled. You can disable this button in PeopleSoft Application Designer. See Workflow Technology: Enabling the Notify Toolbar Button. |