Setting Up Siebel Coherence Cache Client
You need to configure the Coherence client in Siebel to connect to and use the Coherence cache service.
This involves creating the appropriate cache client configuration files, defining the cache name, and ensuring that the client can discover and communicate with the Coherence cluster.
Creating the Coherence Cache Client Profile
Just as you created profiles for each of your Coherence nodes, you must create a client profile for your Siebel server which will be a client of the cache. This profile instructs the Siebel server how to find and use the Coherence cache.
The profile consists of 3 sections:
- Basic Information
- Cache Client Configuration
- SSH Configuration
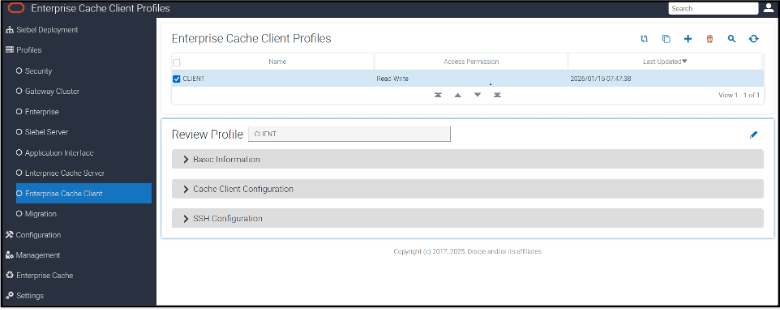
Basic Information
This defines the logging level for the Enterprise Cache Client Profile and its deployment actions. Logs are written to the CacheClient file under \ses\applicationcontainer_internal\logs. The supported log levels are ERROR, INFO, and DEBUG.
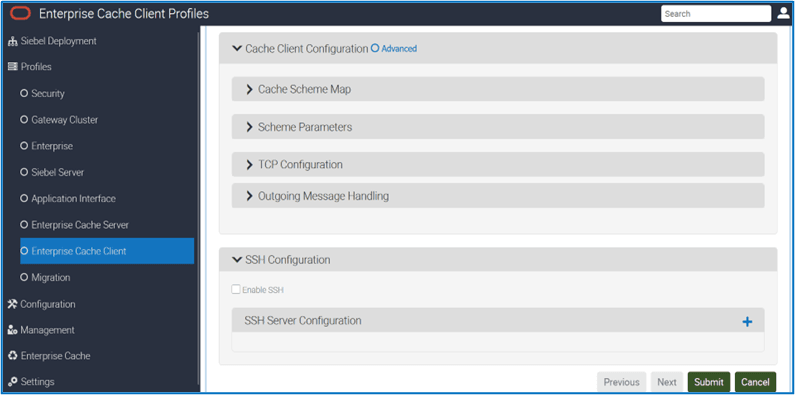
Cache Client Configuration
The Cache Client Configuration Section contains details of the cache instance Name and the Proxy service Name and Coherence nodes on which it is running. For additional information about the proxy service, please refer to the topic “Proxy Services in Coherence Servers.” below.
The values entered in Cache Client
Configuration Section are stored in ZooKeeper and are written to the
coherence-extend-config.xml file under
\ses\siebsrvr\ADMIN - during Enterprise Cache Client
deployment. This file is then read by Siebel to establish a connection with
Coherence. Siebel reads this file during initialization; therefore, if this section
is modified, a Siebel service restart is mandatory for the changes to take
effect.
The Siebel application connects to the Coherence service using the Coherence Extended Proxy Client which comes with the Siebel build starting with version 25.6, which in turn connects to the Proxy Service running on the Coherence Server. The Coherence Server hosts only two services the Extended Proxy Service and the Cache Service. The Proxy Service routes client requests to the Cache Service running in the cluster for operations such as get, put, and remove.
The Extended Proxy Client running in the Siebel Server uses the Enterprise Coherence Client Profile to locate the proxy services, cache name, and the addresses/ports of the Coherence Server nodes in the cluster to access and perform cache operations. Hence, the Enterprise Coherence Client Profile specifies a service name, cache name, Addresses and Port.
Out of the box, the proxy service name is ExtendTcpProxyService and the cache name is siebelcache.
The following section explains proxy services in more detail and describes how they guide the proxy client in establishing the connection.
Proxy Services in Coherence Servers
A Proxy Service in Coherence is a Server-side service that allows Extended Client to access a Coherence cluster. An Extended Client cannot join the Coherence cluster directly; instead, it connects to a Proxy Service, which communicates with the other services within the cluster.
At any point in time, the proxy client maintains a connection to only one proxy service, through which all requests are routed. If this proxy service becomes unavailable because of a network interruption or related failure, the proxy client automatically fails over and connects to another proxy service hosted on a different Coherence node. Hence the address and port of the additional Proxy Service must be specified in the TCP Configuration section of the Enterprise Cache Client Profile. For this reason, Siebel recommends configuring all 3 Coherence node addresses and ports in the TCP Configuration section to ensure high availability in a 3-node cluster.
By default, in Siebel, every Coherence server is launched with a Proxy Service. This can be seen in the Proxy Scheme section of the Enterprise Cache Server Profile.
The default address used in the TCP configuration is “localhost” as the connection is secured via SSH. This is required because we employ the SSH Local Port Forwarding mechanism. With this mechanism, Siebel running in the local host first connects to the Port specified in the TCP Configuration section; the traffic from this Port is forwarded by SSH to the corresponding port on the remote Coherence Server through an SSH tunnel.
Refer to https://www.ssh.com/academy/ssh/tunneling-example#local-forwarding, to understand SSH Local port forwarding.
SSH Configuration
The SSH Configuration section contains details such as the application internal host name and the port of the Coherence server , Local SSH Port, SSH Remote Port, SSH Server Port and SSH Username . Using this information, SSH tunnels are created between the Siebel Server and each Coherence node.
SSH Server Configuration must be completed on all three Coherence nodes. Each Coherence node should have its own TCP and SSH Configuration entry in the Enterprise Cache Client Profile so that, if the first proxy service is unavailable, the Extended Client can seamlessly switch to another proxy service running on a difference coherence Node through the appropriate SSH tunnel.
SSH uses public key–based authentication. In this mechanism, SSH authenticates a specific user account on the remote Coherence machine. Without an SSH Username, the SSH authentication fails; therefore, the SSH Username must be specified.
The SSH tunnel works independently of Siebel; therefore, redeploying the profile is enough to make changes in this section effective.
Refer https://www.ssh.com/academy/ssh details on the SSH tunnel.
To Create and Deploy an Enterprise Cache Client Profile
- Sign in to the SMC for your Siebel Server.
- Create a new Enterprise Cache Client profile.
- Enter the following values:
Cache Client Configuration > Cache Scheme Map
| Profile Field |
Suggested Value |
Description |
|---|---|---|
|
Cache Name |
siebelcache |
This value must match the value used in the Cache Name field in your Enterprise Cache Server Profiles. By default, All the Siebel component is configured to use the cache name “siebelcache”. Siebel recommends same for both Cache Server Profile and Cache Client Profile. |
|
Scheme Name |
remote |
This makes it clear that this is intended to point to a remote machine. Whatever value you pick, it must be re-used when we define this scheme in Scheme Parameters section |
Cache Client Configuration > Scheme Parameters
|
Profile Field |
Suggested Value |
Description |
|---|---|---|
|
Scheme Name |
remote |
This makes it clear that this is intended to point to a remote machine. This must match the value chosen in the previous section. |
|
Service Name |
ExtendTcpProxyService |
Default: ClientExtendTcpProxyService – This is the service that Siebel CRM will use to communicate to Coherence. |
Cache Client Configuration > TCP Configuration
|
Profile Field |
Suggested Value |
Description |
|---|---|---|
|
Cache Server Host |
127.0.0.1 |
This represents the loopback address used for the SSH tunnel—which is always 127.0.0.1. Don't change this Value for any nodes |
|
Port |
7077 |
This is the port number on which Siebel listens via the SSH tunnel. Siebel recommends using a unique port for each node when creating SSH connections—typically in the 707x range; for example 7077 for Node 1, 7078 for Node 2, and so on. |
Cache Client Configuration > Outgoing Message Handling
|
Profile Field |
Suggested Value |
Description |
|---|---|---|
|
Heartbeat Interval |
30s |
Default: 30s - Specifies the interval between ping requests. A ping request is used to ensure the integrity of a connection. Don't change this value. |
|
Heartbeat Timeout |
15s |
Default: 15s - Specifies the maximum amount of time to wait for a response to a ping request before declaring the underlying connection unusable. Don't change this value. |
|
Request Timeout |
30s |
Default: 30s - Specifies the maximum amount of time to wait for a response message before declaring the underlying connection unusable. Don't change this value. |
| Profile Field | Suggested Value | Description |
|---|---|---|
| Enable SSH | Check this checkbox | Enables SSH tunneling. |
| Cache Server Host Name Port | Coherence Node:GatewayPort | Specify the name and Gateway port of one of your Coherence nodes. You need to do this for each node. This tells Siebel CRM how to find the Coherence cache machines. |
| SSH Local Port | The port which this Siebel server is using for SSH traffic |
This is the port number on which Siebel listens via the SSH tunnel. This should be as same as Port in the TCP Configuration. You can use any available port for the connection. Siebel recommends using ports in the 707x range—for example, 7077 for Node 1, 7078 for Node 2, and so on. |
| SSH Remote Port | The port which this Coherence Server is using for SSH traffic |
When you set up your Coherence nodes you specified a port that the nodes use. Enter that port value here. |
| SSH Server Port | Default is 22. It can be changed to any available port on the Coherence server. | This port is used by the SSH client on the Siebel server to connect to the SSH server running on the Coherence server. |
| SSH UserName | Machine Login User |
Specify a user who is a Machine administrator and has access to both the Siebel machines and the Coherence server machines. The SSH username is a global setting, applicable to all SSH Server Configuration entries. Therefore, the same username is used for all tunnels NOTE: Ensure that this user has logged in at least once to all Siebel servers in the enterprise and the Coherence servers before Enterprise Cache Client Profile Deployment. This is mandatory because the private keys are generated during Deployment under the user’s profile directory (C:\Users\<username>), and SSH tunnels are created in the context of that user. Otherwise, the SSH tunnel will not be established. |
From the Siebel server, you must create one SSH tunnel per Coherence node. Each tunnel needs its own unique local port on the Siebel server (e.g., 7070, 7071, 7072). Therefore, the SSH Local Port must be different in each SSH configuration created for a Coherence node to establish its tunnel.
If you reuse the same SSH local port for more than one tunnel, ports can collide and Siebel cannot reliably route traffic to different Coherence nodes. For example, if the first-connected node fails, Siebel cannot reach the remaining Coherence nodes at startup, resulting in a complete cache outage. The port is how Siebel distinguishes different Coherence Nodes and selects the correct tunnel to reach right destination when using SSH local port forwarding.
If you have three Coherence nodes, for example, create three SSH configuration sections in the SMC, each with a different SSH Local Port for example, 7070, 7071, and 7072.
Example mapping with different Siebel Server local SSH ports mapping to three Coherence nodes where they have each used the same SSH port on their separate machines.
| Tunnel # | Local (Siebel Server) Port | Remote SSH Port (Coherence)Node |
|---|---|---|
| 1 | localhost:7070 | CoherenceNode1:7077 |
| 2 | localhost:7071 | CoherenceNode2:7077 |
| 3 | localhost:7072 | CoherenceNode2:7077 |
From version 26.3 onwards, you can deploy the Coherence Client Profile from the Siebel Deployment Tab. This provides the advantage of creating and updating Coherence Client Profile and starting SSH tunnels from all Siebel servers within the Enterprise in a single Deployment.
A Recreate Tunnel button  allows SSH tunnels to be recreated across all Siebel servers in the
enterprise for an already deployed profile, without impacting the Siebel Enterprise
ecosystem. This enables quick re-establishment of tunnels in case of network outages
or related issues with a single click.
allows SSH tunnels to be recreated across all Siebel servers in the
enterprise for an already deployed profile, without impacting the Siebel Enterprise
ecosystem. This enables quick re-establishment of tunnels in case of network outages
or related issues with a single click.
Additionally, this also eliminates the need to restart individual Siebel servers across the Enterprise to recreate SSH tunnels which was mandatory until Siebel version 26.2 when Coherence Caching enabled.
If you are already using Siebel with Coherence caching and have upgraded to version 26.3, it is mandatory to create and deploy a new Enterprise Cache client profile. Otherwise, the tunnel will not be created. This will not impact the existing Siebel Coherence ecosystem; it will only recreate the tunnel.
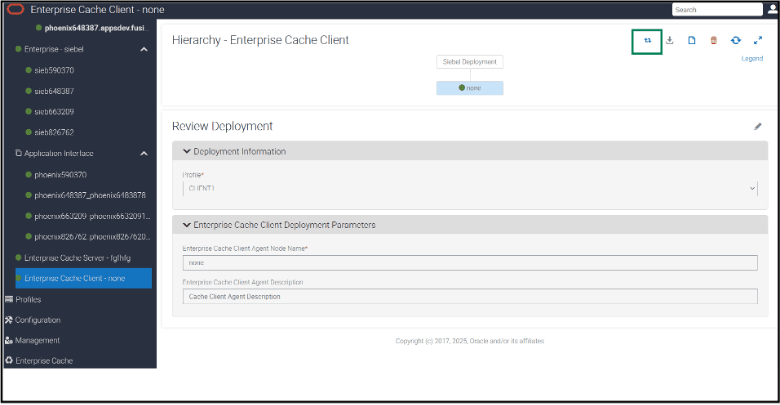
To Deploy Enterprise Cache Client Profile to Enterprise
To deploy the Cache Client Profile in SMC, select . Fill in the following fields and submit the form.
| Deployment Field | Value | Description |
|---|---|---|
| Profile | Choose your Profile | N/A |
| Action | Deploy | Creates /Updates coherence-extend-config.xml Creates SSH Tunnels |
| Enterprise Cache Client Agent Node Name* | Any Name* | Self-Descriptive Any Name |
| Enterprise Cache Client Agent Description | Any Value* | Meaningful any Description |
Enterprise Cache Client Deployment triggers the following actions:
- Create or update the cache client file
coherence-extend-config.xmlunder<SIEBEL_ROOT>\ses\siebsrvr\ADMINon all Siebel servers in the enterprise. - Generates key files using the Elliptic Curve Digital Signature Algorithm (ECDSA)
and creates the public key file
id_ecdsa.pubon all Siebel machines in the enterprise under C:\Users\<username>\.ssh on Windows. On Linux, the corresponding is /home/<username>/.ssh. - Copies the public key file and creates the
administrators_authorized_keysfile in Coherence Servers. - Appends the public key contents from
id_ecdsa.pubto C:\ProgramData\ssh\administrators_authorized_keys in Coherence Server in Windows. Similarly in Linux, /home/User/.ssh/ authorized_keys. - When a custom SSH server port (for example, 44) is configured instead of the
default port 22 in the Enterprise Cache Client Profile, the
C:\ProgramData\ssh\sshd_configfile is automatically updated and the OpenSSH service is restarted to apply the change on Windows. On Linux, this update must be carried out manually. Refer to the SSH Tunnel in Linux section below for details. - SSH tunnel is established from each Siebel Server to the Coherence Servers.
- Separate Tunnel is created to every Coherence node configured in the SSH
Configuration Section.
Once the tunnel is created, you can verify this by checking the Details tab in Task Manager, where you'll see
ssh.exerunning on Windows. Similarly, on Linux, you can verify the tunnel by runningps-ef|grep ssh. -
The SSH tunnel looks like the following in Task Manager Command line tab in Windows and Linux:
Windows:<SIEBEL_ROOT>\ses\siebsrvr\bin\ssh.exe -i C:\User\<UserId>\.ssh\id_ecdsa -C -N -c aes128 -ctr -L 127.0.0.1:<SSH Local Port>:127.0.0.1:<SSH Remote Port > <UserId>@<CoherenceHostName> -p <SSH Server Port> -o StrictHostKeyChecking=noLinux:ssh -i /export/home/User/.ssh/id_ecdsa -C -N -c aes128-ctr -L 127.0.0.1: :<SSH Local Port>:127.0.0.1:<SSH Remote Port <SSH Username>@ CoherenceHostName> -p <SSH Server Port> -o StrictHostKeyChecking=no
SSH Tunnel in Linux
A slight variation is observed in the SSH operational style on Linux.
- In Linux, the SSH Username must match the OS user account used to start the
Coherence Server’s Application Internal. Otherwise, the SSH tunnel will not be
established.
For example, if the Coherence Server application Internal is running under the user
sblqa1, the SSH Username must also besblqa1in Enterprise Cache Client Profile. - When using a custom SSH server port other than the default port 22, the user
must update the Port <custom_port> entry in the /etc/ssh/sshd_config file and
reload the SSH service using
sudo systemctl reload sshd. Thesudoprivileges are required to perform this action.Note:- When a new Siebel Server joins the enterprise, simply redeploy the Enterprise Cache Client.
- When a new Coherence server joins the cluster, update the details in the Enterprise Cache Client Profile both the TCP Configuration and SSH Configuration sections and then redeploy the profile.
Advanced Options in Coherence Client Profile
Rather than filling out every field individually in this profile in the SMC, you can configure the Coherence client if you have expertise with Coherence, simply define the XML and copy-paste it in Advanced Options. This gives you a fast, reliable way to define your Enterprise Cache Client Profiles.
Advanced Options sections where you can paste the XML contents of the file to quickly set up another profile for different Siebel Enterprise using the same values.