Specify Which Filters to Apply to a Visualization
When you add a visualization to a workbook, Oracle Analytics applies all the existing workbook, canvas, and dashboard filters to the visualization by default. Use the Filter This Viz By property to control which filters apply to a visualization.
The Filter This Viz By property provides the following options:
- All: Applies all available filters to the visualization. This is the default setting.
- None: Prevents all available filters from affecting the visualization.
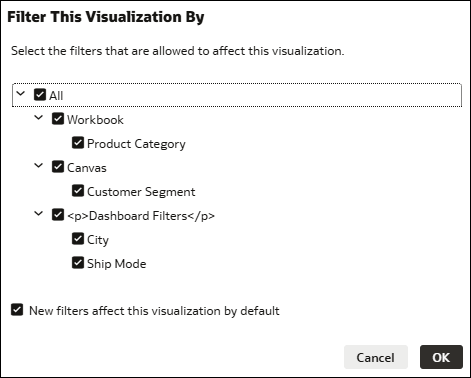
- Custom: Lets you select specific filters to apply to the visualization in a Filter this Visualization By dialog. You can also choose whether you want newly created filters to automatically be applied using the New filters affect this visualization by default option.
This property applies to dashboard filter visualizations too.
You can use this property when you want to stop a filter in a higher location from limiting a dashboard filter or a visualization filter.
Any selection steps or filter groups that affect the visualization are also available to choose from using this property.
- In the Filter This Viz By section, click the current setting and select another option.
- If you selected Custom, choose the filters that you want to apply to the visualization. Click OK.