Use a Button Bar to Pass Parameter Values
Use these steps to create a button bar that lets consumers set the value of one or more parameters in a workbook on click of a button.
To create a button bar that passes parameter values, you need to use a Set Parameter data action for the buttons. The Set Parameter data action uses one or more parameters that you define for your use case. You use these parameters anywhere on the canvas where you want them to be updated when a consumer clicks the buttons in the button bar. For information on how you can use parameters on a canvas, see Use Parameters in Workbooks.
Before you begin, create the parameters and a Set Parameter data action.
- To create a parameter, follow the steps in Create a Parameter.
- To create a Set Parameter data action, follow the steps in Create a Set Parameter Data Action for a Button Bar.
- On your home page, hover over a workbook, click Actions, and select Open.
- In the Data pane, click Visualizations, go to Dashboard Controls, and drag Button Bar
 to the canvas.
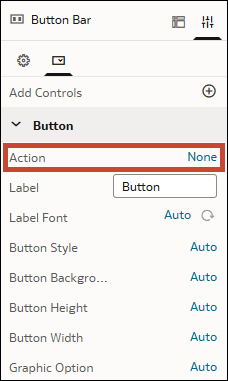
 - In the Properties pane, in the Controls tab, go to the Action row and click None.
- Select the Set Parameter data action from the list of available data actions.
- In the Action row, beside the data action name you just selected, click the pencil icon
 .
. - In the Set Action Value dialog, specify the value or values for each parameter mapping configured in the Set Parameter data action. Click Set.
- In the Label row, give your button a meaningful name that consumers will understand.
- To add additional buttons, click Add Controls
 .
. - Click Save.