3 Migrate Your Oracle Visual Builder Instances to Oracle Cloud Infrastructure

Migrate Oracle Visual Builder Classic instances to Oracle Cloud Infrastructure.

Create Your Service Instance

After subscribing to Oracle Visual Builder, you can provision instances of Oracle Visual Builder using the Quick Start or using the custom template.

Create a QuickStart Instance with a Single Click

After you sign up for your Oracle Cloud account and your services are available, you can create a QuickStart instance of Oracle Visual Builder with a single click from the Oracle Visual Builder console. A QuickStart instance does not include or support the creation of an Oracle Storage Cloud Service container. Without a container, database backups are not possible.

When your services are available, a link for creating a new instance is provided in the Oracle Visual Builder console. If you have already created some services for your account it might be more convenient for you to access the page for creating instances from the Dashboard in the Oracle Visual Builder console.

This QuickStart template automatically creates an instance with the following features:

  • Oracle Visual Builder.

  • Oracle-managed instance.

  • Two-node cluster.

  • An embedded database.

This instance does not include or support the use of an Oracle Storage Cloud Service container. On the overview page for the provisioned instance there is no Backup tab.

To create new instances using QuickStarts:

  1. Sign in to Oracle Cloud.
  2. From the Infrastructure Console, click the navigation menu Navigation menu icon in the top left corner, expand Platform Services, and then click Visual Builder.
  3. Click QuickStarts at the top of the Instances page.

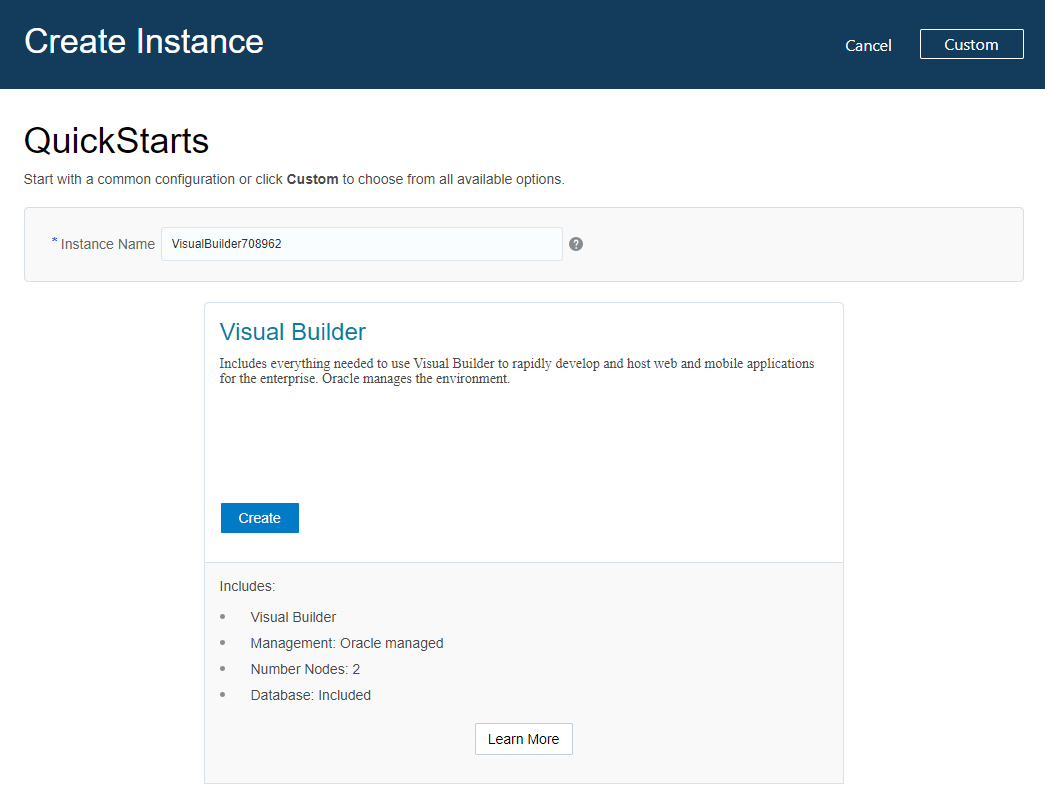
    The Create Instance page contains a field where you enter the name of the new instance and a description of the features of the QuickStart instance.


  4. Type the instance name in the Instance Name field. Click Create.

    If you do not change the default generated value for the Instance Name, you will encounter an error when you attempt to create the instance.

  5. Wait for the instance creation process to finish.

Create a Custom Instance

You can get started quickly by using a brief template that provides you with a pre-provisioned Oracle Visual Builder instance.

To create an instance:

  1. Sign in to Oracle Cloud.
  2. From the Infrastructure Console, click the navigation menu Navigation menu icon in the top left corner, expand Platform Services, and then click Visual Builder to open the Instances page.

    The Instances tab displays a list of your service instances and the resources allocated to the instances. If you do not have any service instances you will see a message with links to information on creating an instance.

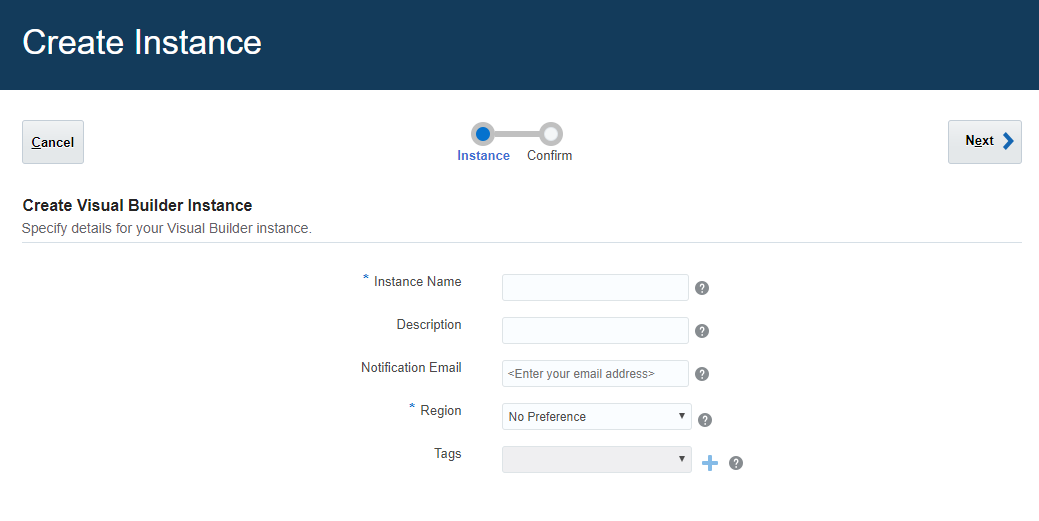
  3. Click Create Instance to open the Create Instance page.
  4. In the Details section:
    1. Specify the Instance Name, Description and Notification Email.
    2. Select the compute region from which to perform the installation.
    3. Select or define tags for the service instance. .
  5. In the Special Instructions section:
    1. Select the I have special instructions from Oracle checkbox if you have received a special tag from Oracle after filing a Service Request (SR). A scenario where you might file an SR is if you are an Oracle partner whose Cloud account administrator is an Oracle employee. In this scenario, you must file the SR and receive the special tag from Oracle before you attempt to provision the Visual Builder instance using the special tag.
    2. In the Special Tag field, enter the special tag that Oracle communicated to you through the SR that you filed.
  6. Click Next, confirm your selections, then click Create.
    When the instance is ready to use it appears in the Oracle Visual Builder console.

Assign Users and Groups to Instance Roles

Your Oracle Visual Builder Classic instance and your new instance on Oracle Cloud Infrastructure share an Oracle Identity Cloud Service instance for managing users and security.

After you create your new Oracle Visual Builder instance, you need to assign users and groups to the new instance that match the users and groups assigned to the old instance.

To assign users and groups to your new instance:

  1. Navigate to the Identity Cloud console and click Applications.
  2. On the Applications page, click the Oracle Visual Builder Classic instance in the list of applications and open the Application Roles tab.
  3. Note the users and groups assigned to each role in the instance.
  4. Return to the Applications page.
  5. In the list, click the name of your new Oracle Visual Builder instance on Oracle Cloud Infrastructure and open the Application Roles tab.
    Your new instance is automatically added to the list of applications when you create it.
  6. For each role, assign users and groups to replicate the role assignments that you noted for the Oracle Visual Builder Classic instance.

Manage Instance Settings

After your new instance is created, you configure the instance's settings to match the settings of the Oracle Visual Builder Classic instance.

Access Instance Settings

Administrators can access a page for managing the instance’s global settings. The settings page contains panels for configuring security settings, specifying Access Denied messages and specifying Oracle Process Cloud Service details.

You can access the instance settings page from any Visual Builder page, but the steps for opening the page will depend on if you are developing visual applications or classic applications.

To open an instance’s settings page:

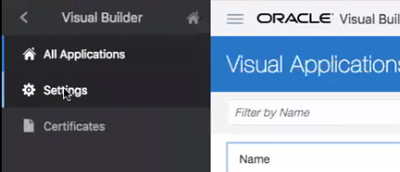
  1. Click Home in the Visual Builder title bar to open the main menu.
  2. Click Settings in the main menu.

    If you are developing visual applications, open the main navigation pane on the Home page and select Settings.


    Description of admin-settings-menu.png follows
    Description of the illustration admin-settings-menu.png

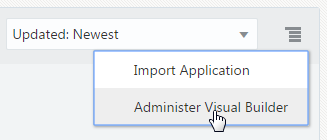
    If you are developing classic applications, select Administer Visual Builder in the Administration Options menu and then click Global Settings.


    Description of admin-options-menu.png follows
    Description of the illustration admin-options-menu.png
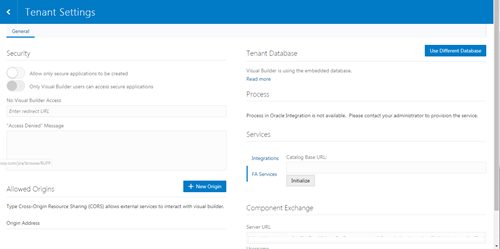
The settings available for the instance are grouped on the page.

Configure Security Options for Applications

Administrators can use the Security panel in the settings page to require authentication for all applications in the instance.

When an administrator enables the Allow only secure applications to be created option, all published and staged applications in the instance will require user authentication. When the option is enabled, users must be assigned a role by the identity domain administrator and log in to access an application. When the option is not enabled, applications can be created that allow access to anonymous users.

When an application has the default security settings, any user with a valid login can access the pages in an application. A developer can modify the default security settings to define the roles that can access applications, pages and components. When the secure application option is enabled, an administrator can enable an option that users must be assigned the role of Visual Builder User in addition to any other roles used to secure access to staged and published applications. For example, security can be configured so that users assigned the role Visual Builder Developer can access the designer but can’t access the published application and data because they are not assigned the role Visual Builder User.

To block access by anonymous users to all applications in the instance:

  1. Open the instance’s settings page.
  2. In the Security panel, enable Allow only secure applications to be created.

    Anonymous users can’t access the applications when this option is enabled.


    Description of admin-settings-security.png follows
    Description of the illustration admin-settings-security.png

    When the secure applications option is enabled, administrators can enable the Only Visual Builder Users can access secure applications option.

Set Page Messages for Access Denied Errors

Administrators can use the instance’s settings page to specify a URL that users are navigated to when they are denied access to an application or page.

Authenticated users might see an Access Denied page or message when they attempt to access an application or page in an application that their user role is not permitted to access. Administrators can set the default page or message that users see when they are denied access to an application or page. Access Denied messages that are set at the application level in the General Settings of an application will override messages set in the instance’s settings page. The default Access Denied page and message is used if the message options in this panel are not set.

To specify an Access Denied page or message for applications in the instance:

  1. Open the instance’s settings page.
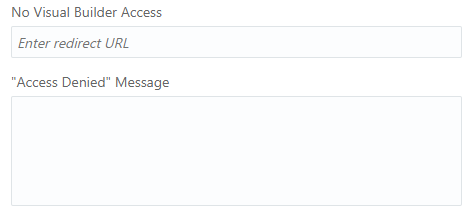
  2. In the Security panel, type a URL that users are directed to when denied access to an application.

    The URL that you specify is used as the Access Denied page for all applications in the instance and should be accessible to users who are not logged in.


    Description of admin-settings-messages.png follows
    Description of the illustration admin-settings-messages.png

    Note:

    If you are configuring settings for classic applications, the Access Denied settings are set in the Messages panel.
  3. Type the message that you want users to see when they are denied access to a page.

    The message that you enter will be displayed in the Access Denied page for all applications in the instance except for those where a message was set at the application level in the application’s General Settings page.

Allow Other Domains Access to Services

Use the Global Settings page to specify the domains that are permitted to interact with services in your instance.

Cross-Origin Resource Sharing (CORS) is a mechanism that enables you to specify the domains that are allowed to exchange data with applications in your instance. By default, incoming requests from domains not on your instance’s list of allowed origins are blocked from accessing application resources.

To add a domain to the list of allowed origins:

  1. Open the instance’s settings page.
  2. In the Allowed Origins panel, click New Origin and type the URL of the domain that you want to allow. Click Submit.

    The Allowed Origins panel lists all origins that are permitted to retrieve information from the instance.


    Description of admin-settings-origins.png follows
    Description of the illustration admin-settings-origins.png

Add a Connection to Process Cloud Service

Administrators can use the instance’s settings page to add a connection to an Oracle Process Cloud Service instance.

If you are using multiple Visual Builder instances, for example, development and production instances, you might need to add connections to Oracle Process Cloud Service in more than one instance.

To add a connection to an Oracle Process Cloud Service instance:

  1. Open the instance’s settings page.
  2. In the Process Cloud Service panel, type the Server URL of the service.
  3. In the Allowed Origins panel, click New Origin and type the URL of the Process Cloud Service instance.

    The Allowed Origins tab lists all origins that are permitted to retrieve information from the service instance.

Add a Connection for Fusion Applications Services

The list of REST services in the service catalog of visual applications is retrieved from a Fusion Applications service. The URL of the Fusion Applications service can be specified in the Tenant Settings dialog box or in the Settings dialog box of a visual application.

All visual applications in the tenant space will use the Fusion Applications base URL specified in Tenant Settings, but a visual application can be configured to use a different Fusion Applications service by specifying its URL in the application’s Settings dialog box. The URL in Tenant Settings is ignored if a URL is specified in a visual application’s Settings dialog box.

To specify a Fusion Applications service for the tenant:

  1. Open the instance’s settings page.
  2. Enter the base URL of the Fusion Applications service.

    When specifying the URL in the Tenant Settings, the administrator only needs to provide the base URL of the Fusion Applications service to retrieve the list of services. The URL in the Settings dialog box for a visual application requires the full path to the interfaceCatalogs endpoint for retrieving the list of services. For example, if the URL for a Fusion Applications instance is <my-fa-instance>, the URL for the interfaceCatalogs endpoint would be https://<my-fa-instance>/helpPortalApi/otherResources/latest/interfaceCatalogs.


    Description of admin-settings-fa-url.png follows
    Description of the illustration admin-settings-fa-url.png

Manage Self-signed Certificates

Administrators can use the Certificates page to upload and manage the self-signed certificates used by the instance to enable inbound and outbound SSL communications to a service’s REST APIs

When creating connections to REST services that use self-signed certificates, you might need to add an API’s certificate to your Visual Builder instance to validate SSL connections to that service. You can use the Certificates page to upload and remove certificate files (.pem)  for services. Uploading a service’s certificate file to the keystore will allow all applications in the instance to communicate with that service. The Certificates page displays a list of certificates that have been added. You can click the Delete button in a row to remove the certificate.

To upload a self-signed certificate:
  1. Open the Visual Builder main menu and click Certificates.

    The Certificates page displays a list of the certificates already uploaded to the instance.


    Description of admin-certificates-page.png follows
    Description of the illustration admin-certificates-page.png
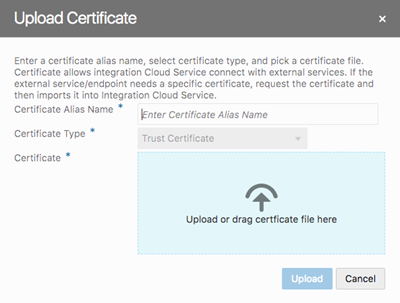
  2. Click Upload to open the Upload Certificate dialog box.

    You use the Upload Certificate dialog box to create an alias for the certificate and upload the service’s certificate file from your local system.


    Description of admin-certificates-upload.png follows
    Description of the illustration admin-certificates-upload.png
  3. Type the alias in the Certificate Alias Name field.

    The alias is used to identify the certificate in the table in the Certificates page. The Certificate Type dropdown list is read-only because only Trust Certificates are supported.

  4. Drag the certificate file from your local system into the upload target area, or click the upload target area to browse your local system.
  5. Click Upload to add the certificate to the service keystore.