Add a Navigation Item for Navigation Drawer Apps
To create a new navigation item for your web app based on the Navigation Drawer Template, and to add it to the Navigation Drawer panel:
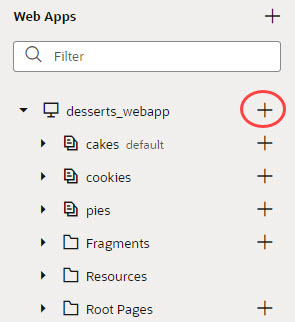
- Click the Create Flow (+) icon next to the application node in the Web Apps pane.
- In the Flow ID field, enter a name for the new navigation item and click Create.
- In the Web Apps pane, expand the Root Pages node and select the shell page.
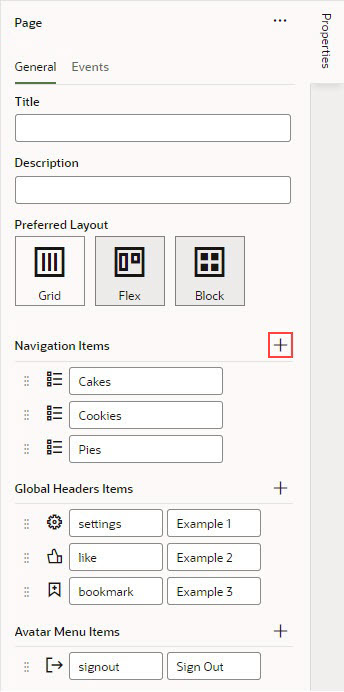
- In the Properties pane, click the Add Navigation Item (+) icon in the Navigation Items section:
- In the pop-up, select the appropriate page flow and click Select.
- Click the Select (+) icon next to the new navigation item to select its icon, which users see in the Navigation Drawer panel.
- If necessary, change the label for the new item, which users see in the Navigation Drawer panel.
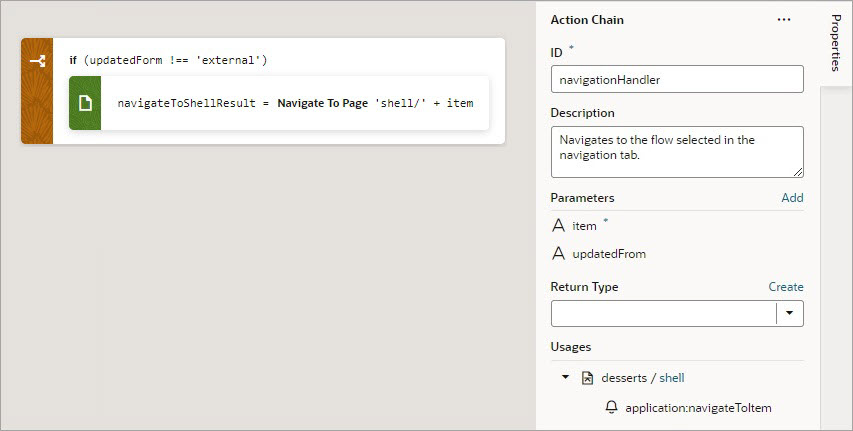
To view the action chain that handles the navigation, on the shell page, click the Action Chains tab and select the navigationHandler action chain:


