Create a Calculated Field

You can use a calculated field when you want to have a single field in your layout that, for example, contains some static string or an expression that is computed from the values of other referenced fields or objects.

Suppose your data source has separate fields for a user's first name and last name. You could create a custom field that combines these fields into a single field called fullName and use that in your layouts instead. The value of this new field is calculated using an expression like [[ 'Name: ' + $fields.firstName.value() + $fields.lastName.value() ]]. In a calculated field, referenced fields defined in the expression are read-only, so they can't be edited in a layout.

To create a calculated field:

  1. Open the dynamic table or form you want to work with in the Layouts tab.
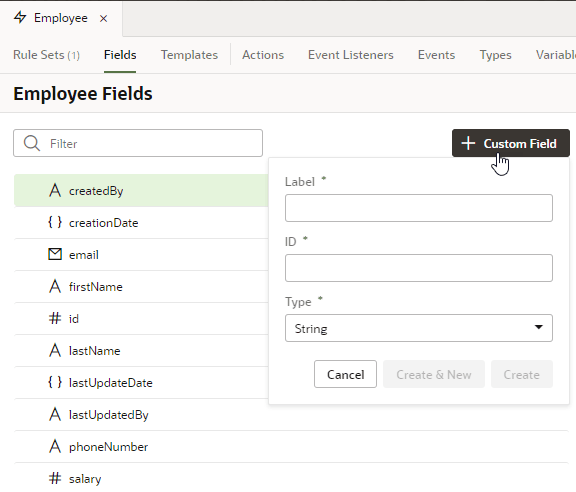
  2. Click the Fields tab, then + Custom Field.
  3. Enter a label for the field (the field's display name). When you enter the label, a suggested ID is generated for you. The ID can't be changed later.
  4. Select the field type. When selecting a type for a calculated field, you should consider the types of the referenced fields you'll include in the expression.
  5. If you want to create an expression and use an existing field, click Add next to Referenced Fields, then select a field in the list. Click Add Field to add it.
  6. Define an expression in the Value property. The expression can include variables, static strings, and referenced fields.

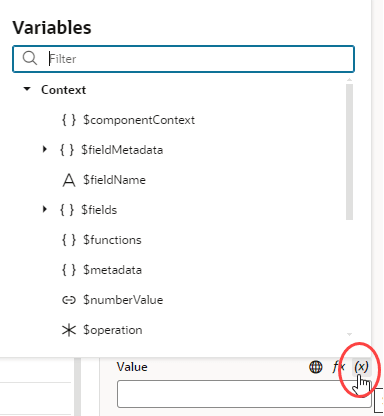
    If you want to use a single variable, click the arrow to open the Variables picker.
    Description of custom_field_variablepicker.png follows
    Description of the illustration custom_field_variablepicker.png

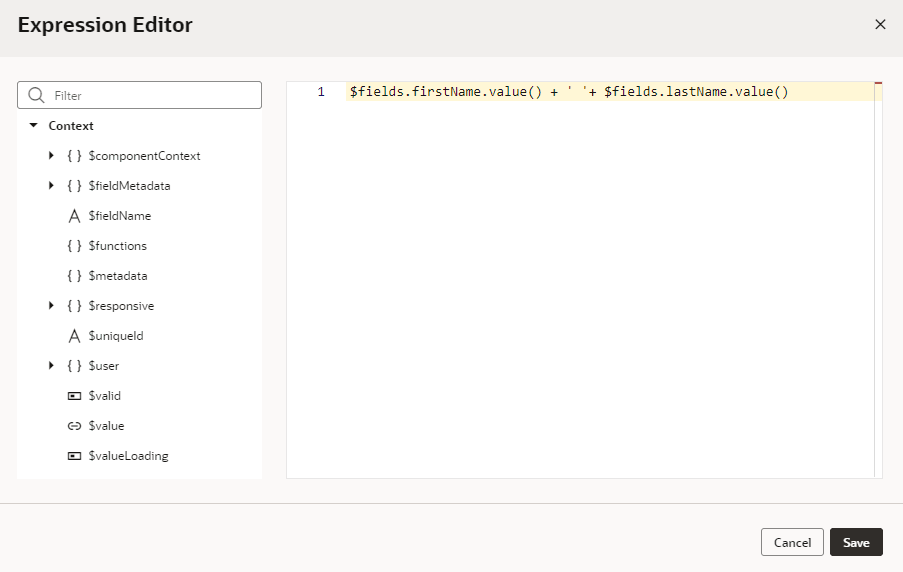
    If you want to use an expression, click Expression Editor icon to open the Expression Editor. In the Expression Editor, you can select field variables in the Variables pane to add them to your expression. You can also add text strings to your expression by typing in the editor. Click Save.

    For example, here's an expression that combines the firstName and lastName fields:
    Description of custom_field_fx.png follows
    Description of the illustration custom_field_fx.png

    The expression you create in the editor is added to the Value field, for example:
    [[ $fields.firstName + ' ' $fields.lastName ]]
    You can also use the $fieldmetadata variable to access field-level metadata. For example, to invoke a function to calculate a field's default value based on its metadata, your expression might look something like this:
    [[$functions.getDefaultValue($fieldMetadata, $componentContext)]]

    where $fieldMetadata represents the metadata of the field.

    To write efficient expressions that handle situations where a referenced field might not be available or the field's value could be null, see How Do I Write Expressions If a Referenced Field Might Not Be Available Or Its Value Could Be Null?

  7. Optionally, you can click Add next to Converter and Validator to add suitable built-in convertors or validators, or create a custom one. If you're using a referenced field, you might want to add converters or validators so that, for example, dates are formatted the way you want, or to make sure a string in a field is not too long.

Your custom fields (and any fields that you have modified, for example, in the Properties pane) are indicated by a gray bar to the left of the field name. In this screenshot, you can see the gray bar next to fullName:
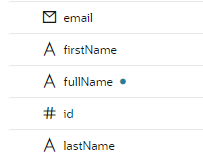
Description of custom_field.png follows
Description of the illustration custom_field.png