Complete Prerequisites: Create and Activate the Client Application
Configure and activate the confidential client application, then take note of the client ID and secret. You'll need that information to connect from third-party applications.
When you configure the confidential client application, you specify the grant type and assign scopes and roles. The confidential client application requires the ServiceInvoker role.
- Access the identity domain.
- Log in to the Oracle Cloud Infrastructure Console with your identity domain administrator credentials.
- In the navigation pane, click Identity & Security.
- Click Domains.
- Select your compartment.
- Select the identity domain.
- In the menu bar, click Integrated applications.
This is the location at which you create the client application for your grant type.

- Create and configure the client application.
- Click Add application.
- Select Confidential Application, then click Launch workflow.
- Enter a name. The remaining fields on this page are optional and can be ignored.
- Click Submit.
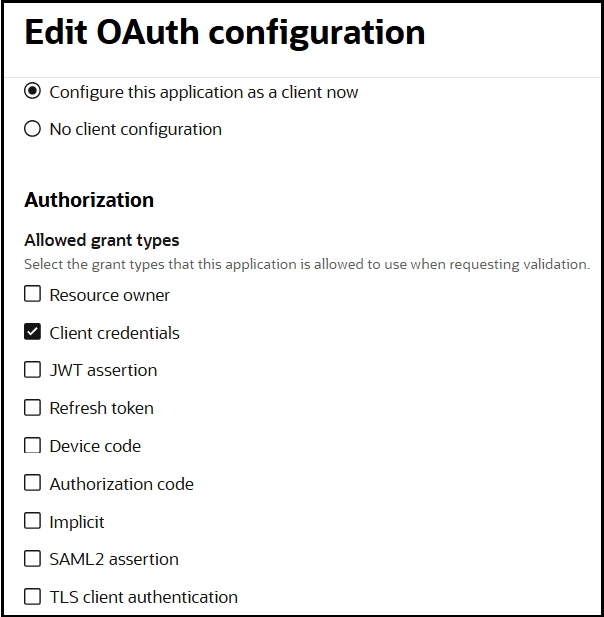
- Click the OAuth configuration tab, then the Edit OAuth configuration subtab.
- In the Client configuration panel, select Configure this application as a client now.
- For client credentials, select Client credentials in the Allowed grant types section

- Leave the Redirect URL, Post-logout redirect URL, and Logout URL fields blank.
- For Client type, ensure that Confidential is selected.
- Bypass several fields and scroll down to the Token issuance policy section.
- Select Confidential in the Authorized resources section.
- Click the Add Resources toggle.
- Click Add scope.
- Find and expand the Oracle Integration application for your instance.
- Select the two scopes appended with the following details: urn:opc:resource:consumer::all and ic/api/.

- Click Add.
The scopes are displayed in the Resources section.
- Ignore the Add app roles check box. This selection is not required.
- Click Submit.
The details page for the client application is displayed.
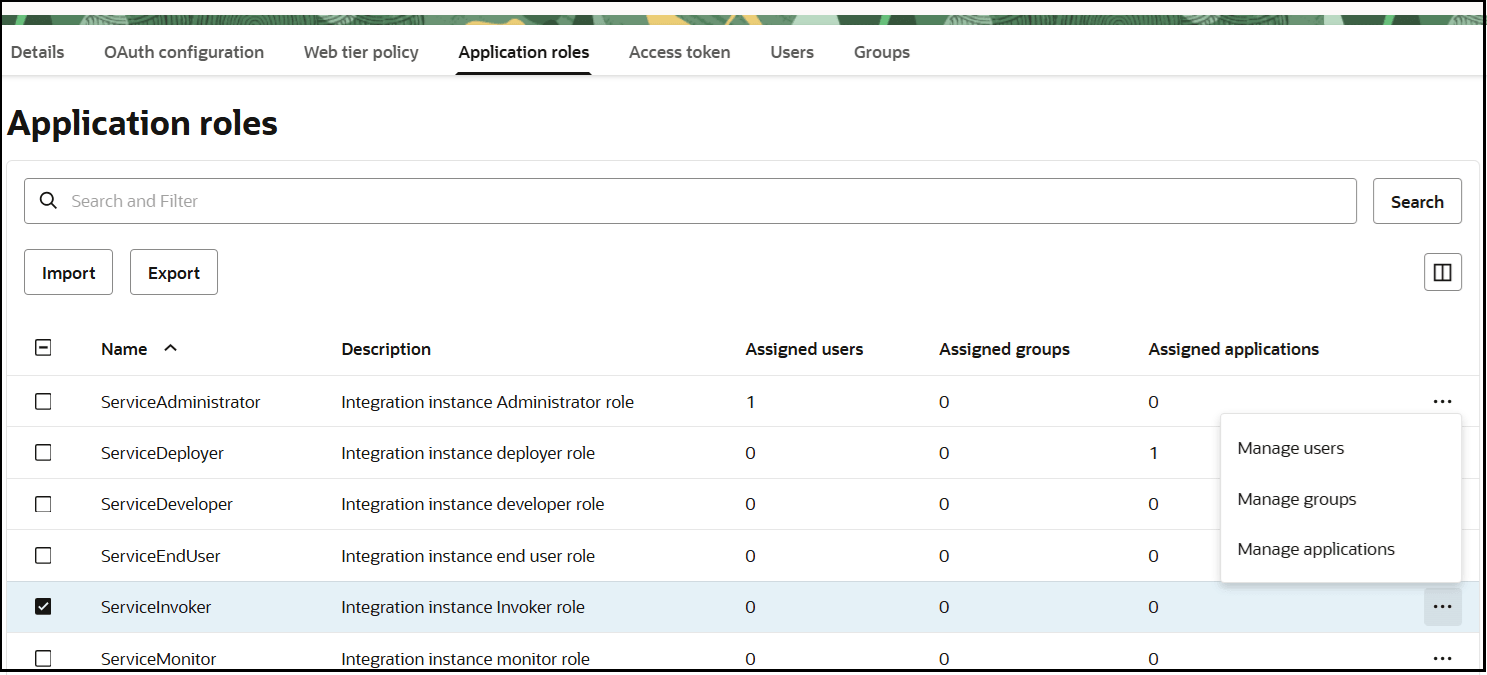
- Add the ServiceInvoker role to the client application.
- In the menu bar, click Oracle cloud services.

- Click the specific application corresponding to the Oracle Integration instance.
- In the menu bar, click Application roles.
- For client credentials, expand ServiceInvoker, then click Actions
 next to Assigned applications.
 Select to assign users, groups, and applications to the instance application.

- In the menu bar, click Oracle cloud services.
- Activate the confidential application.
- From the Actions menu at the top, select Activate, and then Activate application to activate the client application for use.
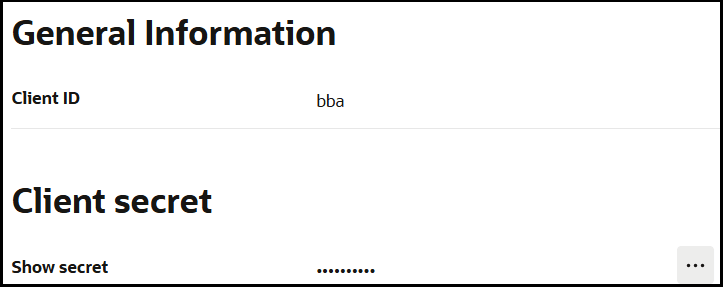
- Get the confidential client application client ID and secret.
In the General Information section, note the client ID and client secret values. These values are required for the third-party application that is communicating with the identity domain.

- Get the access token for the client credentials grant type.
- Fetch the access client to make an access token request with the client credentials.
##Syntax
curl -i -H 'Authorization: Basic <base64Encoded clientid:secret>' -H 'Content-Type: application/x-www-form-urlencoded;charset=UTF-8' --request POST https://<Identity_Domain_Service_Instance>.identity.oraclecloud.com/oauth2/v1/token -d 'grant_type=client_credentials&scope=<app scope>'
###where
#### <base64-clientid-secret> - Base 64 encode clientId:ClientSecret
#### <app scope> - Scope added while creating application in client configuration section (Ends with urn:opc:resource:consumer::all)

##Example
curl -i -H 'Authorization: Basic OGQyM...ZDA0Mjcz' -H 'Content-Type: application/x-www-form-urlencoded;charset=UTF-8' --request POST https://<identity_domain_host>/oauth2/v1/token -d 'grant_type=client_credentials&scope=https://<Resource APP Audience>urn:opc:resource:consumer::all'
Where
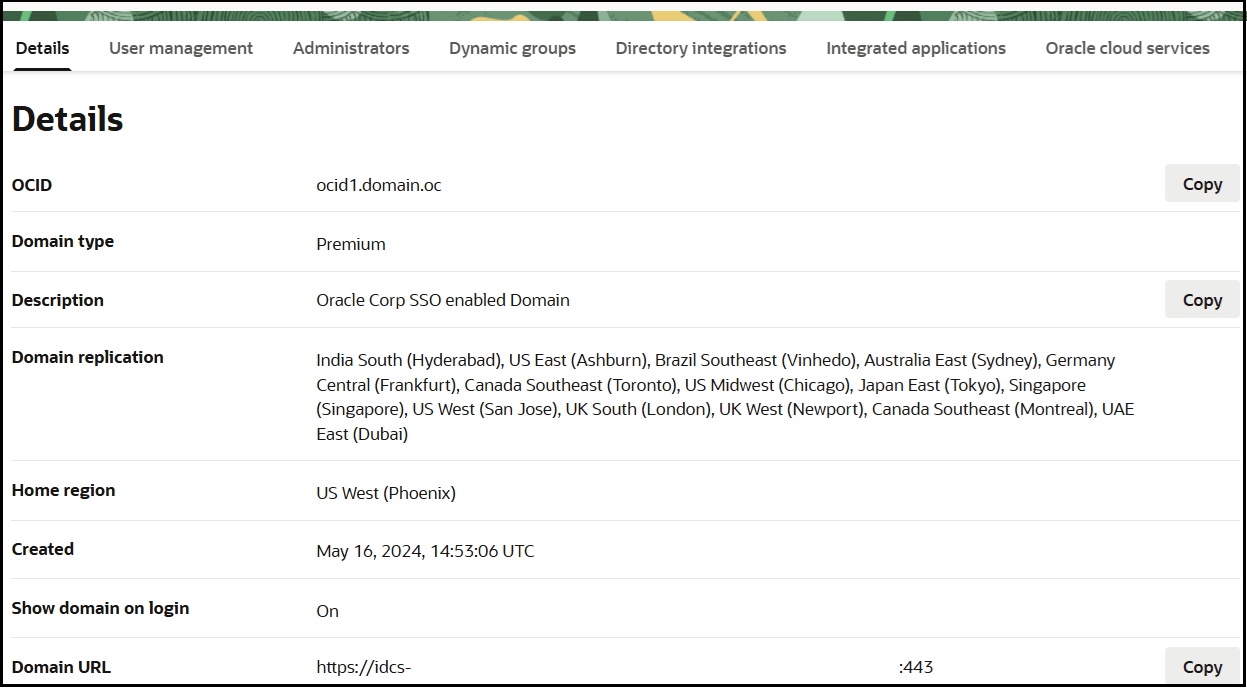
Identity_Domain_Service_Instanceis the value in the Domain URL field of the Details tab of the instance application.
- Capture the
access_tokenfrom the response to use for authorization.{ "access_token": "eyJ4NXQjG...dfsdfsFgets2ed", "token_type": "Bearer", "expires_in": 3600 }
- Fetch the access client to make an access token request with the client credentials.