Create the Integration: Auto Approve Expense Report

Let's create the integration to automatically approve expense claims. Since all the reasoning is done in the AI agent, the integration can be very simple.

Requirements for integrations to be used as tools:

Any integration can be used as an agentic AI tool, but the integration must meet the following criteria:
  • The integration must be part of a project.
  • The integration must be Active. We'll be activating the integration after we create it.
  • The first connection in your integration must be a REST trigger connection with the REST Adapter.
  • The REST trigger connection in your integration must have:
    • JSON payload
    • POST verb
  1. In your project, in the Integrations box, click Add.

    The Add integration panel opens.

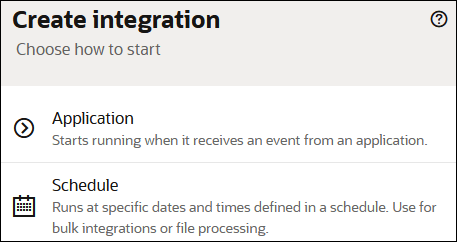
  2. Click Create, then select Application.


    The Create integration panel shows selections for Application and Schedule.

  3. In the Name field, enter Auto Approve Expense Report, leave all other fields as they are, then click Create.

    The integration canvas opens with an option for creating a trigger connection.

  4. Create the trigger connection. You need a trigger connection for an integration to be used as a tool.
    1. Click Add trigger.

      The Create connection panel opens.

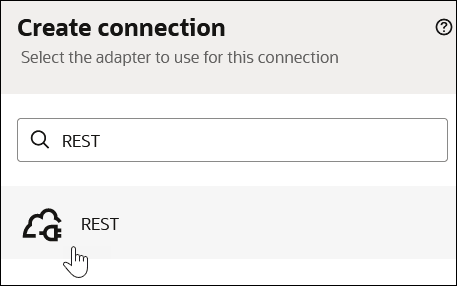
    2. Enter REST in the search field and select REST as the adapter connection to use.


      The Create connection dialog shows REST being selected.

      The Create Connection panel for configuring the REST Adapter connection opens.

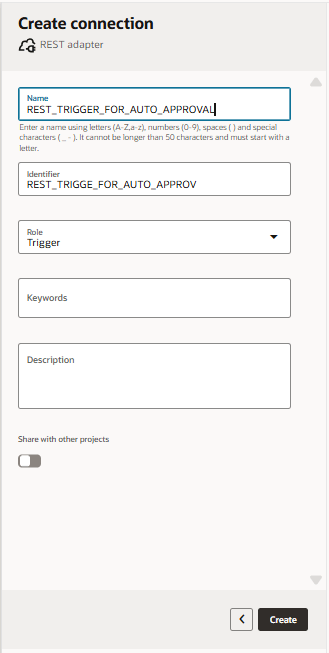
    3. In Create connection, configure the Name and Role fields, leave all other fields blank, and click Create.
      • Name: For the connection name, specify REST_TRIGGER_FOR_AUTO_APPROVAL.
      • Role: Select Trigger so that an inbound application can run the integration.

      The Create connection page for the REST adapter. Fields are Name, Identifier, Role, Keywords, Description, Share with other projects. At the bottom, there's a Create button.

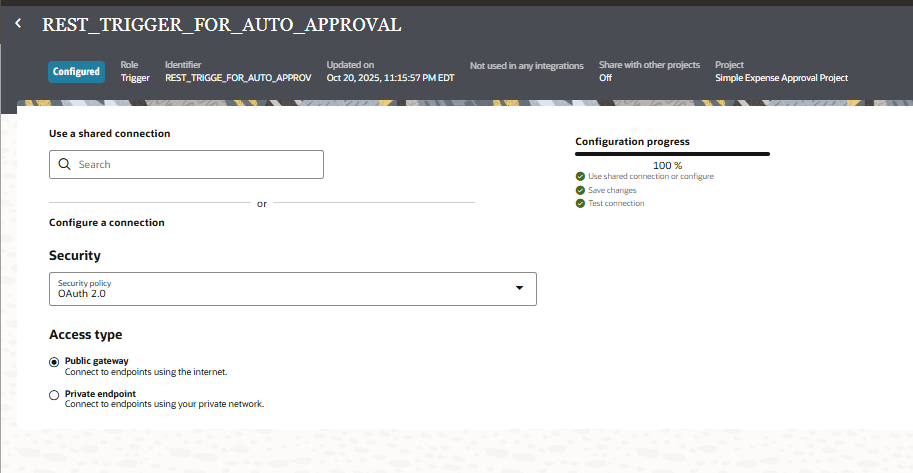
      The page for configuring security and delivery methods for the REST Adapter is displayed.

    4. Configure connection security.
      • Security: From the list, select OAuth 2.0 Or Basic Authentication to secure incoming messages.
      • Access type: Ensure Public gateway is selected. This access type uses the public internet to receive messages.


      REST Trigger connection details page with the fields Use a shared connection, Security, Access type Public gateway(selected), Access type Private endpoint. There is also a configuration progress bar at 100%.

    5. Click Test to test the connection.
    6. Click Save.
    7. Click Back Back icon to return to the integration canvas.
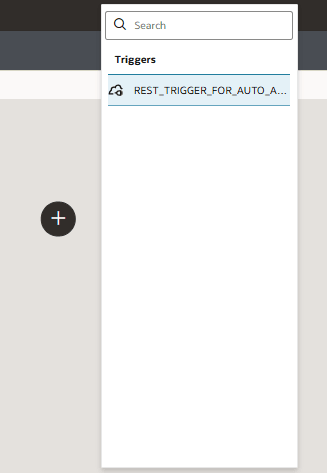
  5. Click Add Add icon to display the Trigger connections dialog and select REST_TRIGGER_FOR_AUTO_APPROVAL.

    Trigger connections dialog with REST_TRIGGER_FOR_AUTO_APPROVAL displayed

    The Configure Basic Info page is displayed.

  6. In Configure Basic Info, in the field What do you want to call this endpoint enter AutoApproveExpense and click Continue.

    The Configure Resource Configuration page is displayed.

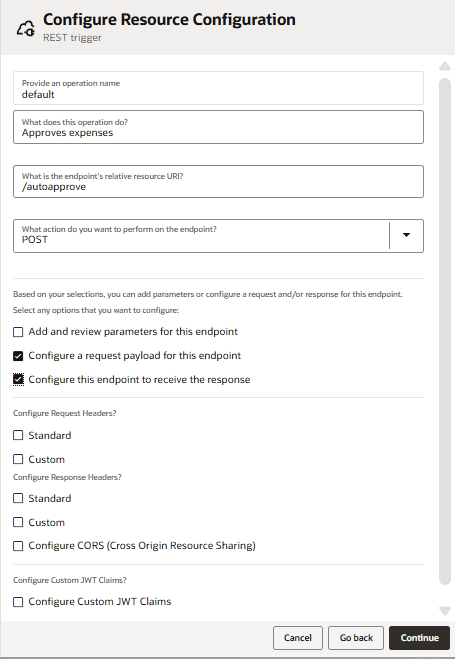
  7. In Configure Resource Configuration, complete the fields as indicated, then click Continue:


    Screenshot of the "Configure Resource Configuration" page for a REST trigger in Oracle Integration. The form contains text fields for an operation name set to "default," a description stating "Approves expenses," and a relative resource URI set to "/autoapprove." The action to perform on the endpoint is set to "POST" using a dropdown menu. Below, there are various configuration options with checkboxes: "Add and review parameters for this endpoint" (not checked), "Configure a request payload for this endpoint" (checked), and "Configure this endpoint to receive the response" (checked). Additional sections allow selection of standard or custom request and response headers, as well as options to configure CORS and custom JWT claims, none of which are selected. At the bottom of the page, three buttons are visible: "Cancel," "Go back," and a highlighted "Continue" button.

    • What does this operation do?: Approves expenses.
    • What is the endpoint relative resource URI?: /autoapprove.
    • What action do you want to perform on this operation?: POST . An integration must have a REST trigger with a POST verb to be used as a tool in AI agents.
    • Configure a request payload for this endpoint: Make sure it has a checkmark.
    • Configure this endpoint to receive the response: Make sure it has a checkmark.

    The Configure Request panel is displayed.

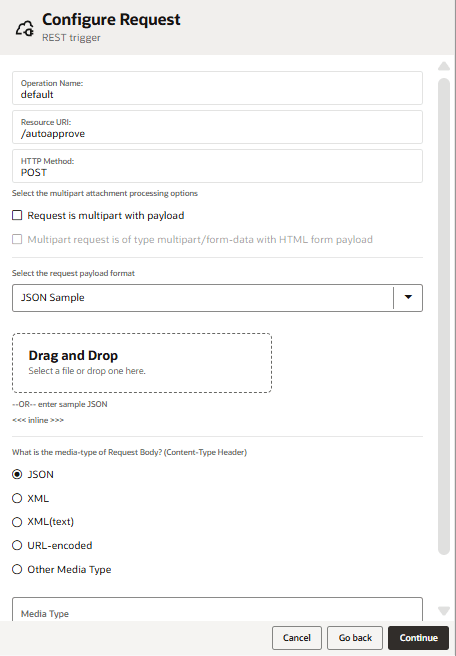
  8. In Configure Request, complete the fields as indicated, then click Continue.

    The trigger connection must have JSON payload to be used as an agentic AI tool.

    • Select the request payload format: JSON Sample.
    • <<<inline>>>: Click and specify the following request format:
      { "AmountClaimed" : "" } 


    Configure Request screen for a REST trigger. Operation name is "default", resource URI is "/autoapprove", HTTP method is POST. Multipart options are visible but not selected. Request payload format is set to "JSON Sample." "JSON" is selected as the media type. "Continue" button is highlighted.

    The Configure Response panel is displayed.

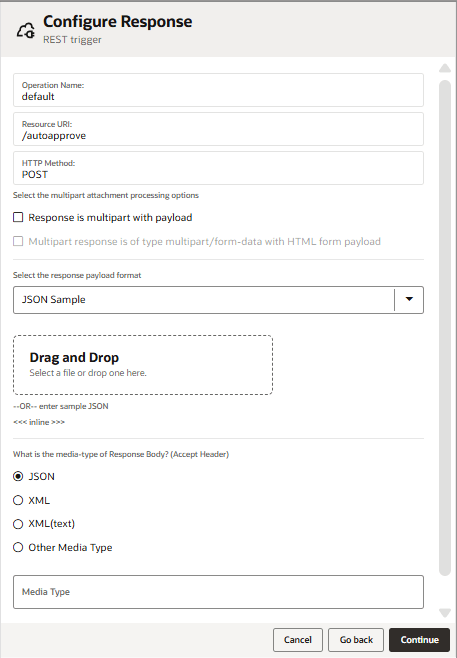
  9. In Configure Response, complete the fields as indicated, then click Continue.

    The trigger connection must have JSON payload to be used as an agentic AI tool.

    • Select the response payload format: JSON Sample.
    • <<<inline>>>: Click and specify the following response format:
      {
        "AutoApproveResponse": ""
      }

    Configure Response screen for a REST trigger. Operation name is "default", resource URI is "/autoapprove", HTTP method is POST. Multipart options are visible but not selected. Response payload format is "JSON Sample". "JSON" is selected as the media type. "Continue" button is highlighted.

    The Summary page is displayed.

  10. Click Finish to complete the trigger connection configuration.

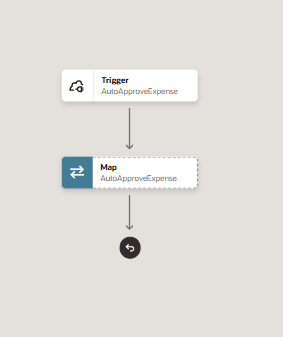
    Your integration should now look like this:


    Integration flow diagram showing a "Trigger: AutoApproveExpense" step, followed by a "Map: AutoApproveExpense" step, with arrows indicating the sequence.

  11. In the map action, click Actions Actions icon, then select Edit Edit icon.
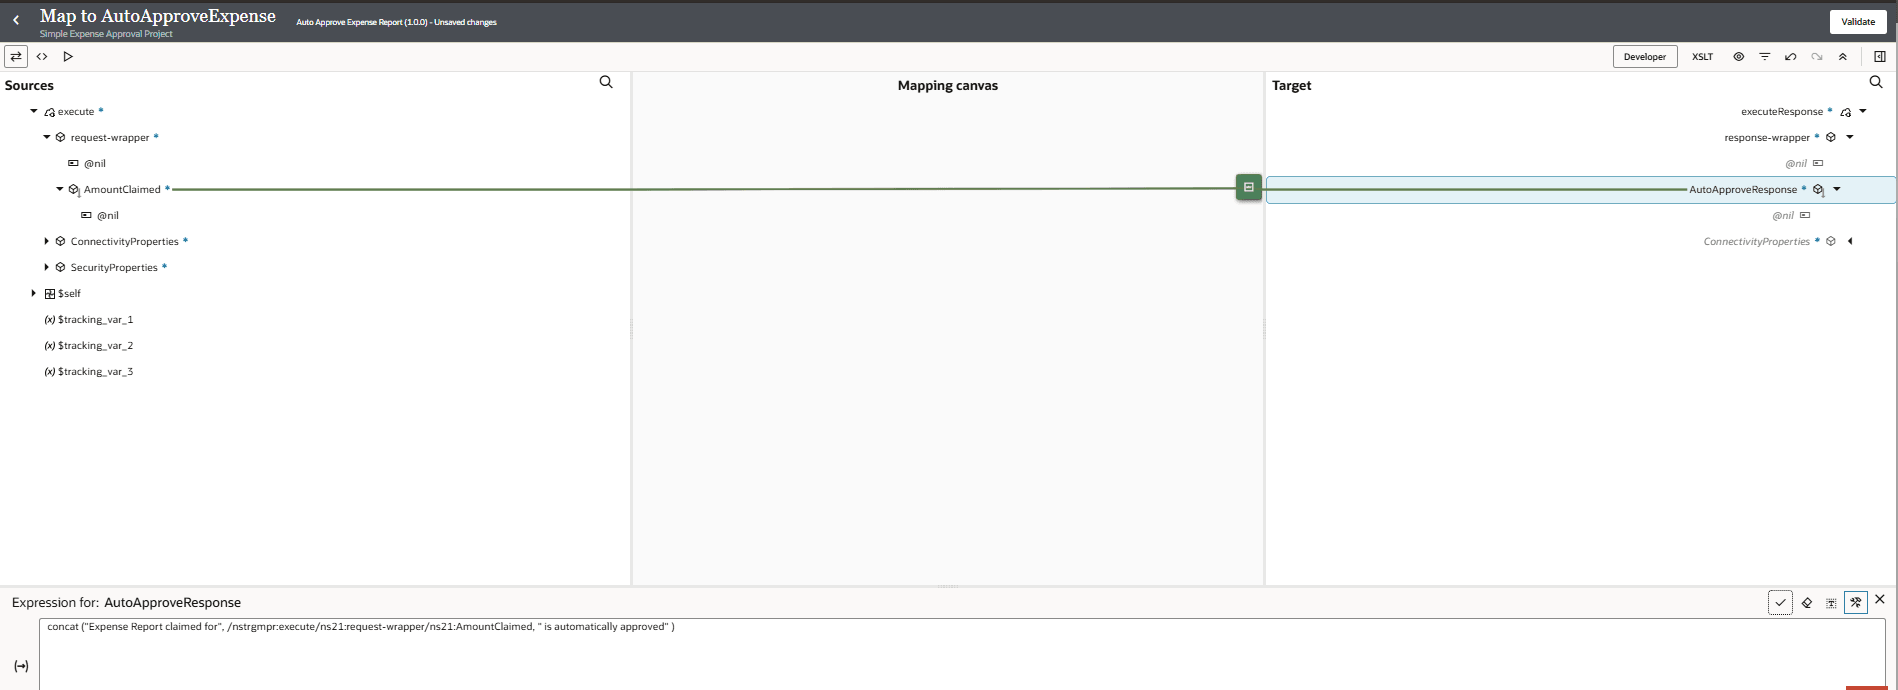
  12. Under Request Wrapper, drag AmountClaimed to AutoApproveResponse to map the fields and add enclose the expression that is there with concat ("Expense Report claimed for", , "is automatically approved")
    For example:
    concat ("Expense Report claimed for", /nstrgmpr:execute/ns21:request-wrapper/ns21:AmountClaimed, " is automatically approved" )

    mapping editor screen showing "AmountClaimed" from the source mapped to "AutoApproveResponse" in the target. An expression for AutoApproveResponse concatenates a message with the claimed amount. The source, mapping canvas, and target panels are shown.

  13. Click Validate.
  14. Click Back Back icon to return to the integration canvas.
  15. Assign a business identifier.
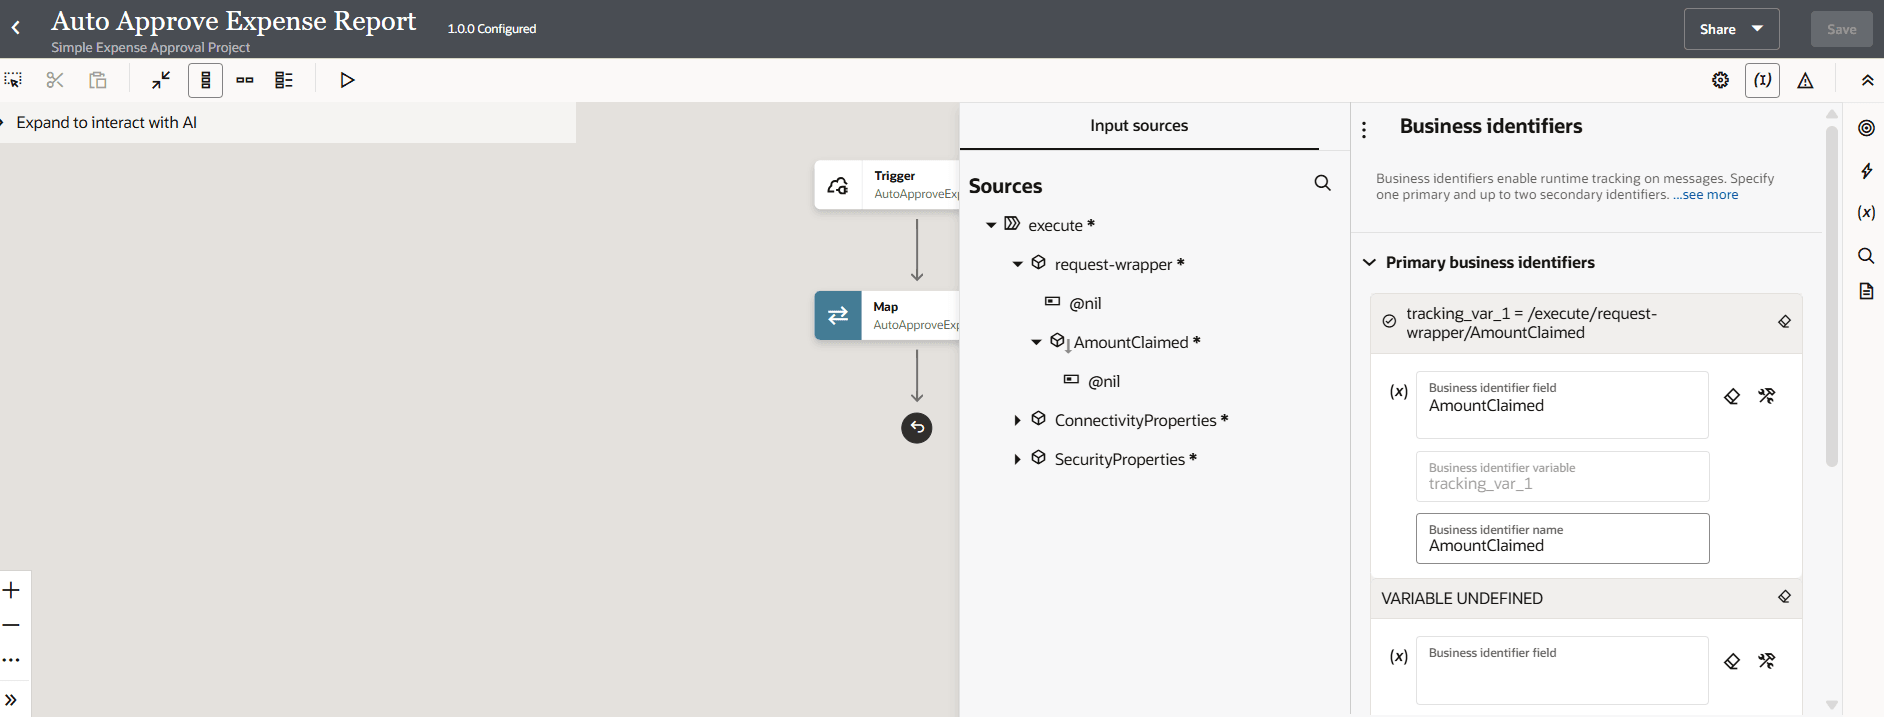
    1. Above the integration, click Business Identifier Business identifiers icon.
    2. Drag AmountClaimed as the primary business identifier.

      The Sources section shows TemplateParameters expanded. The AmountClaimed element has been dragged to the Business identifier name field. Above this field is the Business identifier variable field with tracking_var_1 as the value. Above this is the Business identifier field with a value of name. Two icons appear to the right of this field. All these fields are in the Primary business identifiers panel.

  16. Click Save.

    You have completed creating the integration that automatically approves an expense.

  17. Click Back Back icon to return to the Project page.
  18. Activate the integration. Only Active integrations can become agentic AI tools.
    1. In the Integrations box, next to the integration Auto Approve Expense Report, click Actions Actions icon, and select Activate.