Register the Integration as an Agentic AI Tool

An integration can become an agentic AI tool for AI agents. AI agents can then invoke the integration as a tool to accomplish a specific task.

Let's register the integration as an agentic AI tool so that it can be used by the AI agent.
  1. In the navigation pane, select Projects.
  2. Select the project in which your integration is located. For the tutorial, the project is Simple Expense Approval Project.
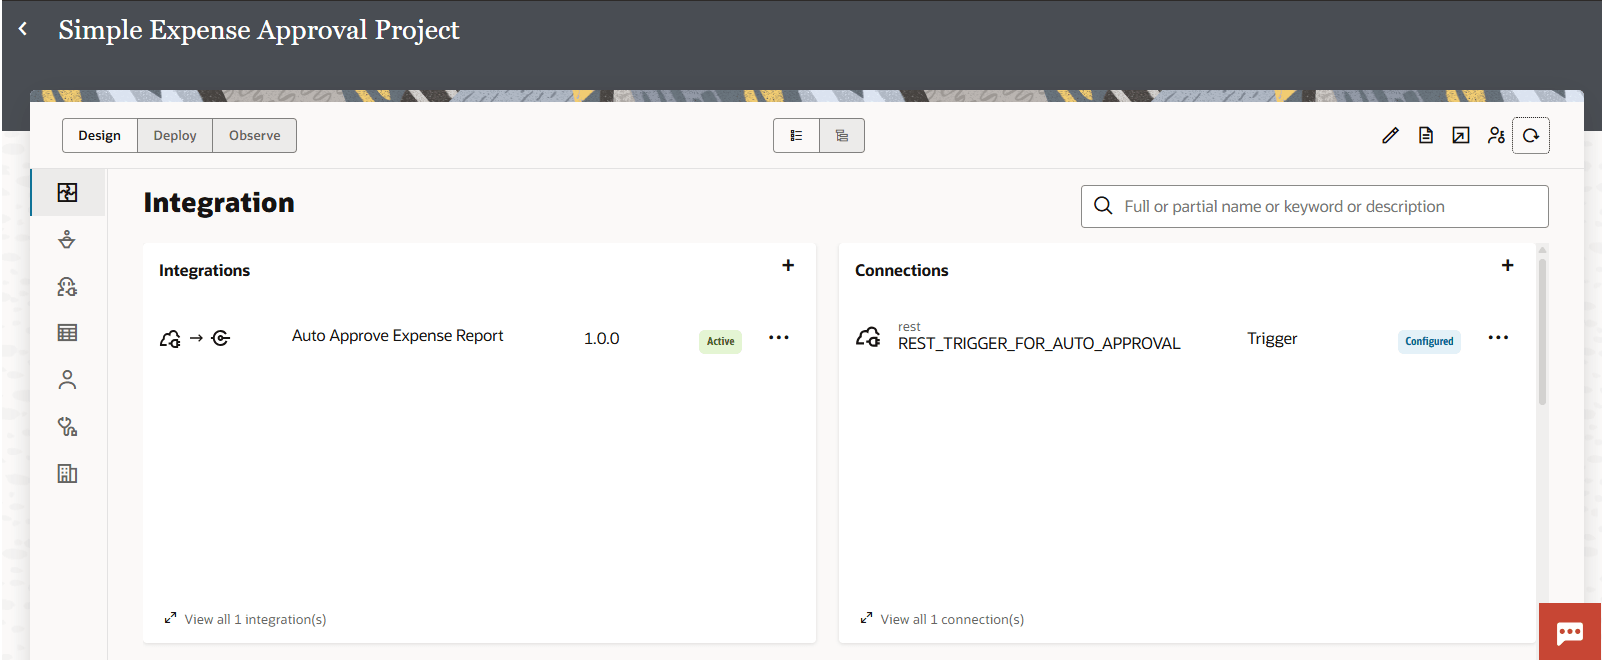
  3. In the Integrations section, find the integration that you want to register as a tool: Auto Approve Expense Report.

    Simple Expense Approval Project dashboard in Design view. The Integrations section shows "Auto Approve Expense Report" version 1.0.0 as active. The Connections section lists "REST_TRIGGER_FOR_AUTO_APPROVAL" as a configured REST trigger. Search bar and navigation icons are visible at the top.

  4. Check that your integration is Active. If it's not active, activate it by clicking Actions Actions icon, and selecting Activate.
  5. Register the integration as a tool.
    1. Next to Auto Approve Expense Report, select Actions Actions icon, and select Create agentic AI tool.

    The Create Tool panel is displayed.

  6. Enter information for the tool.
    Field Description
    Name

    Required. Automatically populated from the integration name.

    Not sent to the Large Language Model (LLM).

    You cannot change the name after the tool has been created.

    Identifier

    Required. Automatically populated from the tool name.

    Uniquely identifies the tool in the project.

    Sent to the LLM as tool metadata. The AI agent uses this information to understand the purpose of the tool and when to use it.

    You cannot change the identifier after the tool has been created

    Description

    Required. Automatically populated from the integration description, if available.

    Sent to the LLM as part of the system prompt.

    The description helps the LLM decide when to use the tool. Add information to clearly describe what the tool does and when to use it. Clear descriptions help LLMs use tools correctly and reduce errors.

    Enter the following description:

    Automatically approves submitted expenses.
  7. Click Create.

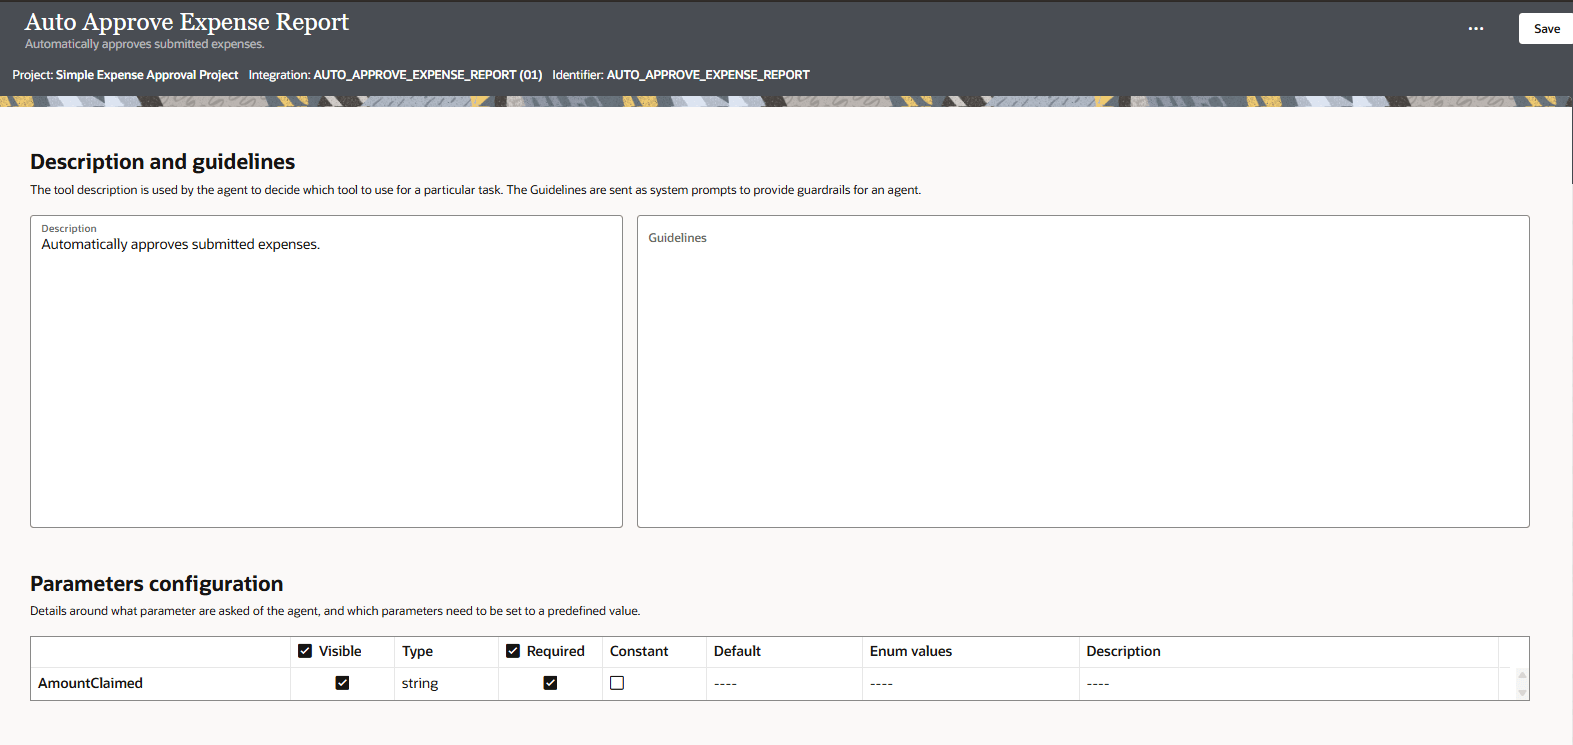
    The tool details page is displayed. The tool details page lists the tool description, guidelines, and input parameters. The tool description and guidelines are sent to the LLM. Guidelines are constraints to limit tool behavior and respect corporate policies. Guidelines influence the LLM decision process.

  8. Review tool parameters.

    When we take a look at the Parameters configuration, we see integration input parameters. The AmountClaimed parameter is listed and it is sent to the LLM because it's marked as Visible. We don't need to make any changes.

    If you were working with an integration that had many parameters, you could make visible to the LLM only parameters relevant to the tool.


    Auto Approve Expense Report tool details page showing a description that reads "Automatically approves submitted expenses." The guidelines section is empty. Below, the Parameters configuration table lists one parameter, "AmountClaimed," which is visible, required, and of type string. Other columns for constant, default, enum values, and description are empty.

  9. Click Save to save your changes.
  10. Click Back Back icon to return to the Project page.

    The integration can now be used in an AI agent.

Next step: Build the AI Agent.