Run and Test the AI Agent

Now that we have created the integration, registered the integration as a tool, added and configured the AI thinking pattern, created the agent and activated it, we can run and test the agent.

  1. In the navigation pane, select Projects.
  2. Select the project in which you created your AI agent. For this tutorial, select the Simple Expense Approval Project.
  3. In the left navigation pane, select AI Agents AI Agents icon.
  4. Run the agent.
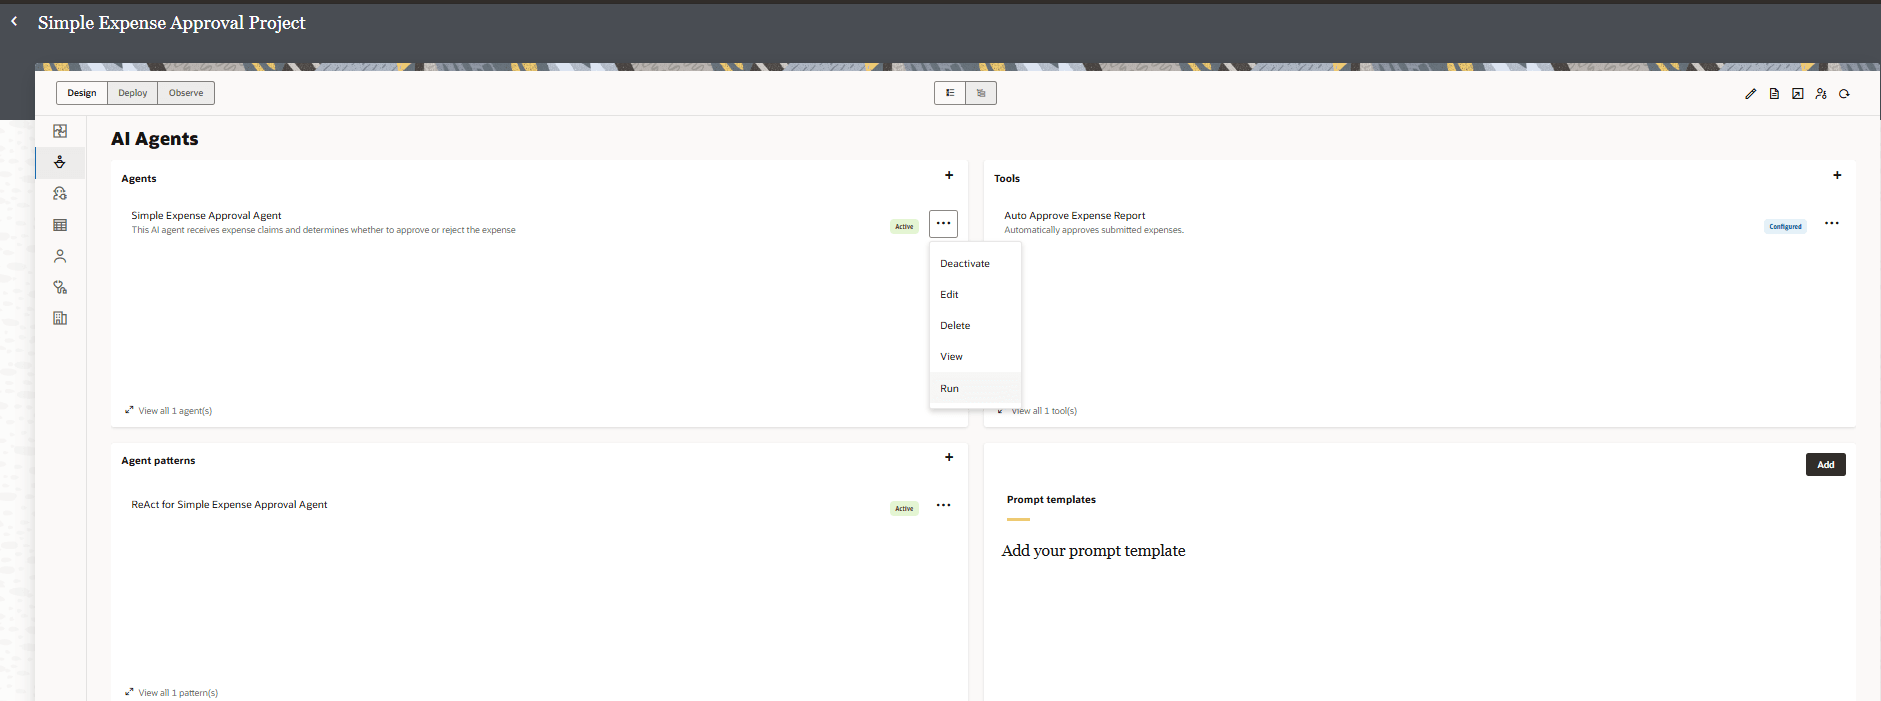
    1. In the Agents box, find the AI agent to run: Simple Expense Approval Agent.
    2. Click Actions Actions icon, and select Run.

      Simple Expense Approval Project screen showing AI Agents, Tools, Agent patterns, and Prompt templates panels. The "Simple Expense Approval Agent" is active, as is the "ReAct for Simple Expense Approval Agent" pattern. "Auto Approve Expense Report" appears under Tools as configured.

      The Test Agent page is displayed.

  5. Test the agent.
    1. In the Test Agent page, enter a natural language prompt to test the AI agent.

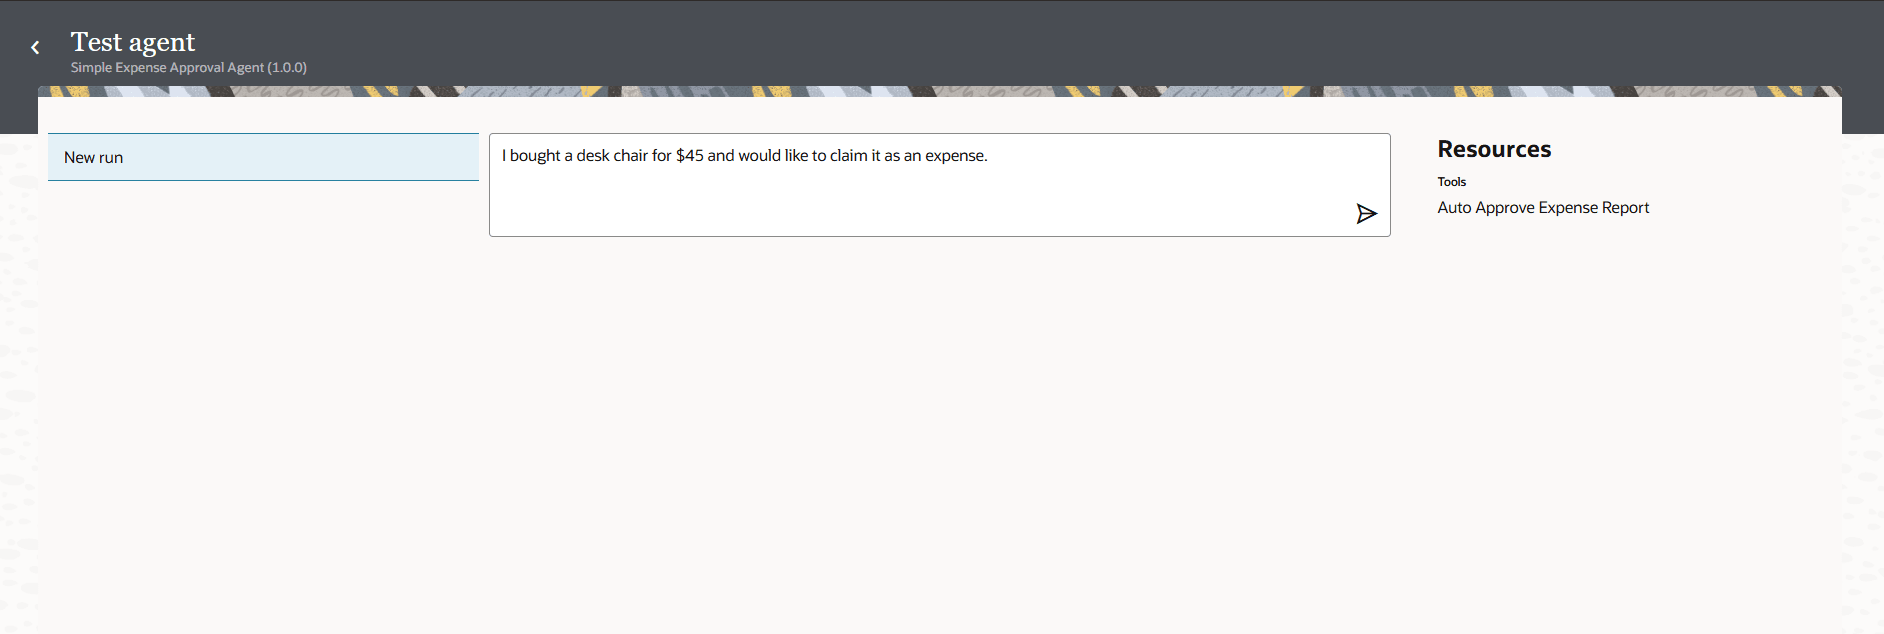
      Since our AI agent is an expense approval agent, enter an expense for less than $50 USD and click Send prompt to agent Send prompt to agent icon.

      For example:

      I bought a desk chair for $45 and would like to claim it as an expense.

      Test agent page for Simple Expense Approval Agent with new run. Prompt is "I bought a desk chair for $45 and would like to claim it as an expense". In the Resources section, the tool listed is Auto Approve Expense Report.

      The progress bar displays and then you see agent actions.

    2. Look at the agent actions.
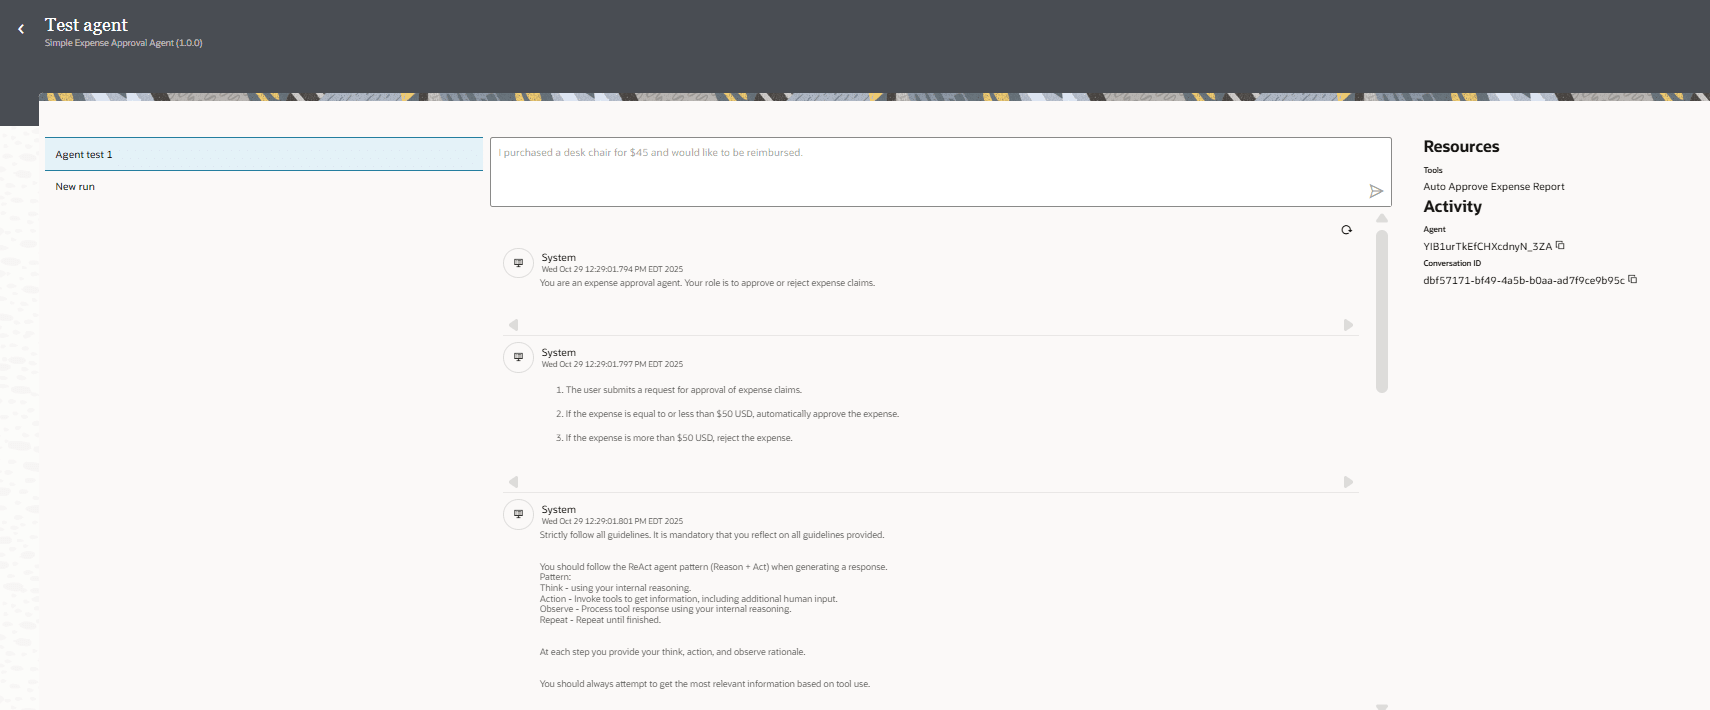
      • System: indicates what you sent to the LLM in the system prompt. This includes the agent role, the agent guidelines, the AI agent pattern guidelines.
      • User: user indicates what you entered to send to the LLM.
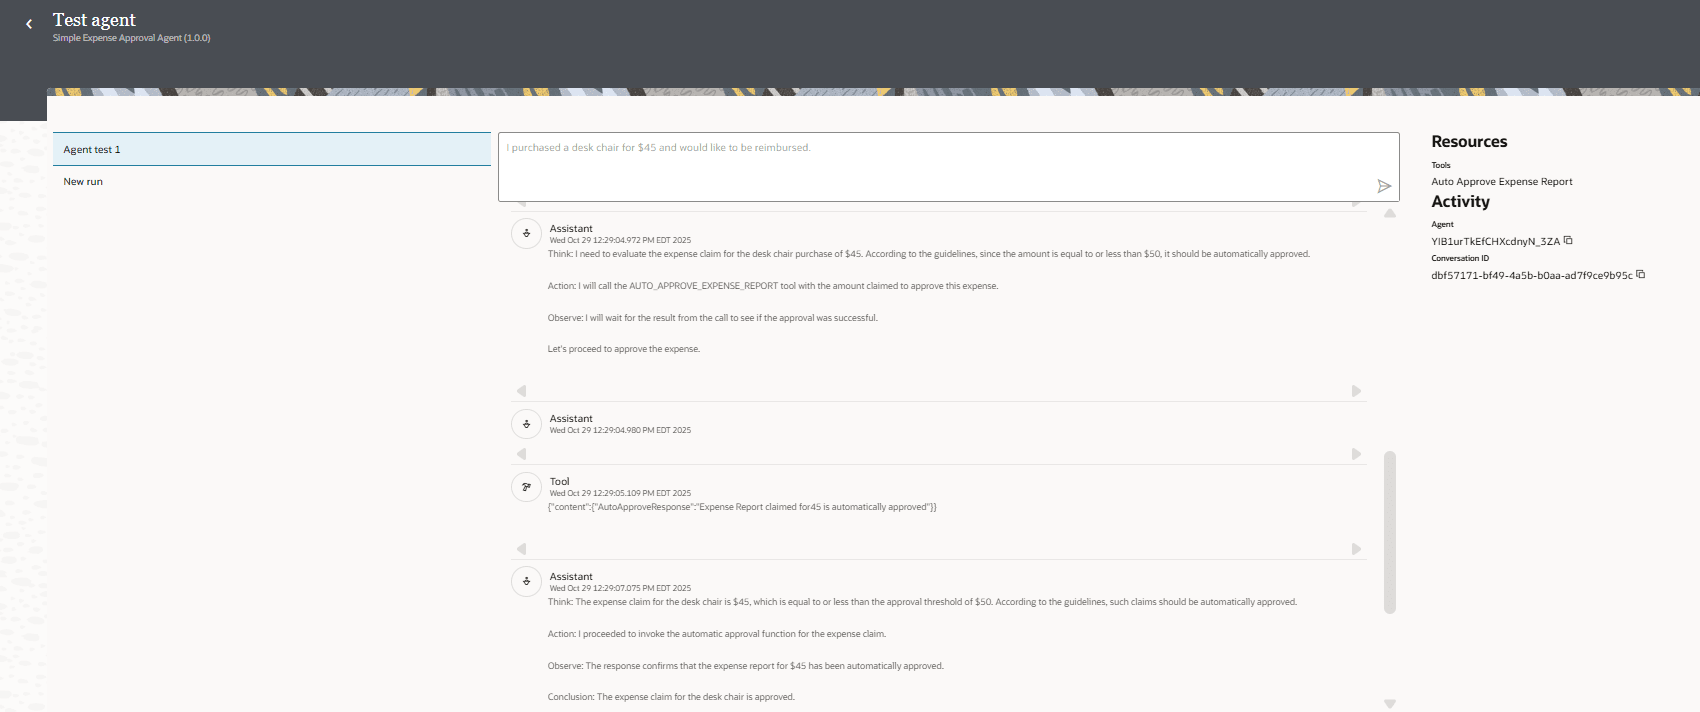
      • Tool: shows response from the tool. You should see that the expense report was automatically approved.
      • Assistant: shows the agent reasoning. You should see in the reasoning that the agent needs to use the AUTO_APPROVE_EXPENSE_REPORT_TOOL. It waits for the return from the tool and concludes that the expense is approved.

      System is what you sent to the LLM:


      Test agent page with agent run 1 selected. In the main area, a user input box contains the message: "I purchased a desk chair for $45 and would like to be reimbursed.", with a send icon beside it. Below it, there is a log of actions with User and Tool visible. To the right, you can see Resources: Tools Auto approve Expense Report, and Activity with agent instance ID and conversation ID.

      Tool is the response from the tool, and Assistant displays the conclusion that the response is approved.


      Test agent page with agent run 1 selected. In the main area, a user input box contains the message: "I purchased a desk chair for $45 and would like to be reimbursed.", with a send icon beside it. Below it, there is a log of actions with Assistant and Tool visible. To the right, you can see Resources: Tools Auto approve Expense Report, and Activity with agent instance ID and conversation ID.

      If for some reason you don't see the conclusion, it could be there's an error in the run. Go to the next step to look at the agent run.

  6. Look at the agent run to see the integrations that ran and find any errors.
    1. From the Test Agent page, click Back Back icon to return to the AI Agents page.
    2. Select Observe.
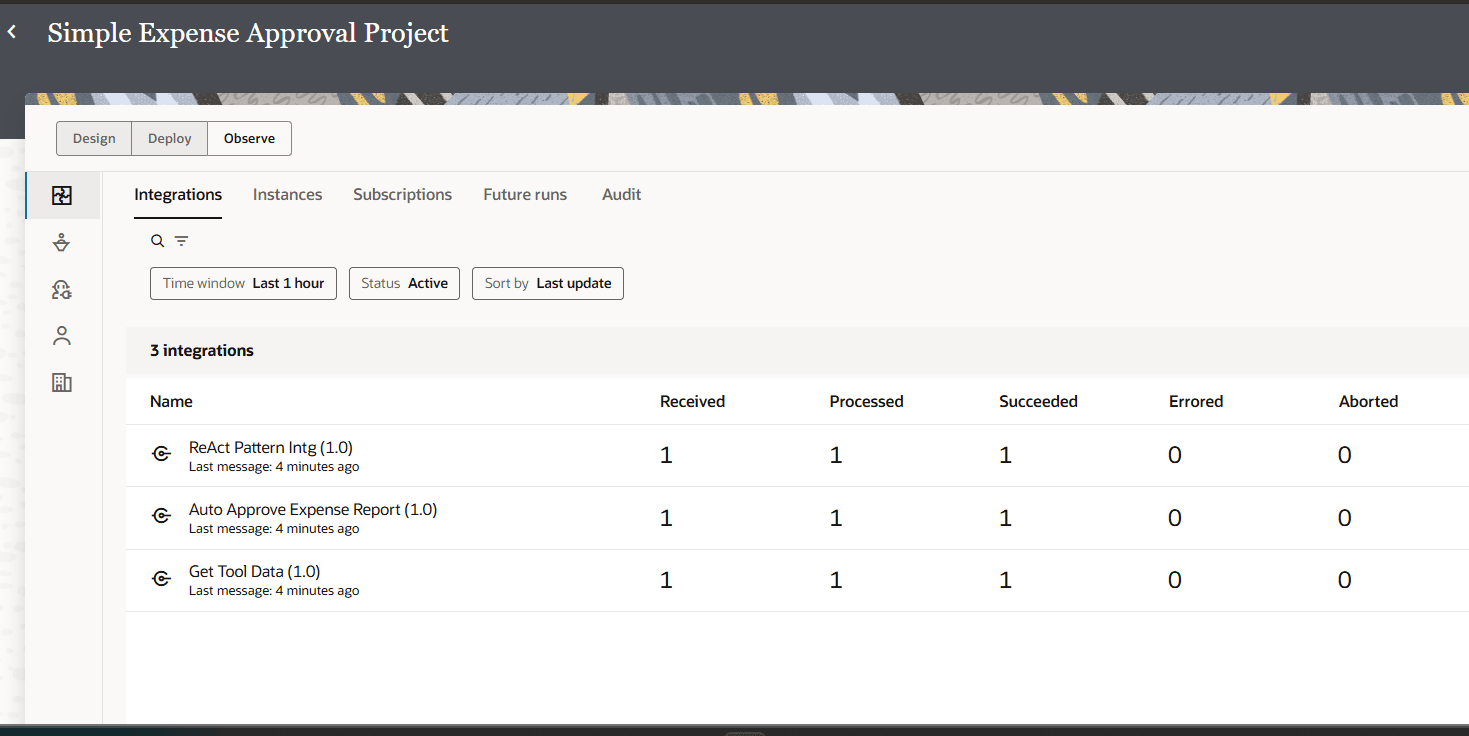
    3. In Integrations, check the integrations that ran.

      The Auto Approve Expense Report integration is there, as well as the system-generated integrations ReAct Pattern Intg and Get Tool Data Intg.

      Check that all integrations were processed and have succeeded.

      You should see something like this:


      Observe tab of the Simple Expense Approval Project, Integrations. The Integrations tab displays statistics for three integrations: ReAct Pattern Intg, Get Tool Data, and Auto Approve Expense Report, each with columns for received, processed, succeeded, errored, and aborted messages. All have a 1 under Received, Processed, and Succeeded.

      If there are any errors, you'll see them under the Errored column.

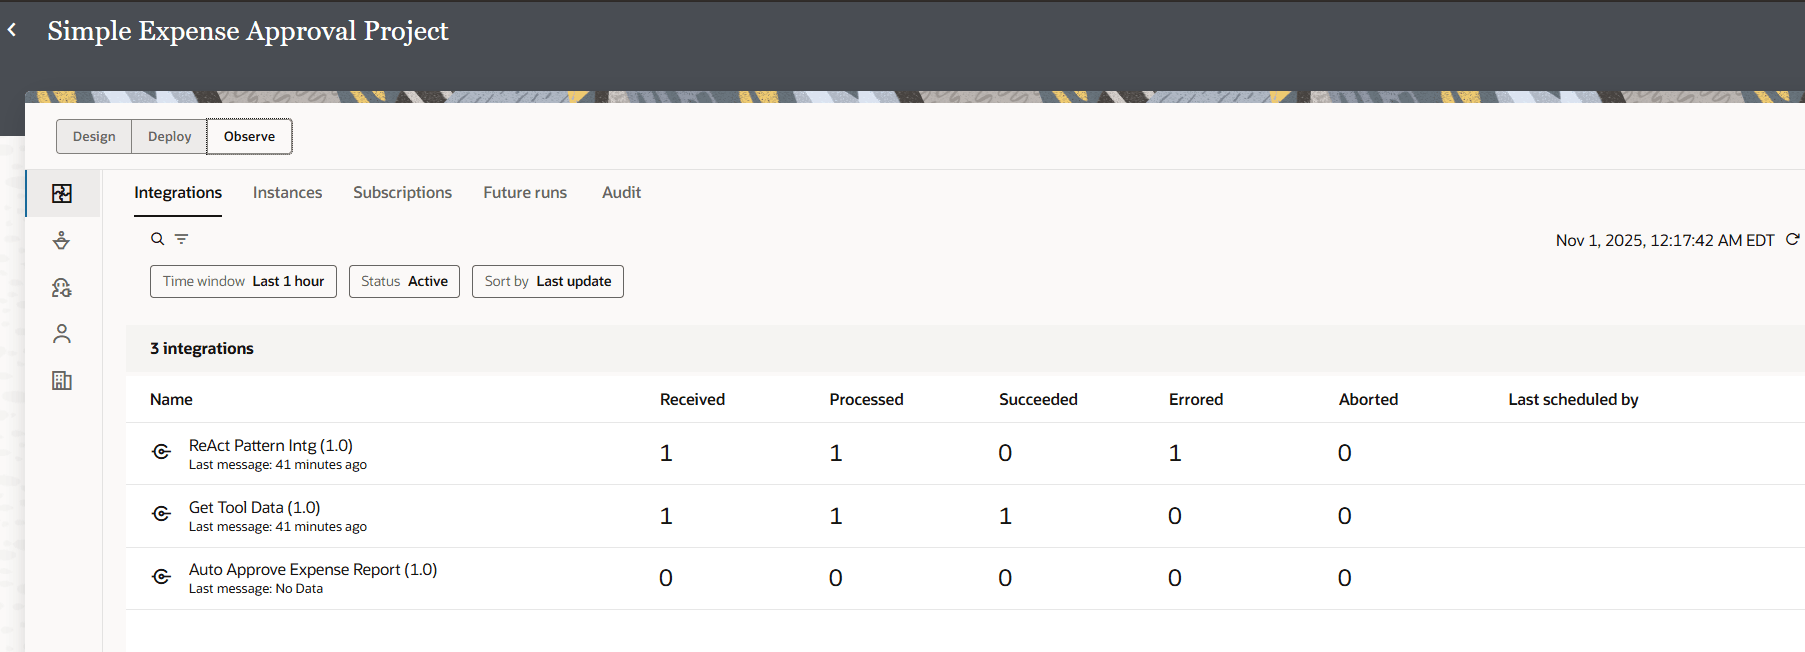
      In the example below, there was an error in the system-generated ReAct pattern integration.


      Observe tab of the Simple Expense Approval Project, Integrations. The Integrations tab displays statistics for three integrations: ReAct Pattern Intg, Get Tool Data, and Auto Approve Expense Report, each with columns for received, processed, succeeded, errored, and aborted messages. ReAct Pattern Intg has a 1 under Errored.

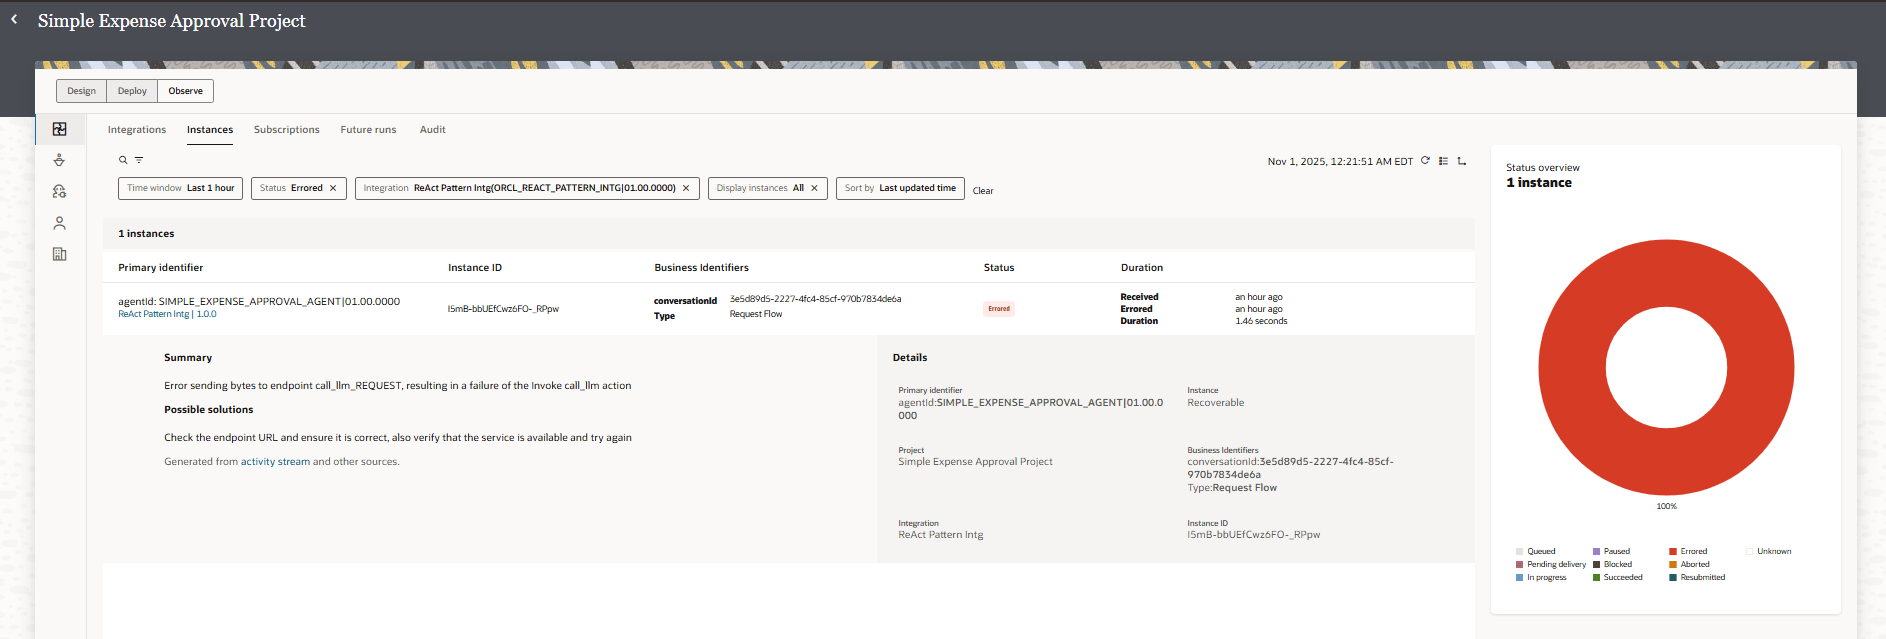
      Click the number in Errored to display the Instances tab to see what the error might be.

      In the Instances tab, select View Details to get a description of the error. In this case, the LLM connection is not properly configured. To fix the error, we would check the LLM configuration in the AI agent pattern.


      Simple Expense Approval Project "Observe" tab with "Instances" selected. Filters are set to the last 1 hour, status "Errored," and integration "ReAct Pattern Intg (1.0.0)." One instance is displayed, showing an error due to a failed endpoint call.

  7. Test the agent again, now with a purchase over $50.
    1. Select Design.
    2. In the left navigation pane, select AI Agents AI Agents icon.
    3. In the Agents box, find the AI agent to run: Simple Expense Approval Agent.
    4. Click Actions Actions icon, and select Run.
    5. Click New run to test the agent again.
    6. Enter a natural language prompt with more than $50 and click Send prompt to agent Send prompt to agent icon.

      For example:

      I bought a desk for $200.

      The progress bar displays and then you see agent actions.

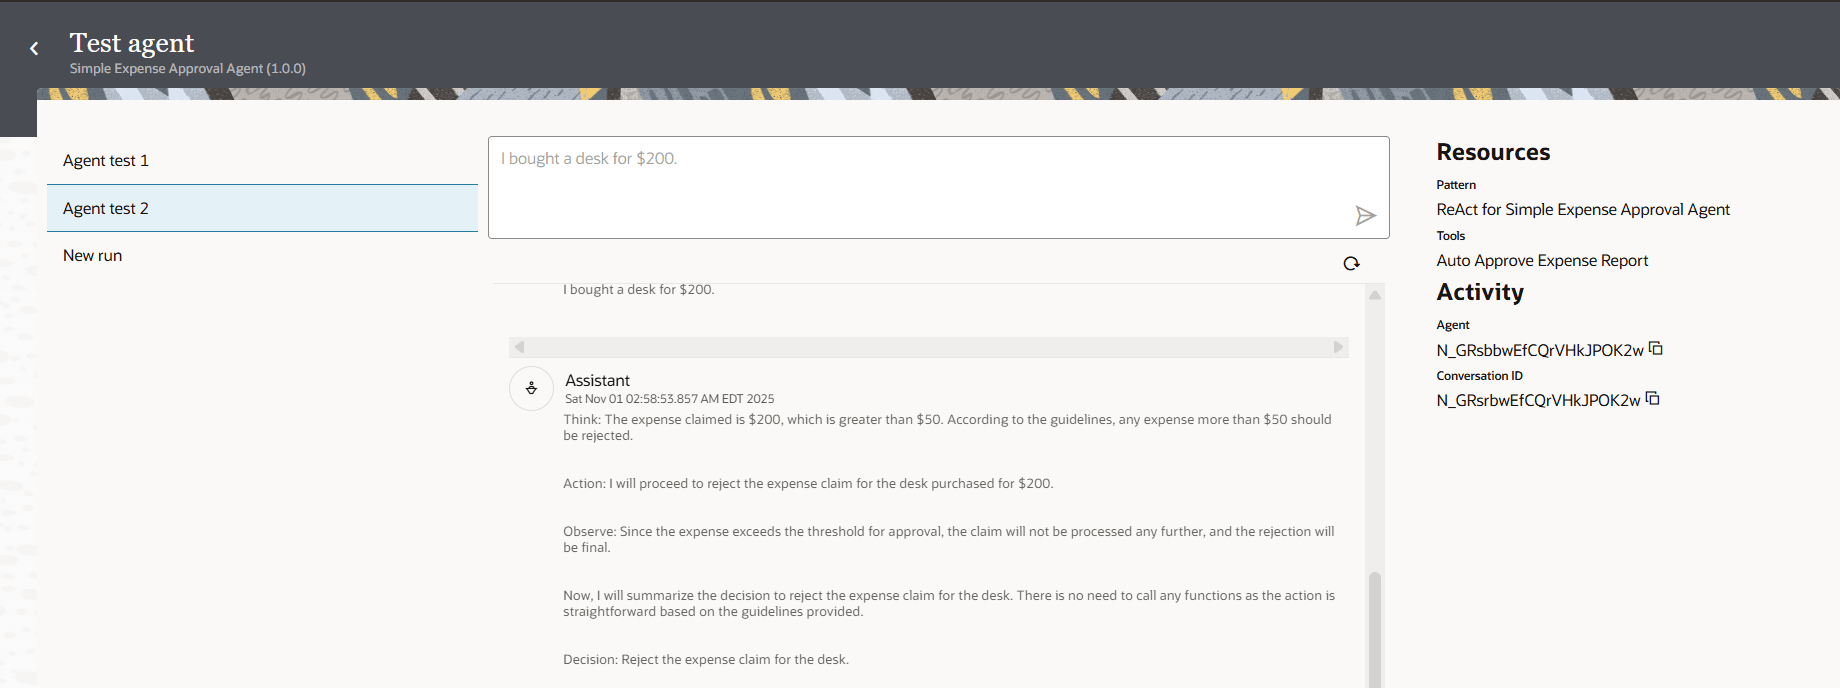
    7. Look at the agent actions. The agent should reason and reject the expense claim.

      You should see something like this:


      Test agent page with agent run 2 selected. In the main area, a user input box contains the message: "I bought a desk for $200.", with a send icon beside it. Below it, there is a log of actions with Assistant and Tool visible. To the right, you can see Resources: Tools Auto approve Expense Report, and Activity with agent instance ID and conversation ID.

Congratulations!

You've created and run your first AI agent. You learned what's required for an integration to become an agentic AI tool, how to create an agentic AI tool, how to create an AI agent pattern, and how to create and test an AI agent.