Add and Configure the AI Agent

We now have all that we need to create the Simple Expense Approval agent. We created an integration and registered it as a tool, configured the ReAct agentic AI pattern, and configured the LLM.

Prerequisites:
  1. In the navigation pane, select Projects.
  2. Select the project in which to create your AI agent. For this tutorial, select the Simple Expense Approval project.
  3. In the left navigation pane, select AI Agents AI Agents icon.
  4. In the AI Agents box, click Add .

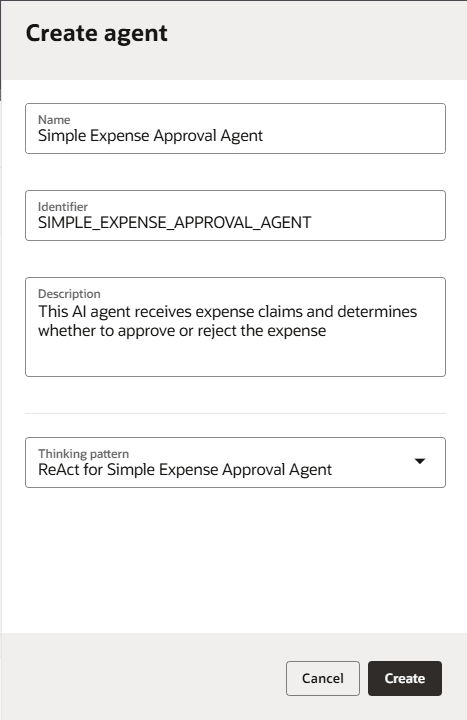
    The Create agent panel is displayed.

  5. Configure required fields for your agent:

    Create agent paenl with fields populated for name ("Simple Expense Approval Agent"), identifier ("SIMPLE_EXPENSE_APPROVAL_AGENT"), description ("This AI agent receives expense claims and determines whether to approve or reject the expense"), and thinking pattern ("ReAct for Simple Expense Approval Agent" selected). Cancel and Create buttons are at the bottom.

    • Name: Name for your AI agent. Provide a descriptive name so that you know what your agent is about. For our tutorial, enter the name Simple Expense Approval Agent.
    • Identifier: Oracle Integration generates this value using the Name value.
    • Description: Provide additional information about the AI agent. This is for information purposes only. For this tutorial, specify "This AI agent receives expense claims and determines whether to approve or reject the expense".
    • Thinking pattern: Select the thinking pattern you created ReAct for Simple Expense Approval Agent. You must have activated the thinking pattern before you can use it in your agent.
  6. Click Create.
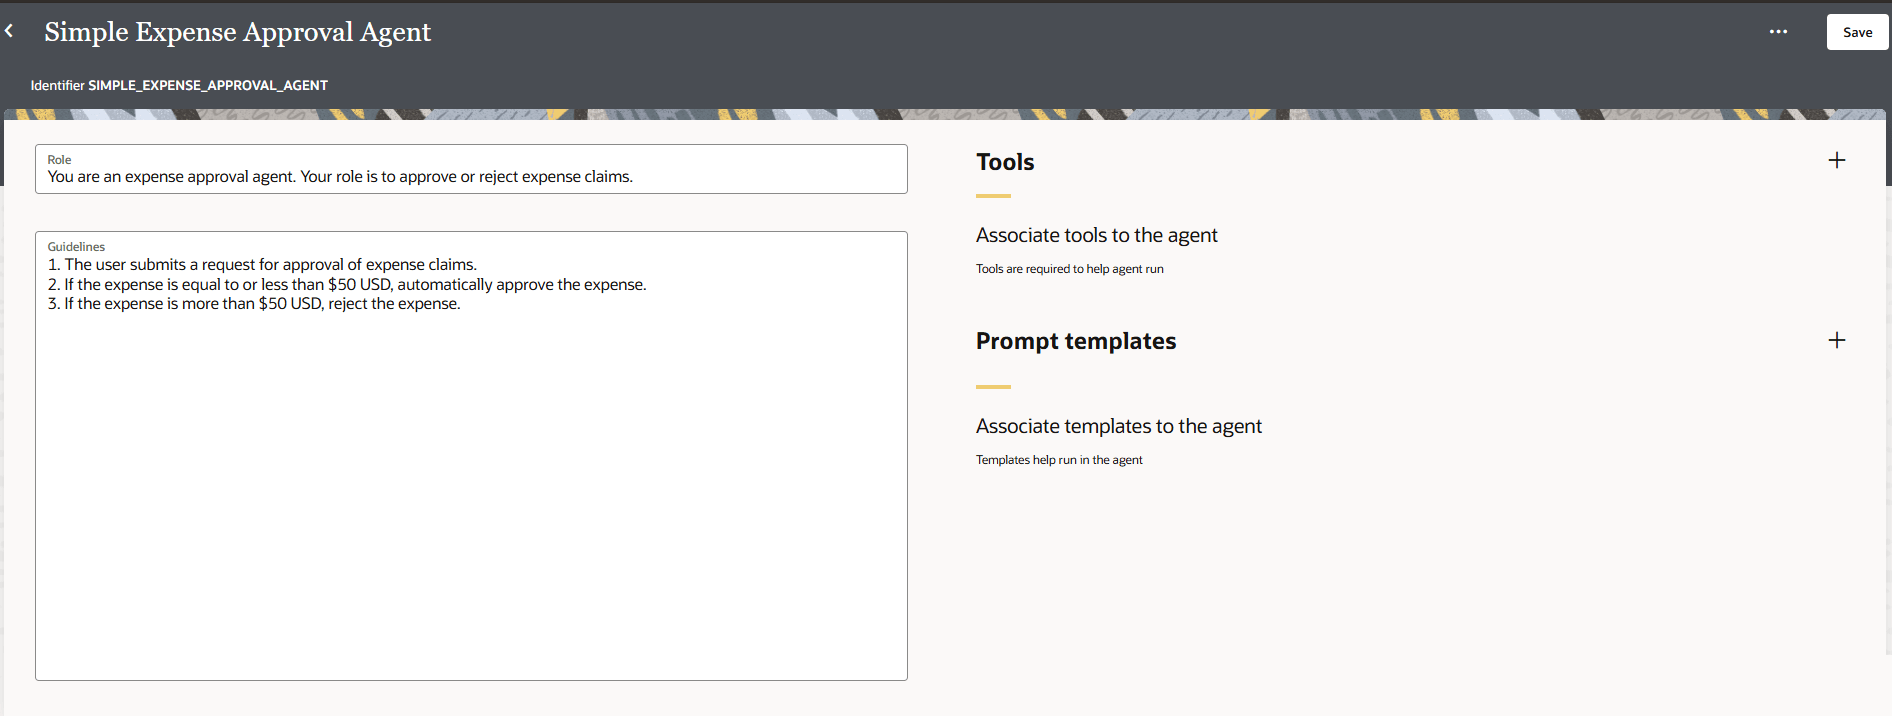
    The Agent details page is displayed.
  7. Configure your agent role and guidelines and click Save.

    Agent configuration screen. The role field states "You are an expense approval agent. Your role is to approve or reject expense claims." Guidelines list three steps for approving expenses based on amount. The right side has sections to associate tools and prompt templates to the agent. Save button is in the top right corner.

    The agent role and guidelines are very important. These fields are sent to the Large Language Model (LLM) and affect agent behavior.

    • Role:

      Sent to the LLM as part of the system prompt.

      Specify a clear role for your agent so that the LLM knows the purpose of your agent. For our tutorial, enter:
      You are an expense approval agent. Your role is to approve or reject expense claims. 
    • Guidelines:

      Sent to the LLM as part of the system prompt.

      Guidelines are important because they define the behavior of the agent. Guidelines influence the LLM decision process. Be clear and specific, and outline the steps you want the AI agent to take. For the tutorial, enter:
      1. The user submits a request for approval of expense claims.
      2. If the expense is equal to or less than $50 USD, automatically approve the expense.
      3. If the expense is more than $50 USD, reject the expense. 
  8. In Tools, provide tools for the AI agent.

    Tools are integrations that have been registered as agentic AI tools and provide external connectivity for the AI agent.

    You already created the tool when you registered the integration as a tool in Register the Integration as an Agentic AI Tool.

    1. Click + to add tools that you previously created.
    2. Select the Auto Approve Expense Report integration.
    3. Click Add.

      Your AI agent is now aware of the tools it has to complete its goal.


      Simple Expense Approval Agent page displaying the agent's role as approving or rejecting expense claims. Guidelines explain approval for expenses $50 or less and rejection for more than $50. On the right, the associated tool

  9. Click Save.
    Your agent is now ready to run.
  10. Click Back Back icon to return to the AI Agents page.
  11. Activate the AI agent.
    1. In the Agents box, find the agent to activate. For the tutorial: Simple Expense Approval Agent.
    2. Click Actions Actions icon, and select Activate.