Receive Requests for Multiple Resources in a Single REST Adapter Trigger with a Pick Action

You can expose multiple entry points to a single integration that uses the REST Adapter as the trigger connection. Each entry point can be configured with a different resource URI and HTTP action/verb, when necessary. This feature eliminates the need to create multiple integrations (each with a separate resource URI and verb) to perform different operations.

This feature is useful in the following scenarios:

  • Supports multiple resource URIs and actions/verbs in a specific integration through the REST Adapter.
  • Supports multiple integration patterns (for example, synchronous and asynchronous). The combination of a resource and a verb is called an operation. Each operation can be configured as a synchronous or an asynchronous one-way service. Asynchronous services accept the request and return immediately with an HTTP 202 status.

Note:

This feature is only available when creating an application integration.

  1. Drag a REST Adapter into the canvas as a trigger connection of an application integration.
    This invokes the Adapter Endpoint Configuration Wizard.
  2. On the Basic Info page, specify the following:
    1. Enter a name and optional description.
    2. Select the Select to configure multiple resources or verbs (maximum 11) check box.
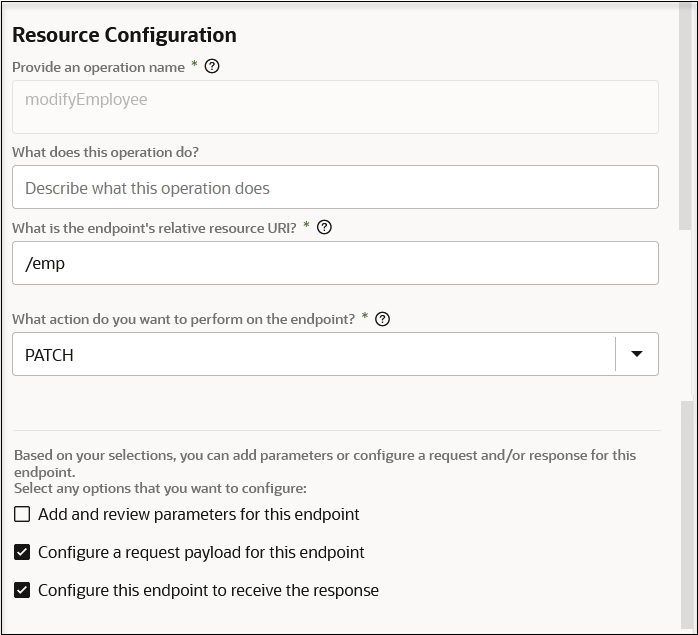
  3. On the Resource Configuration page, specify the operation name, the endpoint relative resource URI, and the action/verb to perform, then click Next.
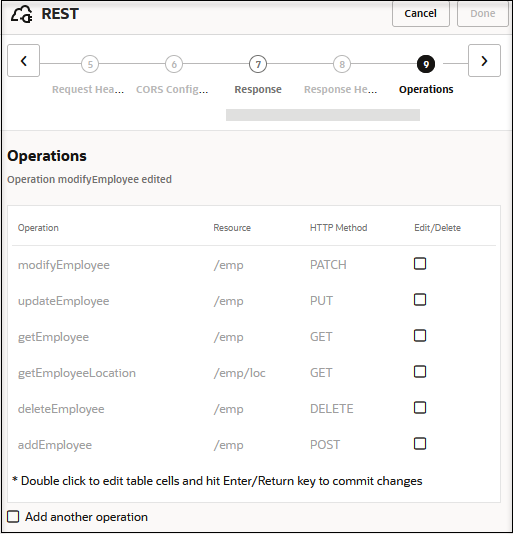
  4. On the Operations page, click Add another operation to add another resource URI and action/verb, then click Next.

    You are returned to the Resource Configuration page.

  5. On the Resource Configuration page, specify a different operation name, endpoint relative resource URI, and action/verb to perform, then click Next.
  6. Continue this process to add as many operations as necessary.
  7. On the Operations page, note that all operations are displayed. Each operation represents a different branch in a single integration.
  8. On the Summary page, review your selections, and click Done.
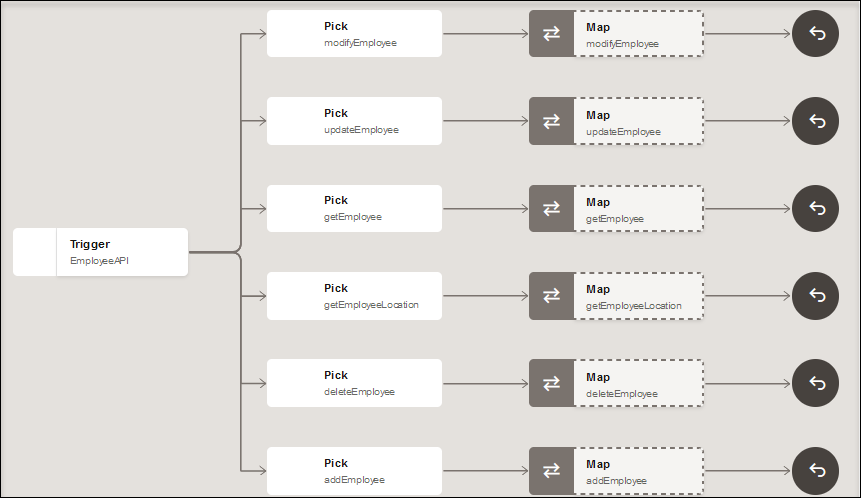
    For this example, there are six branches (modifyEmployee, updateEmployee, getEmployee, getEmployeeLocation, deleteEmployee, and addEmployee).
  9. Place your cursor over each branch to show details about the operation/resource name, action/verb, and resource URI.
  10. Further configure your integration by dragging appropriate actions after each operation name. You cannot add actions between the REST Adapter icon and the operation name.

    This image shows the REST Adapter trigger, and then six pick actions, each with its own operation. Each operation points to a mapper icon.

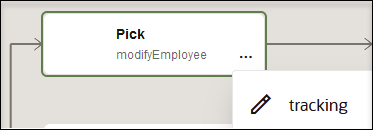
  11. Select Actions Actions icon, then tracking for the pick action operation name for which to define business identifier tracking variables.

    The actions menu of the pick action has been selected to show the tracking option.

  12. Set the tracking variables for each pick action operation branch. Tracking variables are populated per the operation. You must set primary tracking variable for all operations to activate the integration. If any branches are not configured with tracking variables, a red error icon is displayed on the node. Place your cursor over the error icon to show a detailed error message.
  13. Activate and invoke the integration to take the appropriate branch.
    Once activated, the adapter metadata page displays information corresponding to each of the configured resources and verbs.

    The swagger displays all the configured resources and the verbs for each such resource. Similar to swagger from a single resource REST trigger endpoint, you can use this swagger in another invoke connection to automatically discover and browse the resource implemented.

Note:

You can edit the action in the integration to remove or add operation branches. This enables you to convert to and from a standard trigger-based integration with a single operation to an integration with multiple operation branches.