Publish Events in an Integration
You can create an integration that publishes an event. Running the publishing integration enables subscribing integrations to subscribe to this event. This section provides an example of how to create a publishing integration.
You don't need to publish system events. You can subscribe to a system event at any time, without having to create or publish it.
- Decide where to start.
-
Work in a project (see why working with projects is preferred).
-
In the navigation pane, click Projects.
-
Select the project name.
-
Click Integrations
 .
.
-
In the Integrations section, click Add if no integrations currently exist or + if integrations already exist.
The Add integration panel opens.
-
Click Create.
-
-
Work outside a project.
-
In the navigation pane, click Design, then Integrations.
-
On the Integrations page, click Create.
The Create integration panel appears.
-
-
- Select the integration pattern to use.
Note:
Do not select Event as the integration pattern to publish the event. That pattern is for the integration that subscribes to the event. For this example, Application is selected to create an application integration. - Add a trigger connection to the integration. For this example,
a REST Adapter is selected and
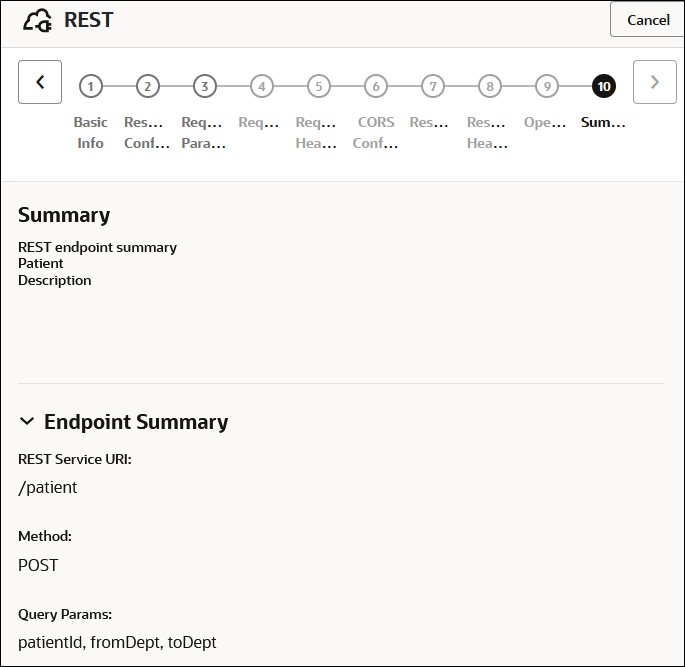
configured with the following details shown on the Summary
page of the Adapter Endpoint Configuration Wizard:
- Endpoints relative resource URI: /patient
- Action to perform on the endpoint: POST
- Query parameters specified: patientId, fromDept, and toDept (these are the parameters defined in the event file)

- Drag a Publish event action into the
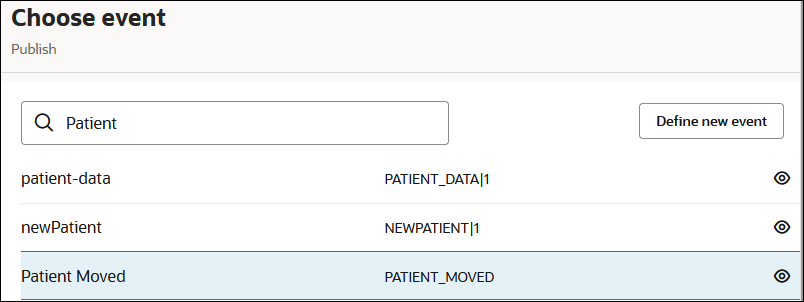
integration canvas. See Publish Events in an Integration with a Publish Event Action.The Choose event panel opens.
- Select the event to publish, and click
Choose. For this example,
Patient Moved is selected.
You can also create a new event from this panel by selecting
Define new event.

The contents of the event are visible under the View details
 icon:
icon:
{ "patientId": "value1", "fromDept": "value1", "toDept": "value1" } - Click Choose, then click Finish.
- Open the Map action that is automatically added above the Publish event action.
- Map the source elements to the target elements. For this
example, the three query parameters specified in the REST Adapter are mapped to the
JSON event: Patient Id,
From Dept, and To
Dept.

- Save and activate the integration.You are now ready to create the integration that subscribes to this event.