Route Expressions with Switch Action Branches
You can define switch action branches to add routing expressions in your integration. The switch action takes the first branch that evaluates to true. The other branches are ignored. A switch is essentially single-threaded.
-
Add a switch action to an integration in either of the following ways:
- On the right side of the canvas, click
Actions
 and drag the Switch action to the
appropriate location.
- Click
 at the location where you want to add the switch action, then
select Switch.
Note:
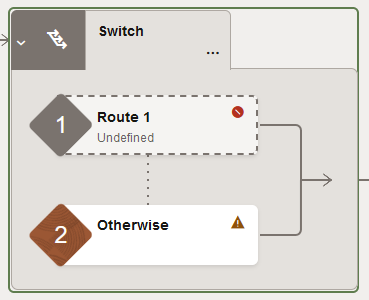
Nested switches are supported.Two branches are automatically created:

-
Route 1 (first) branch: You must define a routing expression for this branch.
-
Otherwise (second) branch: This branch is taken if the routing expression for the initial branch does not resolve to true.
Note:
To add more branches, click Actions in the switch action, then Add.
- On the right side of the canvas, click
Actions
-
From the Route 1 branch icon, double-click the branch or click Actions
 , then Edit.
The Configure Route panel opens. This includes a Sources tree of elements.
You can now define different data flows for both the defined and otherwise branches in the switch action.
-
Click Edit
 under Configure Route to enter a name for
the Route 1 branch.
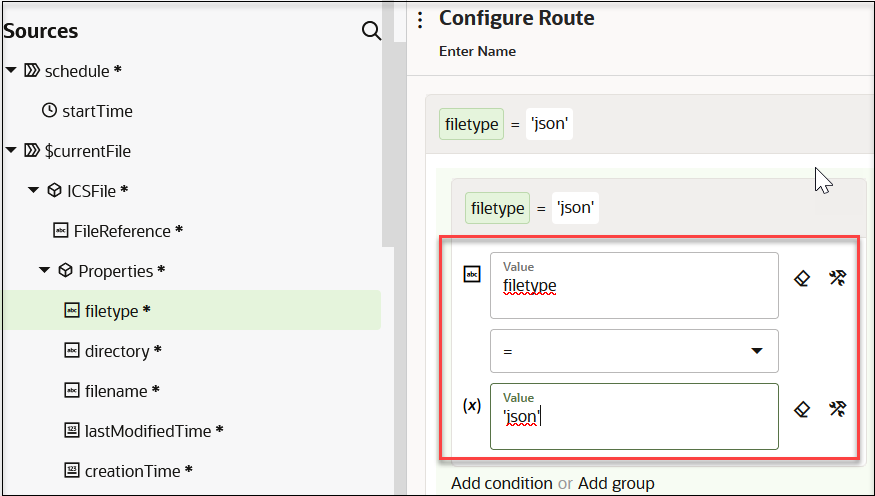
- Define a routing expression. For this example:
- filetype is dragged to the upper Value field
- = is selected as the operator
'json'is manually entered in the lower Value field. You can also drag a value from the Sources tree or select a value from the drop-down list.

You can add functions to your expression under the Functions tab. XPath version 2.0 functions are supported. Base 64 encode and decode functions that process data confidentially across layers and functions that return boolean results are also supported. Functions that return nonboolean values are not supported.
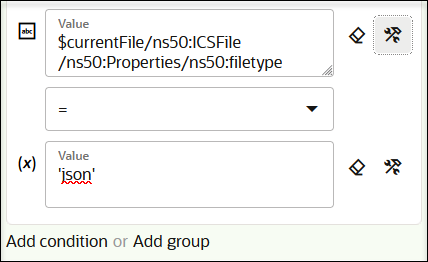
- Click Switch to Developer Mode
 to view the complete path name.

- Click Add condition to add more conditions or Add group to add group conditions, when needed.
- Click Save.
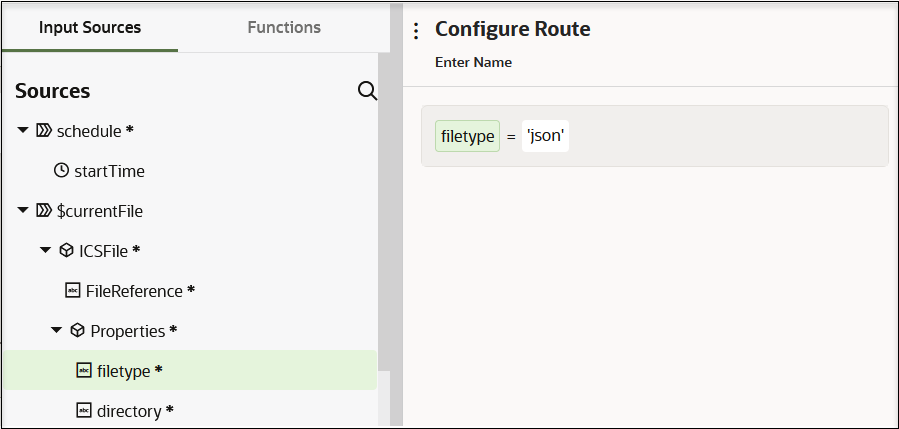
For this example, the following expression is defined:

- Drag other actions and invokes into the branches of the switch action, when
required by your integration. For this example, two switch action branches are
defined.

- Invoke an Endpoint Dynamically in Using the Oracle ERP Cloud Adapter with Oracle Integration 3
- Design an Asynchronous Search Operation with Pagination in Using the Oracle NetSuite Adapter with Oracle Integration 3
- Use the Extract API in a Schedule Integration in Using the SAP Concur Adapter with Oracle Integration 3
- Use the Pagination Concept in an Integration in Using the Jira Adapter with Oracle Integration 3