Import Data Files Using the Bulk Data Import Operation

This use case describes how to import data files from an FTP server into the Netezza database. Similarly, you can import data files from an application into the Netezza database using the Netezza Adapter.

To perform this operation, you create the FTP Adapter and Netezza Adapter connections in Oracle Integration. The Netezza Adapter first validates an input file header with the target table header (columns), places file data into a mount location (local to the database), and inserts the mount location data into the target table if the data is in the expected format.
  1. Create a schedule integration.
  2. Drag an FTP Adapter into the integration canvas.
  3. Configure the FTP Adapter as follows.
    1. On the Basic Info page, provide a name.
    2. On the Operations page, select Download File from the Select Operation list.
    3. Select Binary from the Select a Transfer Mode list.
    4. Provide the input directory, file name, and download directory.
    5. On the Summary page, review your selections.
  4. Drag a Netezza Adapter into the integration canvas.
  5. Configure the Netezza Adapter endpoint:
    1. On the Basic info page, provide an endpoint name, and select Perform Bulk Data Import Operation.
    2. On the Bulk Load from File to Table page, enter the mount location, and select the delimiter (for example, comma), schema, table, and table columns.
    3. On the Summary page, review your selections.
  6. In the mapper, map the file reference from the FTP response to pass the data to the target table. The FTP response (file reference) provides an input to the Netezza database.
  7. Click Validate.
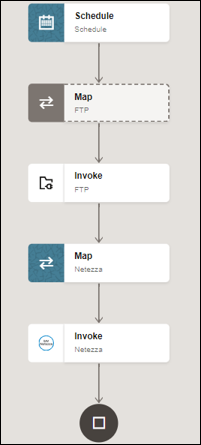
    The completed integration looks as follows.


    The schedule, map, invoke (FTP), map, and invoke (Netezza) icons are shown.

  8. When complete, save and activate the integration. As a result, the Netezza Adapter inserts the mount location data into the target table if the data is in the expected format.