Updating JSON Content Dynamically for Trigger Request and Invoke Response Connection Payloads

You can enable support for dynamic JSON content in the Adapter Endpoint Configuration Wizard. This capability is useful when runtime payloads need to include JSON elements that are not defined in the design-time payload. Although these elements are not present at design time, they are made available to the integration and translated between JSON and XML at runtime.

Design-time trigger request and invoke response payload structures can change frequently. If a payload element is missing from the mapper, it is not translated between JSON and XML. Dynamic JSON enables you to include simple or complex object elements at runtime, ensuring they are translated without requiring design-time updates. This capability eliminates the need to frequently rerun the Adapter Endpoint Configuration Wizard to accommodate payload structure changes to the REST Adapter.

This example provides a high level overview of creating and running an integration that enables dynamic JSON content for REST Adapter trigger requests and invoke responses.

  1. Configure REST Adapter trigger and invoke connections.
  2. Create an application integration.
  3. Drag the REST Adapter trigger connection into the integration and configure it as follows:
    1. On the Resource Configure page, enter a relative resource URI, select POST as the action, and select the following options:
      • Configure a request payload for this endpoint
      • Configure this endpoint to receive the response
    2. On the Request page, select JSON Sample as the payload format, enter a JSON sample payload, and select the Allow Dynamic Json check box. For this example:
      {
        "val1" : "v1"
      }
    3. On the Response page, select JSON as the media type of the response body and enter a JSON sample payload. For this example:
      {
        "test1" : "t1",
        "test2" : 2.0,
        "test3" : 3,
        "val1" : "val1",
        "val2" : true
      }
  4. In the mapper, map the source val1 to target val1 elements that appear in the design-time payloads.
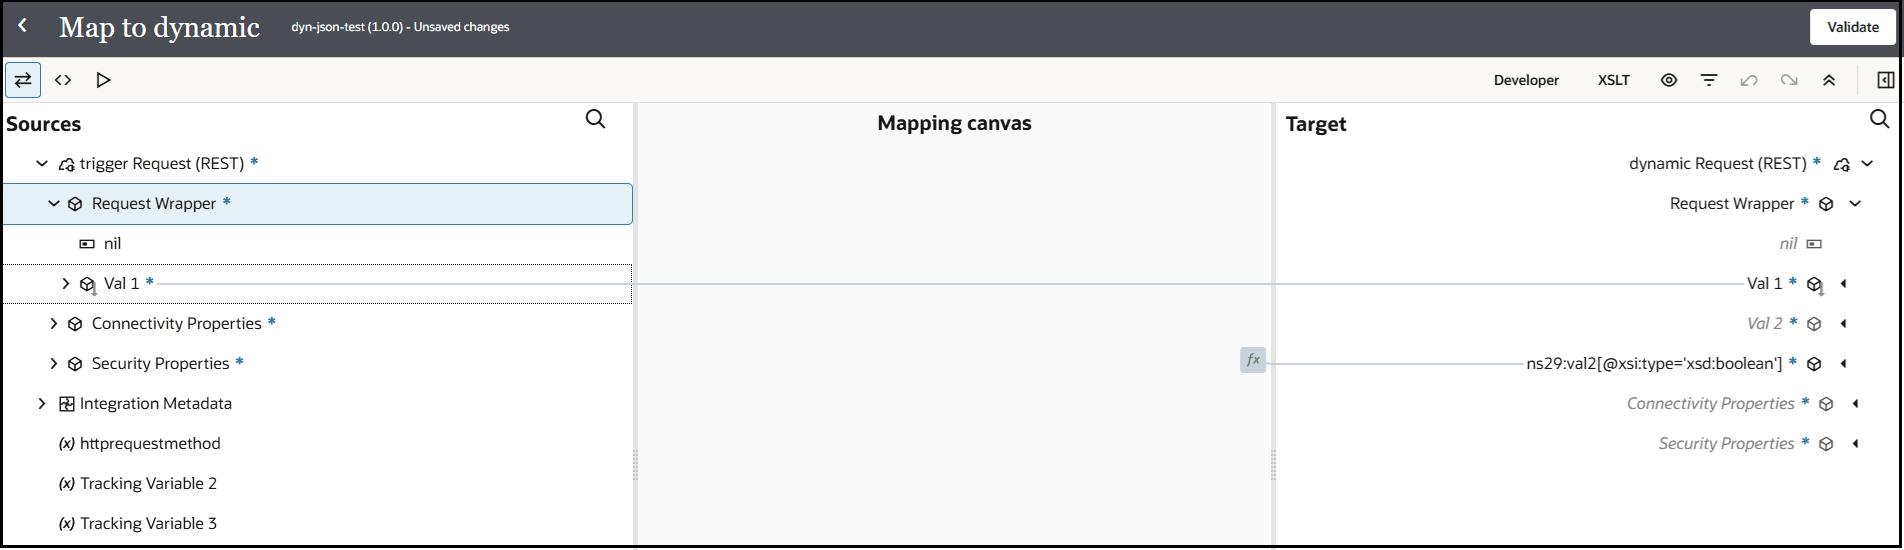
    The Sources, Mapping canvas, and Target sections of the mapper are shown. The source val1 to target val1 elements are mapped.

  5. Click code editor Mapper code icon to enter the code editor of the mapper.
  6. Directly add syntax for a dynamic JSON element (for this example, val2). The code editor enables you to add dynamic JSON elements for use at runtime. These elements cannot be mapped as elements in the mapper because they do not exist in the JSON schema payload you selected during REST Adapter trigger connection configuration in the Adapter Endpoint Configuration Wizard. However, they are translated between JSON and XML at runtime.
    <xsl:template match="/" xml:id="id_11">
                  <nstrgmpr:execute xml:id="id_12">
                        <ns29:request-wrapper>
                              <ns29:val1>
                                    <xsl:value-of select="/nssrcmpr:execute/ns22:request-wrapper/ns22:val1"/>
                              </ns29:val1>
                              <ns29:val2 xsi:type="xsd:boolean">
                                    <xsl:value-of select="/nssrcmpr:execute/ns22:request-wrapper/*[local-name()='val2' and namespace-uri()='']"/>
                              </ns29:val2>
                        </ns29:request-wrapper>
                  </nstrgmpr:execute>
            </xsl:template>
  7. Drag the REST Adapter invoke connection into the integration and configure it as follows:
    1. On the Resource Configure page, enter a relative resource URI, select POST as the action, and select the following options:
      • Configure a request payload for this endpoint
      • Configure this endpoint to receive the response
    2. On the Request page, select JSON Sample as the payload format and enter the JSON sample payload. For this example:
      {
        "val1" : "v1",
        "val2" : true
      }
    3. On the Response page, select JSON as the media type of the response body, enter a JSON sample payload, and select the Allow Dynamic Json check box. For this example:
      {
        "test1" : "t1"
      }
  8. In the mapper, map the source elements to the target elements that appear in the design-time payloads.
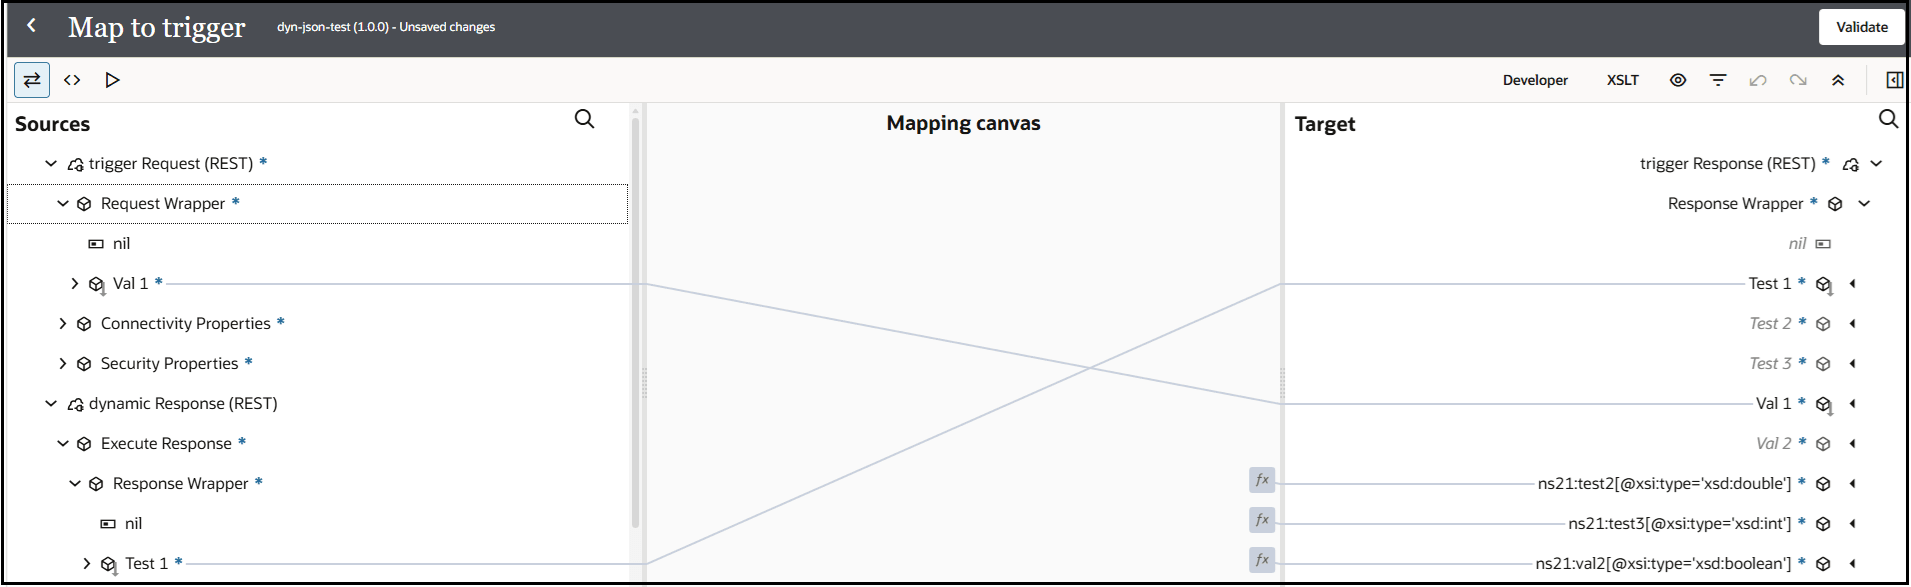
    The Sources, Mapping canvas, and Target sections of the mapper are shown. The Val1 and Test1 source elements are mapped to Val1 and Test1 target elements.

  9. Click the code editor Mapper code icon to enter the code editor of the mapper.
  10. Directly add syntax for the dynamic JSON elements (for this example, test2 and test3) for use at runtime. These elements are translated between JSON and XML at runtime.
    <xsl:template match="/" xml:id="id_11">
                  <nstrgmpr:executeResponse xml:id="id_12">
                        <ns21:response-wrapper xml:id="id_31">
                              <ns21:test1 xml:id="id_51">
                                    <xsl:value-of xml:id="id_52" select="$dynamic/nsmpr0:executeResponse/ns28:response-wrapper/ns28:test1"/>
                              </ns21:test1>
                              <ns21:test2 xsi:type="xsd:double">
                                    <xsl:value-of select="$dynamic/nsmpr0:executeResponse/ns28:response-wrapper/*[local-name()='test2' and namespace-uri()='']"/>
                              </ns21:test2>
                              <ns21:test3 xsi:type="xsd:int">
                                    <xsl:value-of select="$dynamic/nsmpr0:executeResponse/ns28:response-wrapper/*[local-name()='test3' and namespace-uri()='']"/>
                              </ns21:test3>
                              <ns21:val1>
                                    <xsl:value-of select="/nstrgmpr:execute/ns21:request-wrapper/ns21:val1"/>
                              </ns21:val1>
                              <ns21:val2 xsi:type="xsd:boolean">
                                    <xsl:value-of select="/nstrgmpr:execute/ns21:request-wrapper/*[local-name()='val2' and namespace-uri()='']"/>
                              </ns21:val2>
                        </ns21:response-wrapper>
                  </nstrgmpr:executeResponse>
            </xsl:template>
  11. Save the integration and define a business identifier.
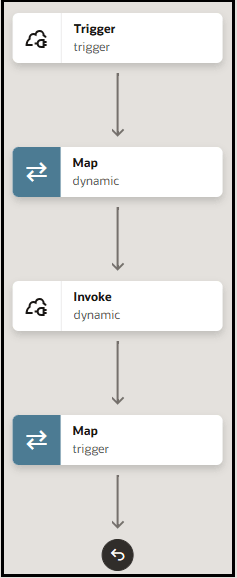
    The integration looks as follows:


    The integration shows a REST Adapter trigger, mapper, REST Adapter invoke, and mapper.

  12. Activate and run the integration from the Configure and run page.
  13. Review the activity stream. For example, the REST Adapter trigger connection shows the design-time payload with val1 that was added during configuration in the Adapter Endpoint Configuration Wizard. The data mapping shows that val1 and val2 (the element added in the code editor of the mapper) were processed and translated between JSON and XML.
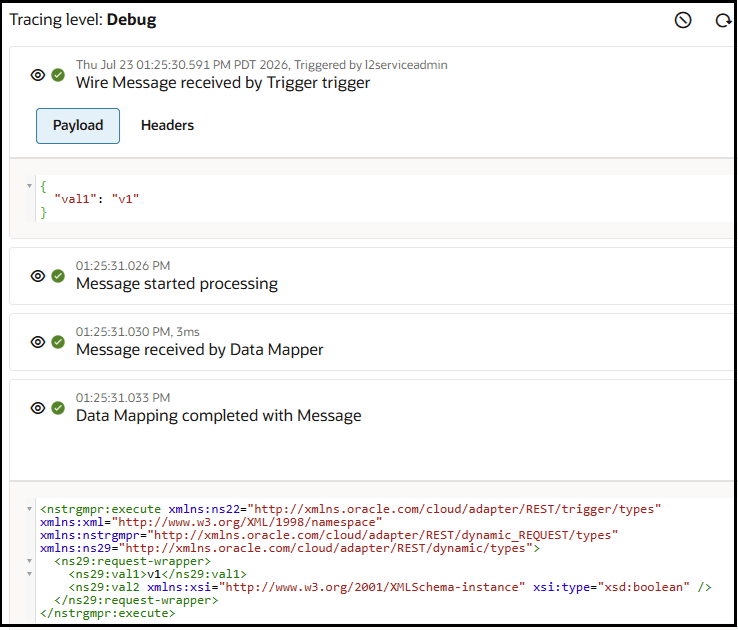
    The activity stream is shown. The tracing level is set to debug. The trigger payload that includes Val1 is shown. The data mapping content is shown. Val1 and Val2 are shown in the content.