Pre-General Availability: 2024-09-02

Add a Data Stitch Action

A data stitch lets you perform an action on the data that a robot collects. With a data stitch, you can move data across variables and output properties.

Unlike other robot actions, a data stitch doesn't allow a robot to interact with an application's user interface. Instead, it allows you to manipulate data. For example, you can build an array of data or a list structure by assigning and appending values for variables and output properties.

Note:

You must use the low-code capabilities to add this action to a robot. Keep reading for step-by-step instructions.

Use Case: Assigning a Value

The assign operation for a data stitch action assigns a new value to a variable.

For example, consider a robot that needs to provide the total value of an invoice. The robot uses the get text action to obtain two values: an invoice value and a tax value. The robot assigns the values to two variables.

Next, the robot must add these values to calculate the total value of the invoice. To add these values, create an expression and assign the total to an output variable. You perform both of these tasks in the data stitch action.

Use Case: Appending a Value

The append operation for a data stitch action preserves the existing value for a variable and appends a new value as a suffix. Use the append operation to build a collection as a response or output from a robot.

For example, consider a robot that updates a set of invoices. Use a foreach loop to update each invoice, one at a time. To provide the robot with the invoice numbers to update, define the input's trigger, which is a collection that holds arrays of values for each property.

After the foreach loop processes each invoice, the data stitch action inserts the invoice number into another variable.

For more details about this use case, see Use Case: Save Data After Iterating.

Add a Data Stitch Action Using the Low-Code Tools

  1. Open the robot to edit.
    1. In the navigation pane, select Projects.
    2. Select the project name.
    3. In the left toolbar, select Robot Robot.
    4. In the Robots box, select the robot to open.

      The canvas appears.

  2. Add the action to the robot.
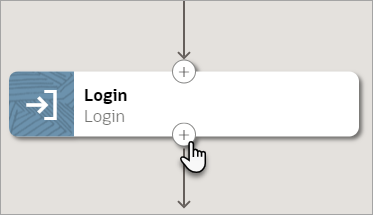
    1. On the canvas, point to an action, and click +.
      A mouse cursor points to an action in the canvas and hovers over the plus sign button, which appears at the bottom of the rectangle that represents the action. A plus sign button also appears at the top of the rectangle, for adding an action after the current action.

      A menu of available actions appears.

    2. Select Data Stitch.

      A data stitch action appears on the canvas, and the Data Stitch panel appears.

  3. In the panel, enter a Name and Description for the action.

    The Name appears on the action in the canvas and should help you and others understand the goal of the action.

  4. Specify how you need to manipulate data.
    1. Select Add assignment.

      The cursor appears in the Variable field, and the Variables panel appears.

    2. Drag a variable to the Variable field.

      The data stitch action assigns or appends a value to a variable. This variable receives the value.

    3. From the Operation drop-down, select one of the following options:
      • Assign: Select this option when the robot assigns a new value to the variable that you selected.

      • Append: Select this option when the robot preserves the existing value for a variable and appends a new value as a suffix.

    4. In the Value field, enter the value to assign or append to the variable that you selected for the Variable field.

      For example, you might drag a variable to the field, hard code a value, or compute a value using an expression.

  5. Add additional assignments to the data stitch as needed.

    To see a sample use case, see Use Case: Save Data After Iterating.

  6. Click OK.
  7. Above the canvas, select Save.