Add a Switch Action

You add a Switch action when you want to evaluate an expression and create an outcome with that value. An outcome of "default" is used when the expression does not evaluate to a usable string.

To add a Switch action to an action chain:
  1. Open the Actions editor, for example, at the page level.
  2. Create an action chain, or open an existing action chain to add the action in the editor.
  3. Drag Switch from the Logic section of the Actions palette into the action chain.

    You can drag the action onto the Add icon ( Add icon ) in the action chain, or between existing actions in the chain. The Properties pane opens when you add the action to the chain.

  4. Update the ID field in the Properties pane to make the action more easily identifiable.
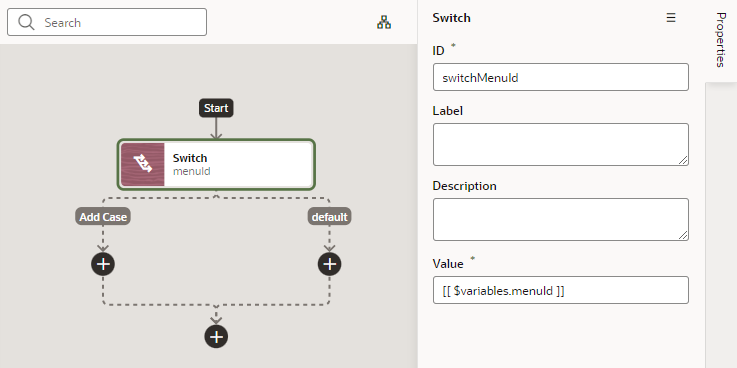
  5. In the Value property, enter a value that should be used as the outcome value. If this property is null or undefined, the outcome is "default".

    For example, when a menu defines a set of options, you can use the Switch action to perform actions for each menu item. In this case, you'd pass the menuId input parameter containing the selected menu item's ID in the Value property:
    Description of switch-action-add.png follows
    Description of the illustration switch-action-add.png

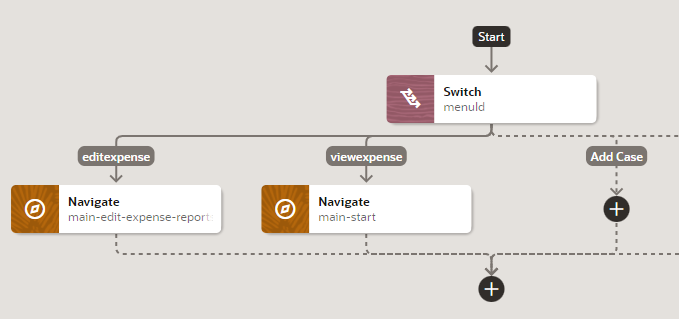
  6. Optional: You can add further actions for each case. For example, if you want to navigate to a particular page when the menu item is selected, you can add a Navigate action for each menu item.
    1. Click the Add icon ( Add icon) under Add Case.
    2. In the Add Case dialog, enter the case value to be used as the outcome. In our menu example, you would specify the ID of each menu item. Again, if this property is null or undefined, the outcome is "default".