Set Conditions for a Rule

You determine when a rule is applied by defining a condition. For example, you might create a rule that is applied only when the user is in Canada and has the Manager role.

There are two ways to define the rule's conditions. The first way is to use the basic condition builder to create conditions by selecting criteria and values. This way should be enough to define most conditions. However, if you need to create more complex conditions, and you are comfortable working with expressions, you can click Use Advanced Expression to open the visual expression editor. For more about using the expression editor, see Build Advanced Expressions.

Rules define overrides that are applied to properties only when the rule's conditions are satisfied at runtime. For conditions that use criteria in the User context, like User Authenticated ($user.isAuthenticated) or Roles ($user.roles), the condition is met if the logged-in user satisfies the condition.

Note:

When using the Roles criterion ($user.role) in a condition, the Value drop-down lists the available Oracle Applications Cloud job and abstract roles. (The drop-down will not list any duty roles. If you want to specify a duty role, you can manually type the duty role name in the Value field.)

To create a condition for a rule:

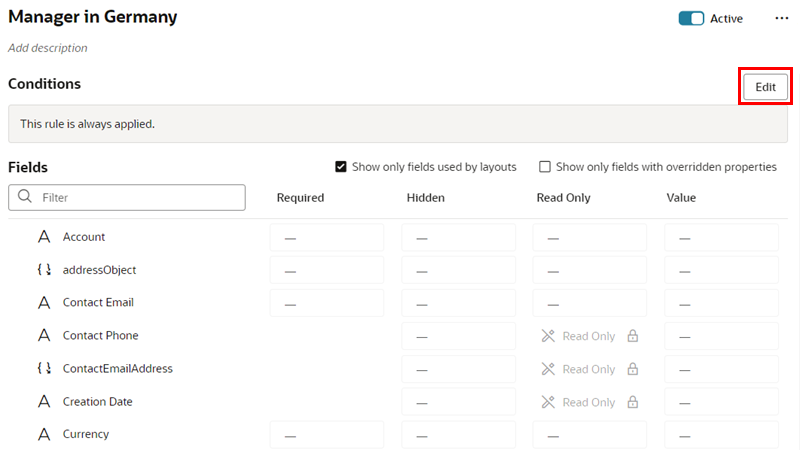
  1. Select the rule you want to edit, then click Edit to open the condition builder:
  2. In the condition builder, define one or more conditions.

    When possible, Visual Builder starts you off by pre-populating the conditions with criteria used in the page, but you can use different criteria in your condition. The criteria, and their available values, depend on the object and what has been set for the page.

    To define a condition:

    1. Select a criterion from the dropdown menu.

      You can choose any of the listed criterion in your conditions, but you cannot change the list of available criteria to add your own.

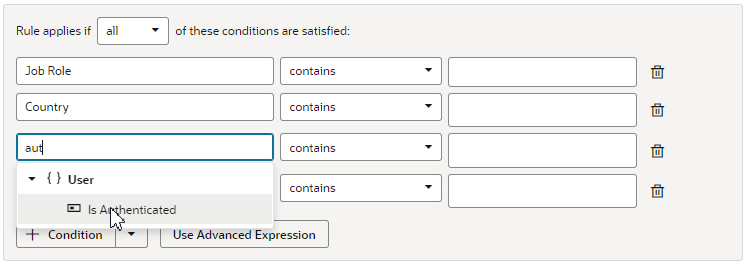
      If you know what criteria and values you're looking for, you can try typing in the field to filter the list:


    2. Select an operator.

      The options available in the operator dropdown menu are pre-defined based upon the criterion's type. So for a criterion like User Authenticated, the operator menu only has equals, and the only available values in the value menu are yes and no:


    3. Specify the values.

      Select a value from the dropdown list, or type a value in the field. Depending on the criterion, you might be able to choose multiple values.

  3. To add another condition, click + Condition, and then define the new condition. To remove a condition, click Delete icon.

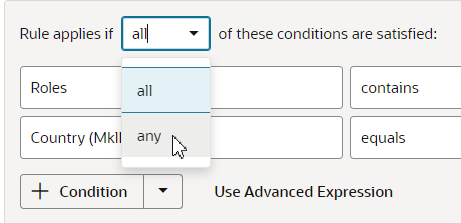
    When you have more than one condition, the rule is applied only when ALL the conditions are true (by default). However, you can change this to ANY, which means only one of the conditions has to be true in order for the rule's overrides to be applied:


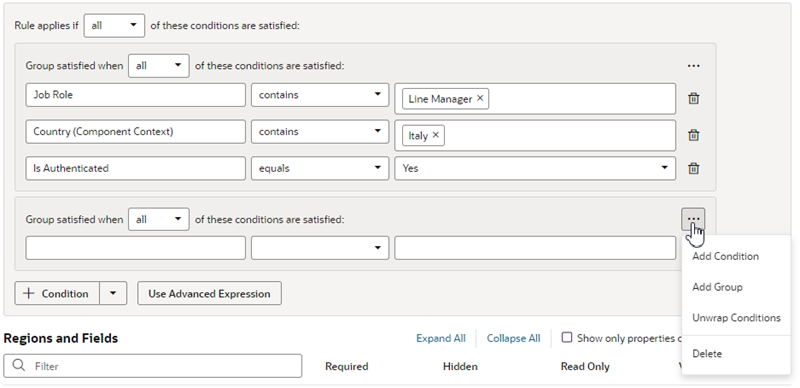
  4. To create a group, click the arrow next to + Condition, and then select Add Group in the dropdown menu. Grouping conditions lets you create more complex conditions for the business rule.

    When you click Add Group, your existing conditions and groups are combined into one group, and a new group containing a condition is added.


    Each group has a menu with options for managing the group:

    • Add Condition. Adds a new empty condition to the group.
    • Add Group. Creates a new group within the group.
    • Unwrap Conditions. Ungroups the conditions, and the empty group is deleted.
    • Delete. Deletes the group and all the conditions in the group.

    After creating a group, you can add and define conditions in the group, and set the logic (any, all) for the groups.

  5. Click Done to close the condition builder.

    Conditions are always saved automatically, so you don't need to worry about explicitly saving your changes when editing a condition.

To change the conditions for an existing rule (not a new one), click the rule in the list, then click Edit above the Conditions pane.

If you’re creating a new rule, the next step is to set properties for the fields.

Create Condition Using a Field's Initial Value

When choosing a field in the condition builder, you might see fields listed under both Field Values and under Initial Field Values.

When creating a condition, you might want to use the value retrieved from the data source when the page loads—that is, the Initial Field Value. Once the page loads, the Initial Field Value doesn't change. The Field Value, on the other hand, is the value displayed or cached in a page, which may already have been modified by a rule or user. For example, say the value for the Head Count field retrieved from the data source (the Initial Field Value) is 50. There might be some rule that sets the field's value (the Field Value) to 60. The Field Value is displayed in the Head Count field in the form. The user may then change the Head Count field to 70 in the form, so the Field Value for Head Count is now 70. The Head Count Initial Field Value, however, is unaffected by changes made by rules or users, so it is still 50.

Let's look at how to add a rule so that users cannot edit the Head Count value in a form if the field's initial value is greater than 100.

  1. In the business rules editor, create a new form rule.
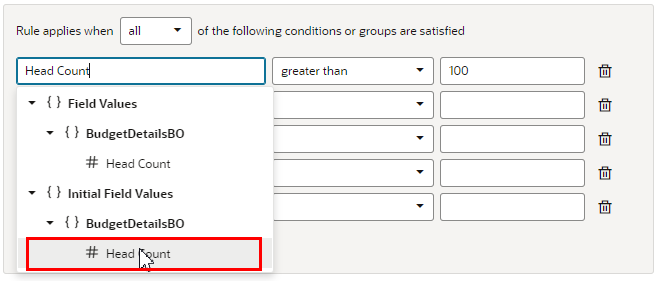
  2. Create a condition where the initial value of Head Count is greater than 100.

    In the criterion dropdown list, be sure to select Head Count under Initial Field Values (as opposed to under Field Values):


  3. Set the Read Only property of the Head Count field to Read Only.

    To help you locate where the Head Count field is used, you can type 'head' in the filter field to filter the list of fields:


In this example, the Head Count field in the form might display a value greater than 100 and still be editable, because a rule is modifying the Head Count value. If you wish, you could create a validation rule that displays a message when the Head Count is over 100, telling the user the Head Count field value must be 100 or less. In the condition for the validation rule, make sure the rule is evaluating the Field Value (not the Initial Field Value) for the Head Count field.

Build Advanced Expressions

When creating conditions for business rules, you may find your conditions are more complex than you can achieve using the basic condition builder. If this occurs, you can build your own custom expressions to suit your needs.

Note:

If you use advanced expressions in the condition builder, you will no longer be able to use the basic condition builder. If you have already defined some conditions in the basic condition builder, they will be displayed as actions in the Advanced Expression editor.

To create an advanced expression:

  1. Click Use Advanced Expression in the condition builder.

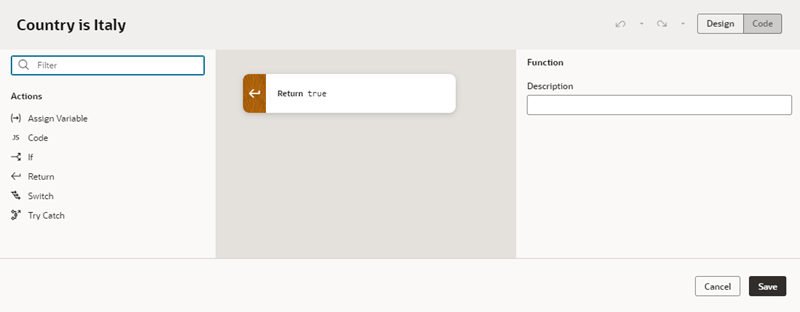
    The Advanced Expression editor has a Design mode, which you use to visually create an expression, and a Code mode where you can type the expression. You toggle between modes using the Design and Code buttons in the header.

    This image below shows Design mode, which has an Actions palette on the left, a canvas in the middle, and a Properties pane on the right:


  2. Drag an action from the palette and position it on the canvas.


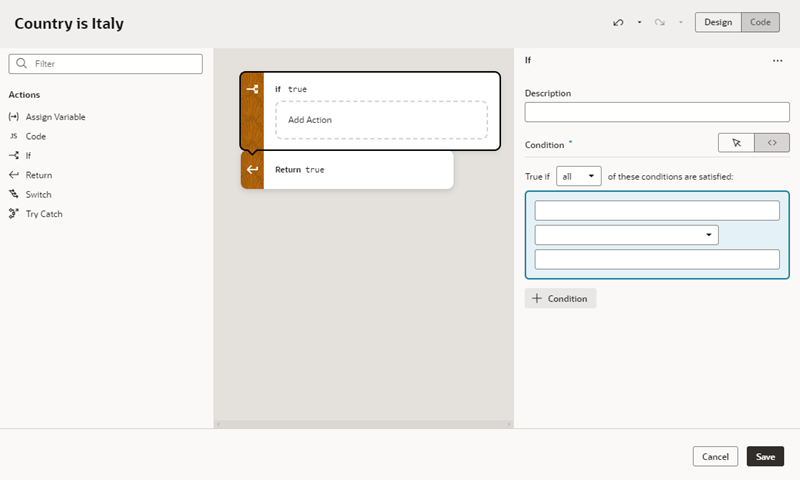
    Let's take a look at what happens when we drag an If action onto the canvas:


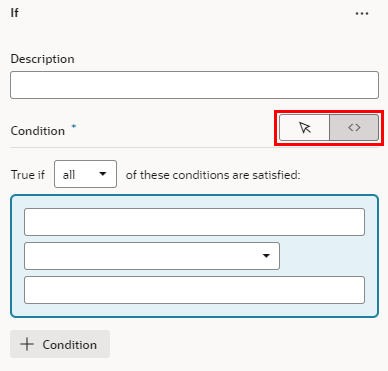
    When the If action element is selected on the canvas, the Properties pane contains a Description field and a condition builder.

  3. Define the action in the Properties pane and on the canvas.
    1. Edit the action's properties in the Properties pane. The properties displayed in the Properties pane vary according to the action.

      For an If action, the Properties pane has a condition builder for selecting the condition's criterion, operator, and value. Click + Condition in the Properties pane to add a condition. Right-clicking a condition opens an options menu for adding, moving, and deleting the condition. You can also reposition a condition using drag-and-drop in the condition builder.

      You can use the condition builder's toggle buttons to switch between the Design and Code views:


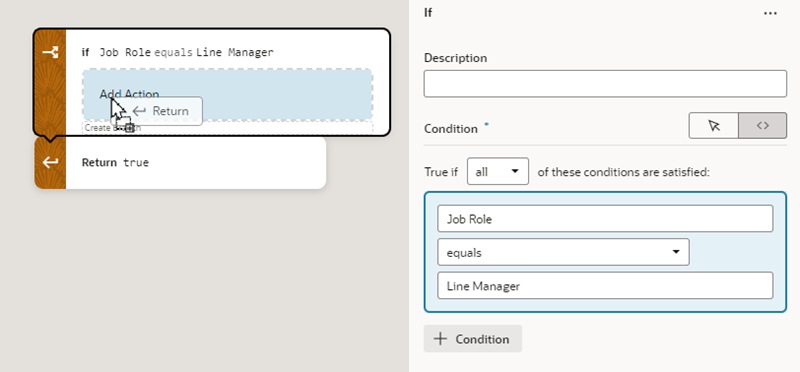
    2. On the canvas, drag actions from the palette (for example, Return, Assign Variable, Try Catch) into the action's Add Action drop target.

      For an If action, you need to define what happens when the condition is true. If the condition is true, and you want to return from the advanced expression, drag a Return action into the action's drop target:


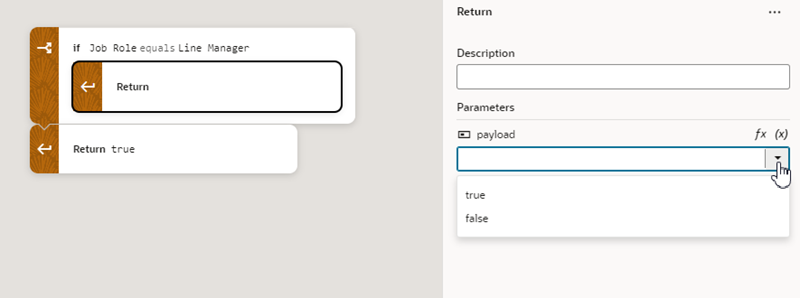
      Now select the Return action on the canvas, and then select 'true' in the Payload dropdown list in the Properties pane:


  4. Repeat steps 2 and 3 to add more actions to the expression.

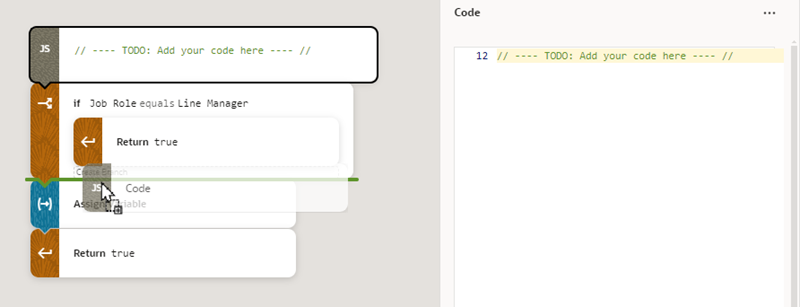
    As you add more actions, you can reorganize the order by grabbing the front of the action element on the canvas, and then moving it into a new position:


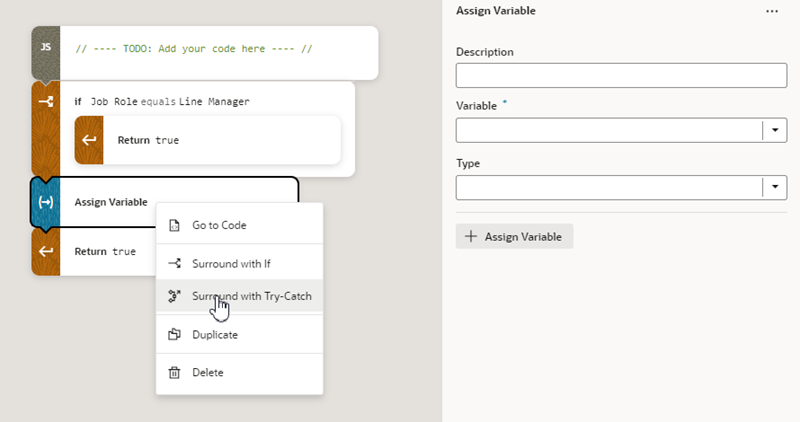
    Right-clicking an action on the canvas opens a popup menu with some convenient shortcuts, including deleting the action and switching to Code view:


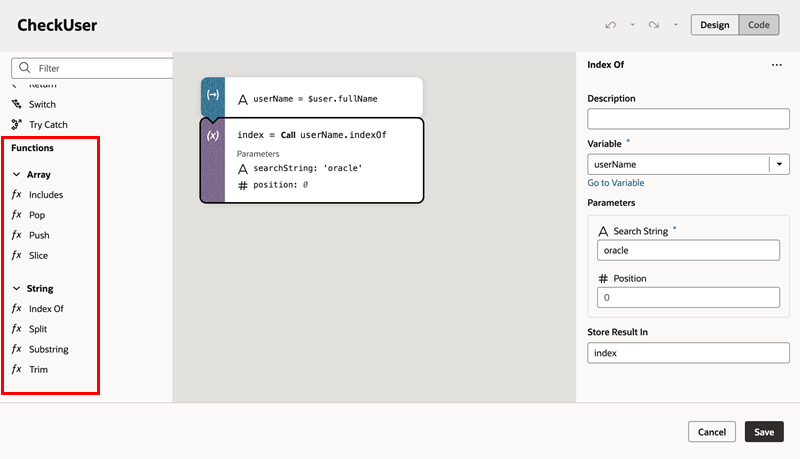
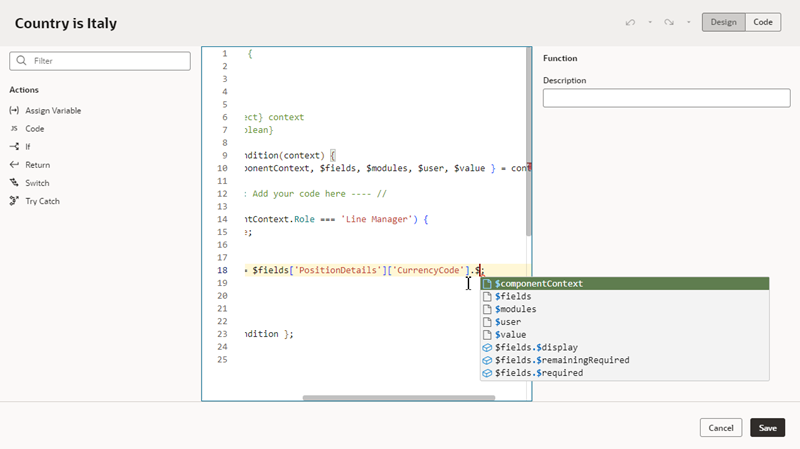
    At any point, if you're comfortable typing expressions you can click Code in the header to open the editor's Code mode. In Code mode you can type your expression directly, and take advantage of the code completion in the editor:


  5. Confirm that the payloads for your Return actions are correct.
    When a Return action is selected on the canvas, you can choose a payload in the dropdown list in the Properties pane.
  6. When you're finished building your expression, click Save.

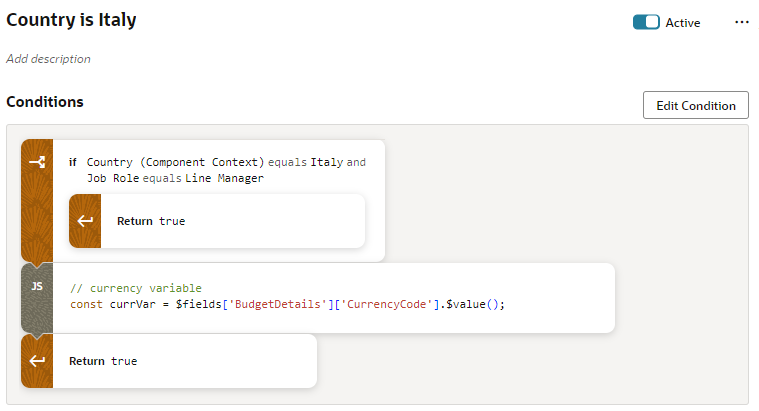
When you look at your rule, the condition looks like this if it's created using the expression editor: