Use RDF Wizard to Create an RDF Graph

You can create a new RDF graph using the RDF wizard feature in Graph Studio.

As a prerequisite, you must upload the RDF data to Oracle Cloud Infrastructure Object Storage. You can then access the RDF data store from Graph Studio with or without credentials. See Perform Prerequisites to Use RDF Graph Wizard for more information.
The RDF wizard consists of two pages:
  • On the first page, you can provide the OCI object store credentials to create a new credential or select any existing object store credential. Otherwise, you can simply provide a pre-authenticated request URL to access the object store without credentials.
  • On the second page, you can provide the RDF graph information.
To create an RDF graph, perform the following steps in the RDF wizard:
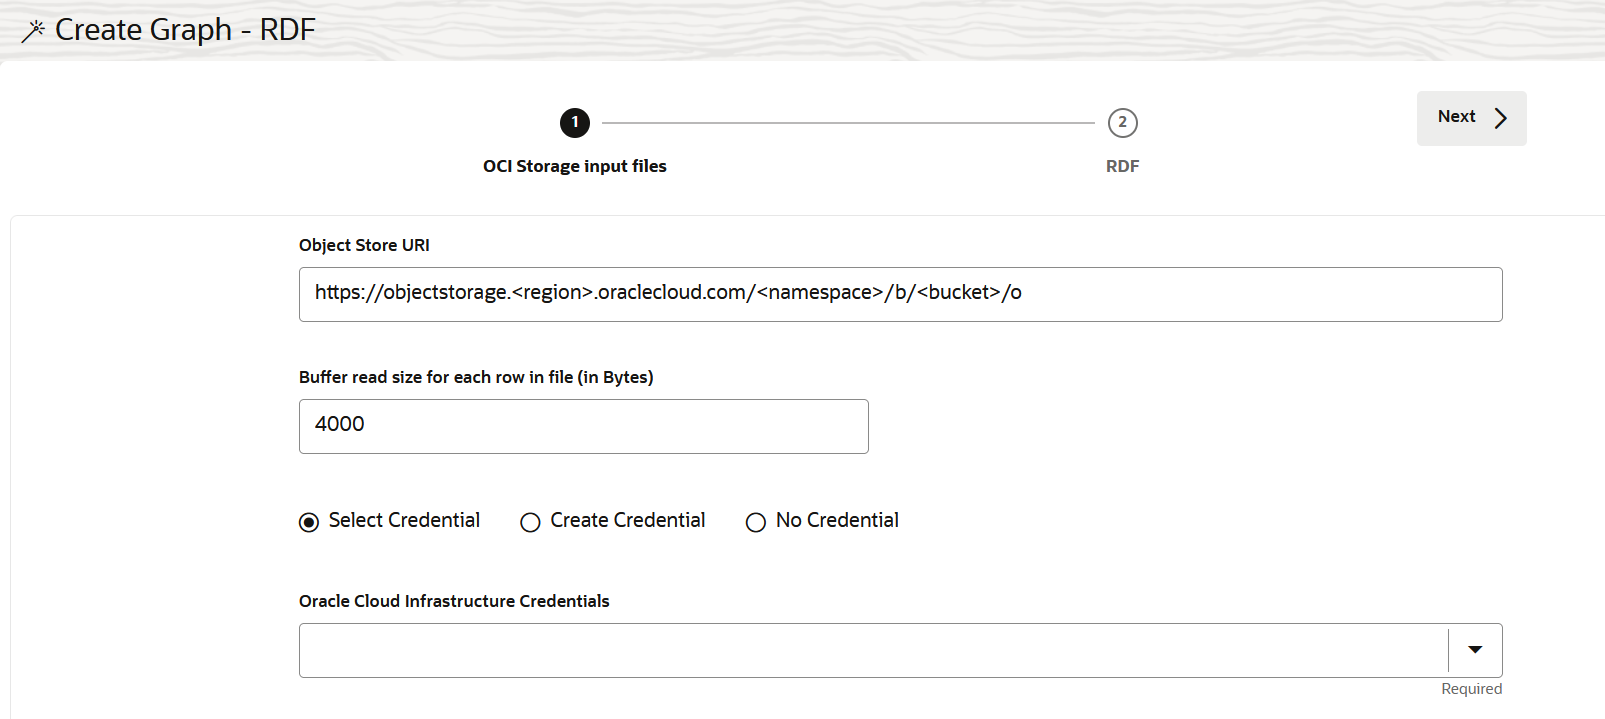
Description of rdf_wiz.png follows
Description of the illustration rdf_wiz.png
  1. Enter the URI path or the Pre-Authenticated Request URL to the RDF object store in your OCI bucket.
  2. Optionally, enter the Buffer read size for each row in file.
  3. Choose the required Credential option:
    • Select an existing credential:
      1. Click Select Credential.
      2. Select a credential name from the Oracle Cloud Infrastructure Credentials drop-down list.

        On selection, the Oracle Cloud Infrastructure User Name value is automatically populated.

    • Create a new credential:
      1. Click Create Credential.
      2. Enter a Credential Name.
      3. Enter your Oracle Cloud Infrastructure User Name.
      4. Enter the Auth Token value.
    • Click No Credential to access the object store using pre-authenticated request URL.
  4. Click Next.
  5. Enter the RDF Graph Name.
  6. Click Create.

    This redirects you to the Jobs page, where the RDF graph creation job is initiated.

    Successful completion of the job indicates that the RDF data is imported and the RDF graph is created successfully. The newly created graph appears on the Graphs page in the RDF Graph tab.