Work with Preinstalled Conda Environments
As a graph user, you can download and activate a preinstalled Conda environment.
You can then access the activated environment in a Python(PGX) paragraph. The
following example describes the steps for a graph user to work with a preinstalled Conda
environment.
- Navigate to the Notebooks page and open a new notebook.
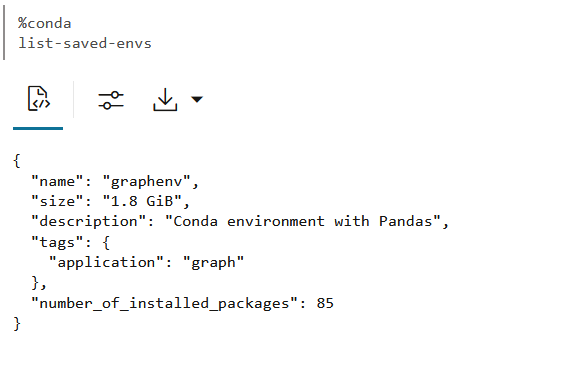
- List all the available preinstalled Conda environments:
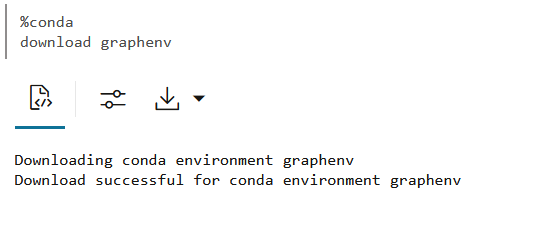
- Download the required Conda environment.
The following example downloads the saved
graphenv:%conda download graphenv
Description of the illustration conda_download_env.pngNote the following:
- If you wish to skip the download in case the Conda environment already
exists, then you can run the following
command:
download <env_name> --skip-if-exists - If you wish to overwrite an already downloaded Conda
environment, then you can run the command as
shown:
download <env_name> --overwrite - You can download multiple Conda environments and can always
switch between your environments by using the Conda
activate
                                <env>
command. - If the environment download exceeds the maximum local
storage limit of 8 GB, then the Conda interpreter throws an error. In
such a case, you can remove an environment from the local storage, using
the following command, and repeat the download
operation:
env remove -n <env_name>
- If you wish to skip the download in case the Conda environment already
exists, then you can run the following
command:
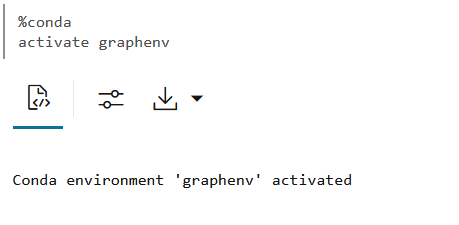
- Activate the required environment.
%conda
activate graphenv
Description of the illustration conda_activate_env.pngWhen you activate a specific Conda environment, the earlier active environment is automatically deactivated. Therefore, when you are working with multiple environments, it is recommended that you activate the required environment before switching to another.
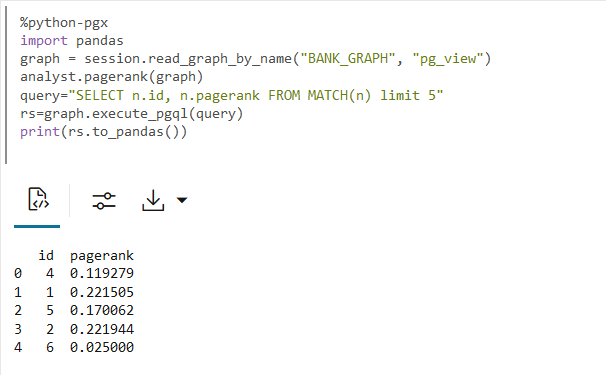
- Access the environment in a Python(PGX) paragraph.As a prerequisite, perform the following steps:Once you have verified the active environment and the packages installed in the active environment, then you can access the environment in the Python(PGX) paragraph. For instance, the following example uses the
- Run the Conda
infoorenv listcommand and verify that you have activated the required environment. If not, run the Condaactivatecommand, as described in the preceding step, to activate the required environment. - Run the Conda
listcommand to verify that the activated environment contains the required packages that you need to access in the Python(PGX) paragraph. - This step applies only if you want to work with the
PyPGX APIs. Verify that the output of the Conda
listcommand shows theoracle-pypgx-clientpackage. If this package is not available in the activated environment, then you cannot work using the PyPGX APIs. See step-2 in Create and Publish a Conda Environment for more information.
pandaspackage in the activated conda environment to convert a PGQL result set into Pandas dataframe. - Run the Conda

