Add a Cross Region Standby Database
You can enable Autonomous Data Guard with a cross region standby when Autonomous AI Database is available (Lifecycle state shows Available).
To add a standby database you must have adequate available resources. Adding an Autonomous Data Guard standby database will only be successful if adding the standby database does not cause you to exceed your Tenancy or compartment limits for CPU and Storage.
Perform the following prerequisite steps as necessary:
-
Open the Oracle Cloud Infrastructure Console by clicking the
 next to Cloud.
 -
From the Oracle Cloud Infrastructure left navigation menu click Oracle AI Database and then click Autonomous AI Database.
-
On the Autonomous AI Database page, select your Autonomous AI Database from the links under the Display name column.
To add a cross region Autonomous Data Guard standby:
-
On the Autonomous AI Databases details page, select the Disaster recovery tab.
-
On the Disaster recovery tab, click Add peer database.
-
In the Region list, select a region.
The region list shows the available remote regions where you can create a cross region standby. When you add a standby database, the list of available regions only shows a remote region if your tenancy is subscribed to the remote region (you must be subscribed to the paired remote region). See Autonomous AI Database Cross Region Paired Regions for more information.
-
When you select a region, Autonomous AI Database shows the Compartment list. From this list select a compartment for the cross region standby.
-
Select the disaster recovery type. In addition, when the source database is configured with a private endpoint, enter the private endpoint information for the peer.
a. Select the disaster recovery type: Autonomous Data Guard.
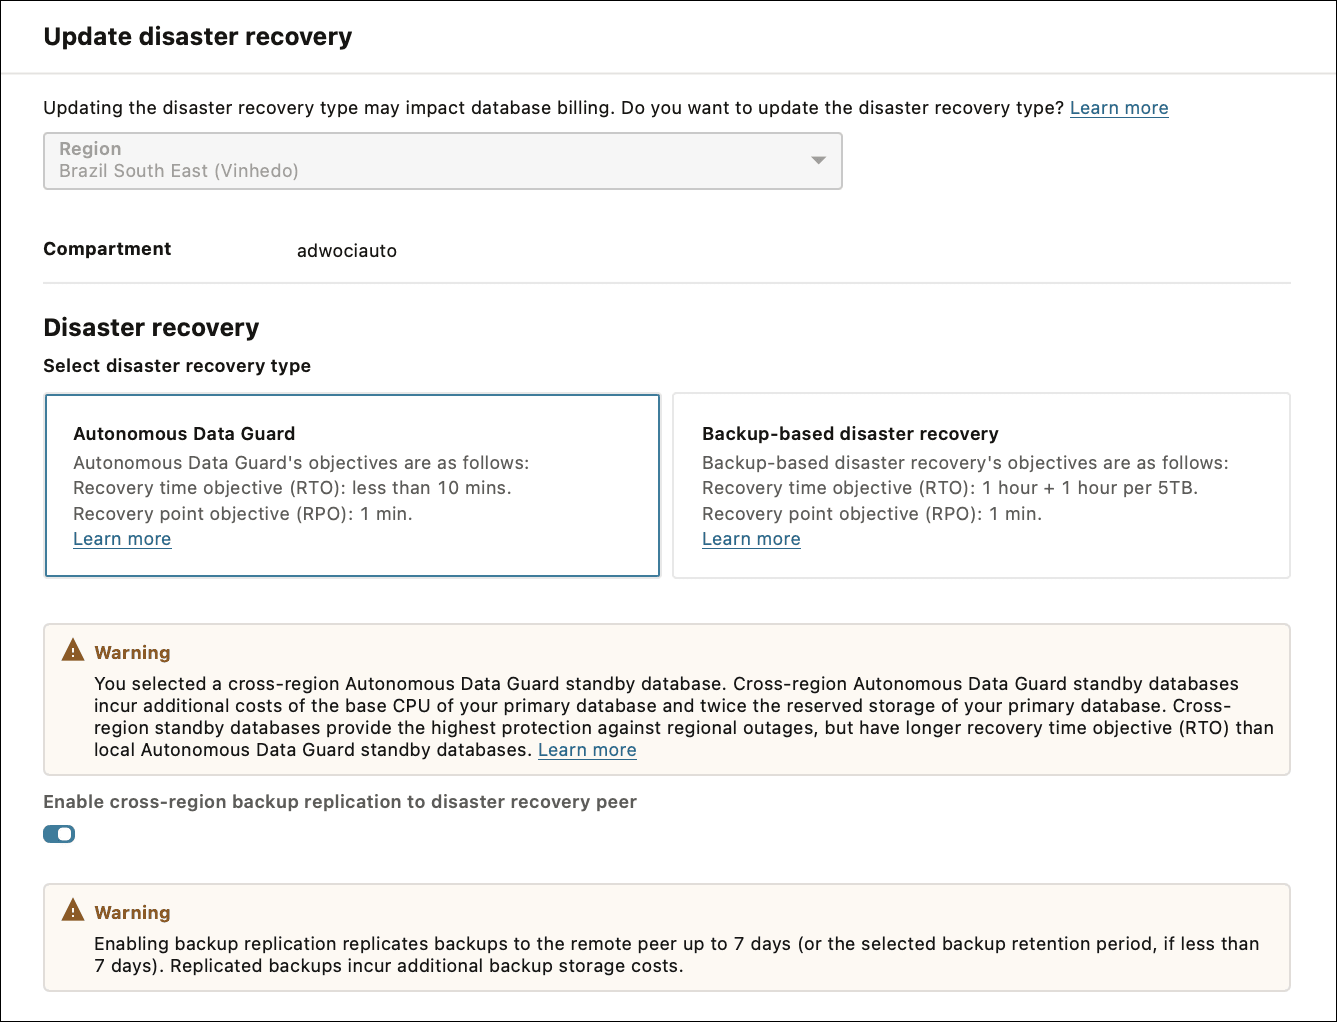
Description of the illustration adb_add_standby_select_region.png
b. If you want to enable cross region backup replication, switch the Enable Cross Region backup replication to disaster recovery peer toggle on.
See Replicating Backups to a Cross Region Autonomous Data Guard Standby for more information.
c. When the source database is configured with a private endpoint, in the Network access for standby area enter the Virtual cloud network and the Subnet.
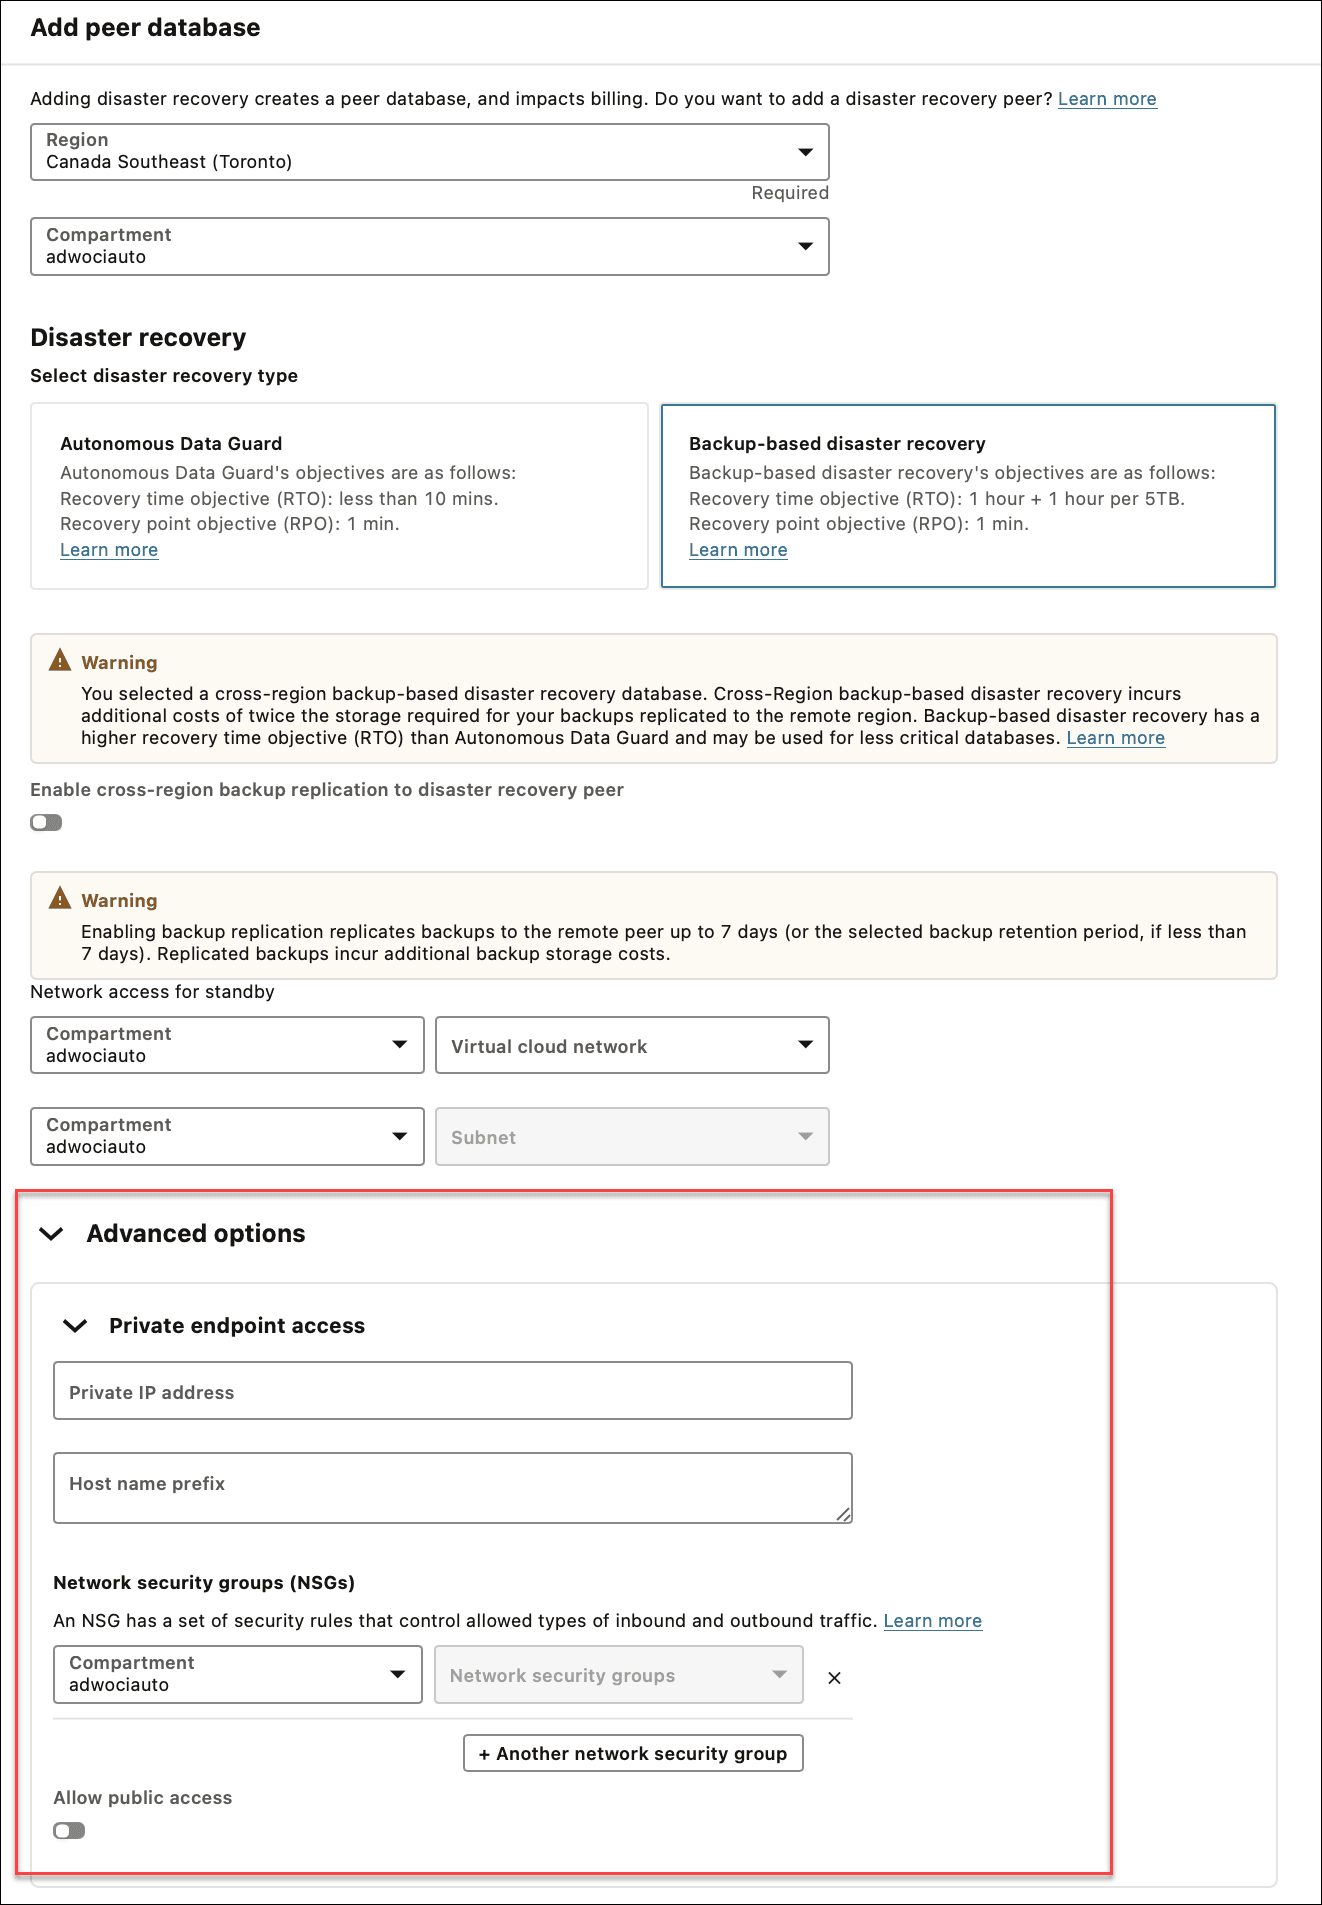
Description of the illustration adb_create_cross_region_peer_private_endpoint.png
In these Network access for standby fields you specify the private endpoint's VCN and Subnet on the remote region where the standby is created.
Note: If you change your network access on the source database to enable a private endpoint after the standby is created, you must manually access the standby to enable a private endpoint on the peer.
-
Click Add.
The Autonomous AI Database lifecycle state badge shows Updating. On the Disaster recovery tab the State column for the peer shows Provisioning.
After some time the lifecycle state badge shows Available and the standby database provisioning continues.
Note: While you add a standby database, the primary database is available for read/write operations. There is no downtime on the primary database.
When provisioning completes, on the Oracle Cloud Infrastructure Console, on the Autonomous AI Databases details page, the Disaster recovery area the shows the following:
-
Role shows Primary
-
The Local field shows either Backup-based or Autonomous Data Guard.
The local field also has an
 menu. If the local standby is Backup-based, the actions menu shows the options Upgrade to Autonomous Data Guard and Switchover.
 -
The Cross Region field shows:
-
Autonomous Data Guard when you have single cross region standby database.
-
x peers: When you have multiple cross region disaster recovery peers, where x is the number of cross region peers.
-
When you add a cross region standby, the standby database created in the remote region has the same display name as the primary database with an “_region” extension. Where region is the region name, such as IAD or BOM.
On the Disaster recovery tab the Peer Autonomous AI Database column shows the standby database name and a provides a link. Click the link to go to the Oracle Cloud Infrastructure Console for the remote standby database.
Notes for adding a cross region standby database:
-
Autonomous AI Database generates the Enable cross region disaster recovery work request. To view the request, on the Autonomous AI Database details page select the Work requests tab.
-
After you add a cross region (remote) standby database, the wallet and connection string from the primary database will contain only the hostname of the primary database, and the wallet and connection string from the remote database will contain only the hostname of the remote database. This applies for both instance and regional wallets.
See Cross Region Disaster Recovery Connection Strings and Wallets for more information.
-
If you switch on the Enable Cross Region backup replication to disaster recovery peer toggle, replicating the backups to the remote region can take between several minutes and several hours, depending on the size of the backups. After backups are replicated, on the peer's Autonomous AI Database details page, the Backups tab shows the list of replicated backups.
-
While you add a standby database and the lifecycle state badge shows Updating. The following actions are disabled for the primary database while it is updating:
-
Move Resource. See Move an Autonomous AI Database to a Different Compartment for information on moving an instance.
-
Stop. See Stop Autonomous AI Database for information on stopping an instance.
-
Restart. See Restart Autonomous AI Database for information on restarting an instance.
-
Restore. See Restore and Recover your Autonomous AI Database for information on restoring.
-
Add cross region disaster recovery peer. You need to wait until the update completes on the primary database before you can add an additional cross region peer.
-
-
See Cross Region Autonomous Data Guard Notes and Notes for Customer-Managed Keys in OCI Vault with Autonomous Data Guard for information on using customer-managed keys and for additional notes for using Autonomous Data Guard with a cross region standby.