Integrate Oracle Digital Assistant into a Website Built in Oracle Content Management
Introduction
Organizations are often looking to create content-sharing websites (such as marketing sites, sales portals, and partner hubs) for distributing content to internal or external audiences. Oracle Content Management offers tools with powerful features to build such content-sharing websites.
Digital assistants and chatbots enable sales and marketing teams to fast-track their digital business expansion and enhance their customer experience.
Oracle Digital Assistant is a platform that allows you to create and deploy digital assistants, which are AI-driven interfaces that help users accomplish a variety of tasks in natural language conversations. But what happens when you need a content management system (CMS) to serve all of your content? Fortunately, Oracle Content Management, with its rich headless CMS capabilities, has a graceful solution for all your content administration and governance needs.
In this tutorial, we’ll first build a chatbot in Oracle Digital Assistant by leveraging Oracle Content Management as a headless CMS as well as its software development kit (SDK) for content delivery in JavaScript. Next, we’ll use Oracle Content Management’s Site Builder to create and edit a sales enablement website and add the chatbot using an Oracle Content Management custom component.
The tutorial consists of four steps:
- Set up your Café Supremo sales enablement website
- Build the Oracle Digital Assistant skill
- Set up the Oracle Content Management custom component
- Add the custom component to the website
Prerequisites
Before proceeding with this tutorial, we recommend that you read the following information first:
To follow this tutorial, you’ll need:
- an Oracle Content Management subscription
- an Oracle Content Management account with the Content Administrator role
- an Oracle Digital Assistant (ODA) subscription
- an ODA instance
- a Windows or Mac computer with Node.js and Node Package Manager (NPM) installed for global access
What We’re Building
Café Supremo is a fictional coffeehouse chain, which has store locations worldwide. The Café Supremo sales enablement website is created with Oracle Content Management.
The Café Supremo sales enablement website allows sales representatives of the Café Supremo company across the globe to get all the information they need about sales. To learn what a sales enablement website is and see an introduction to the Café Supremo sales enablement website, see Learn about creating a sales enablement website.
This is an enhanced version of the Café Supremo sales enablement site, which features a chatbot developed using Oracle Digital Assistant (ODA) that pulls content delivered from an Oracle Content Management channel.
This is what the sales enablement site will look like at the end of this tutorial:
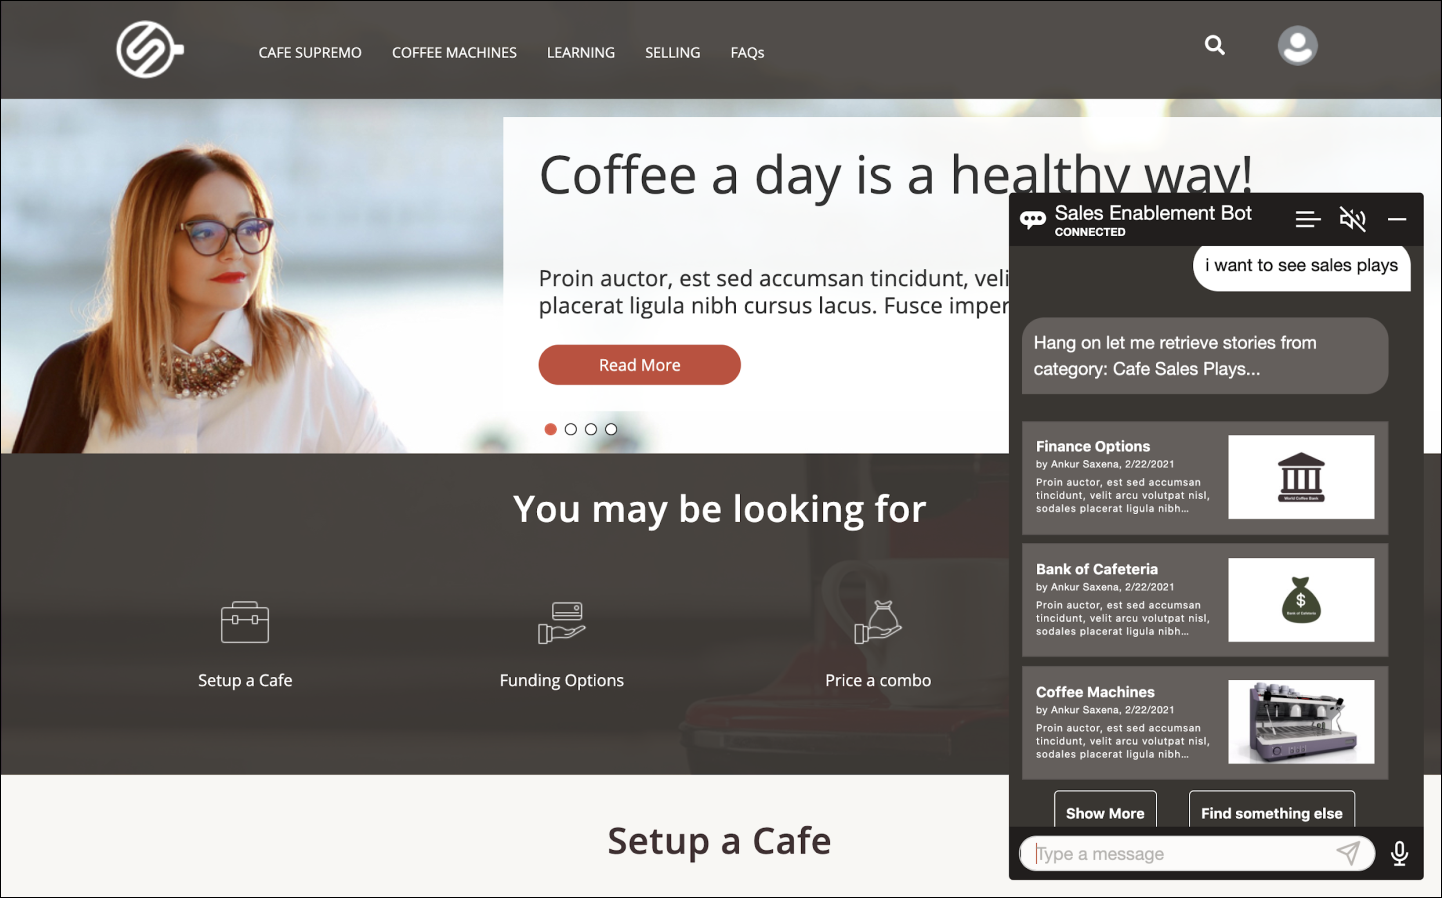
Task 1: Set Up Your Café Supremo Sales Enablement Website
In this section, you’ll set up the Café Supremo sales enablement website using Oracle Content Management.
To get started, you’ll need to download the zip file containing the template and sample code for the Café Supremo sales enablement website from the Oracle Content Management downloads page. Once you obtain a copy of the template, upload it to Oracle Content Management, where you’ll use it to create the sales enablement website.
The zip file contains a readme file, license files, and the template zip file.
Note: The images used in the sample template and the Café Supremo sales enablement website are Shutterstock images. If you reuse these images, then they must be licensed through Shutterstock. You can also replace these images with your own images.
To set up the Café Supremo reference sales enablement website:
Sign in to Oracle Content Management as an administrator. If you don’t see an ADMINISTRATION section in the left navigation menu in the Oracle Content Management web interface, you don’t have administrator privileges. In that case, contact your service administrator.
In the left navigation menu, click Developer, and then View All Templates.
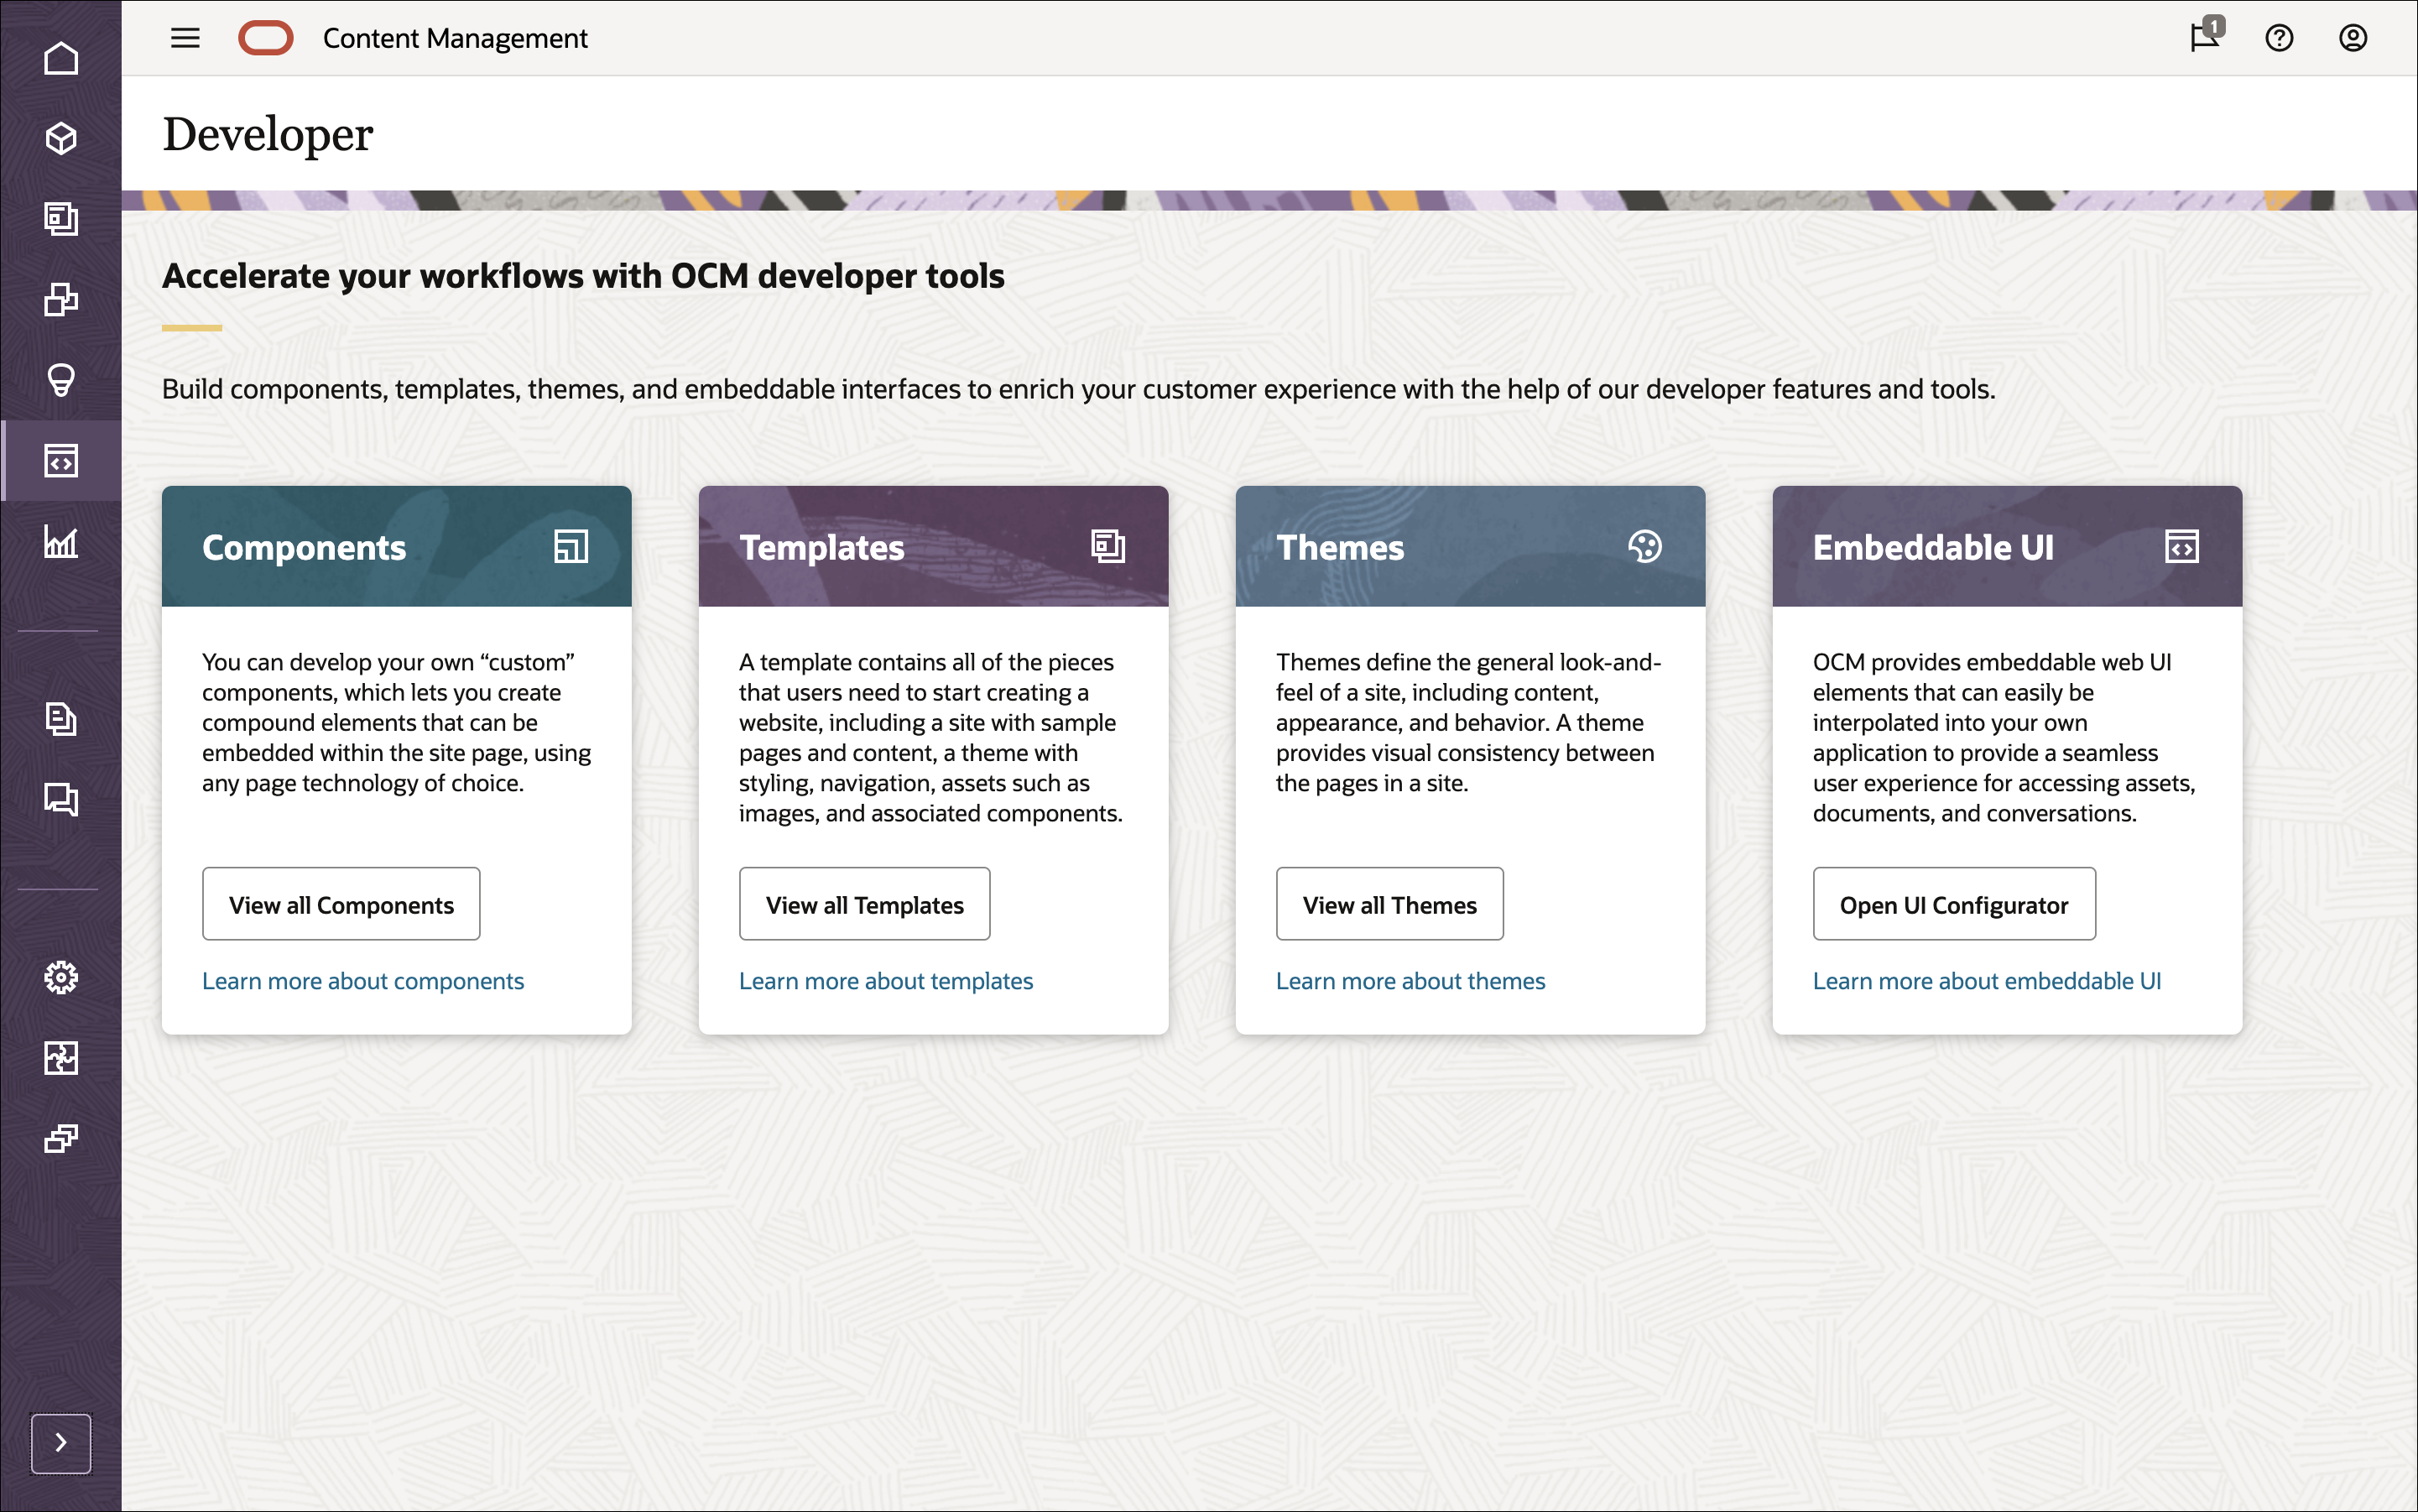
On the Templates page, click Create, and choose Import a template package.
In the Pick a File dialog, navigate to the folder where you want to upload the file or create a new folder, and click Upload.
Locate and select the CafeSupremoSalesEnablement.zip template package, and click Open. Wait for the file to be uploaded. Once the file is uploaded, it will be available for selection.
Select the CafeSupremoSalesEnablement.zip checkbox and click OK. The CafeSupremoSalesEnablement template is now included in the list of templates on the Templates page.
Click Content under ADMINISTRATION in the left navigation menu.
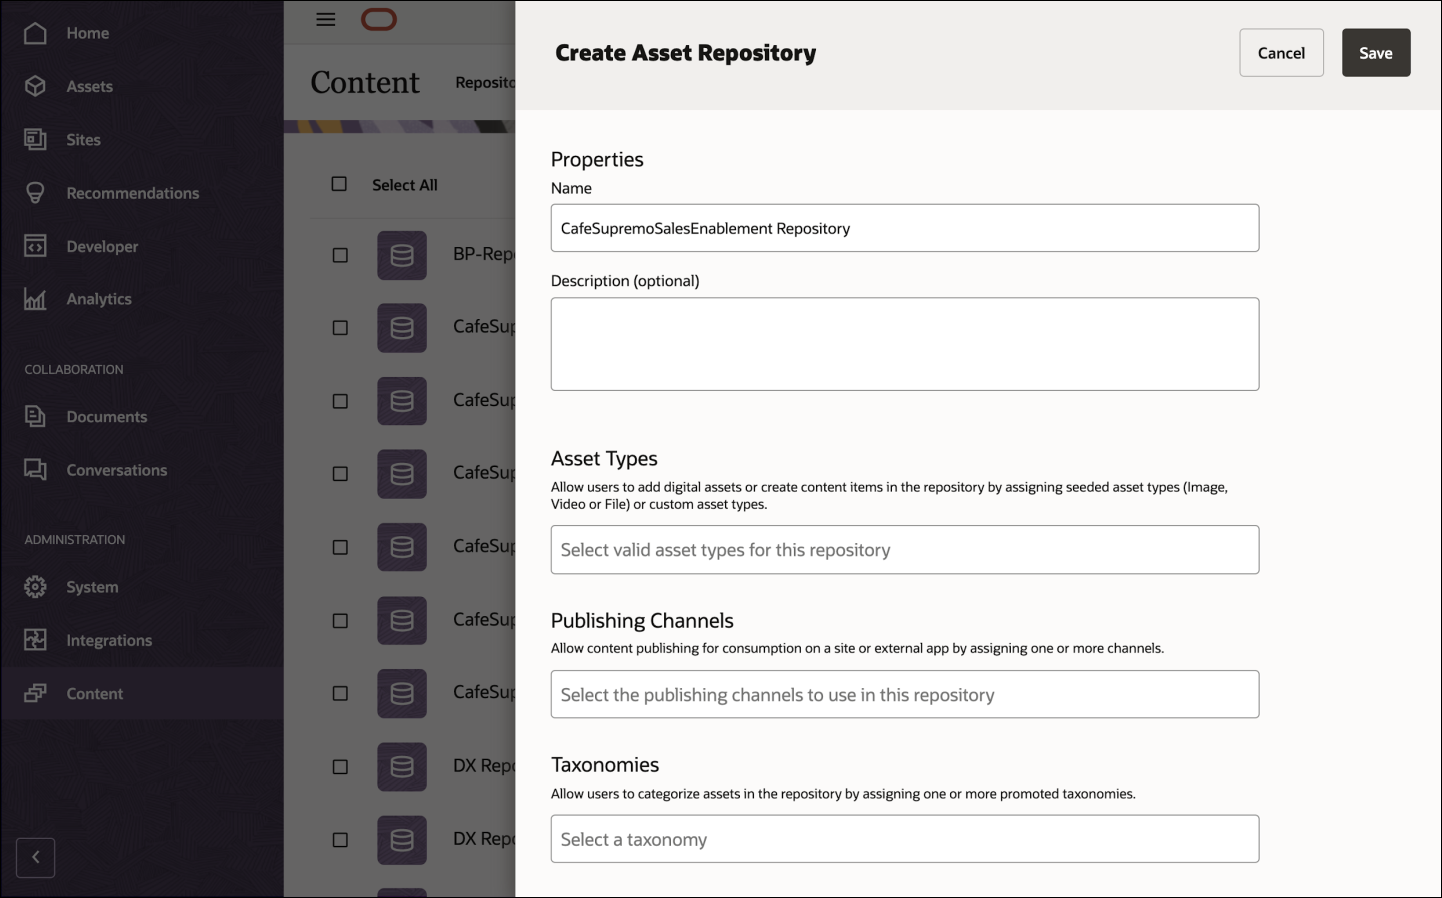
Now create a repository, which is a storage location to manage all your digital assets that you use in your website in one place:
Choose Repositories from the dropdown list and click Create in the upper-right corner.
In the Name field, enter a meaningful repository name for your website (for example, ‘CafeSupremoSalesEnablement Repository’).
In the Default Language field, make sure that English (United States) (en-US) is selected.
Click Save. The newly created repository is now included in the list of repositories on the Content page.
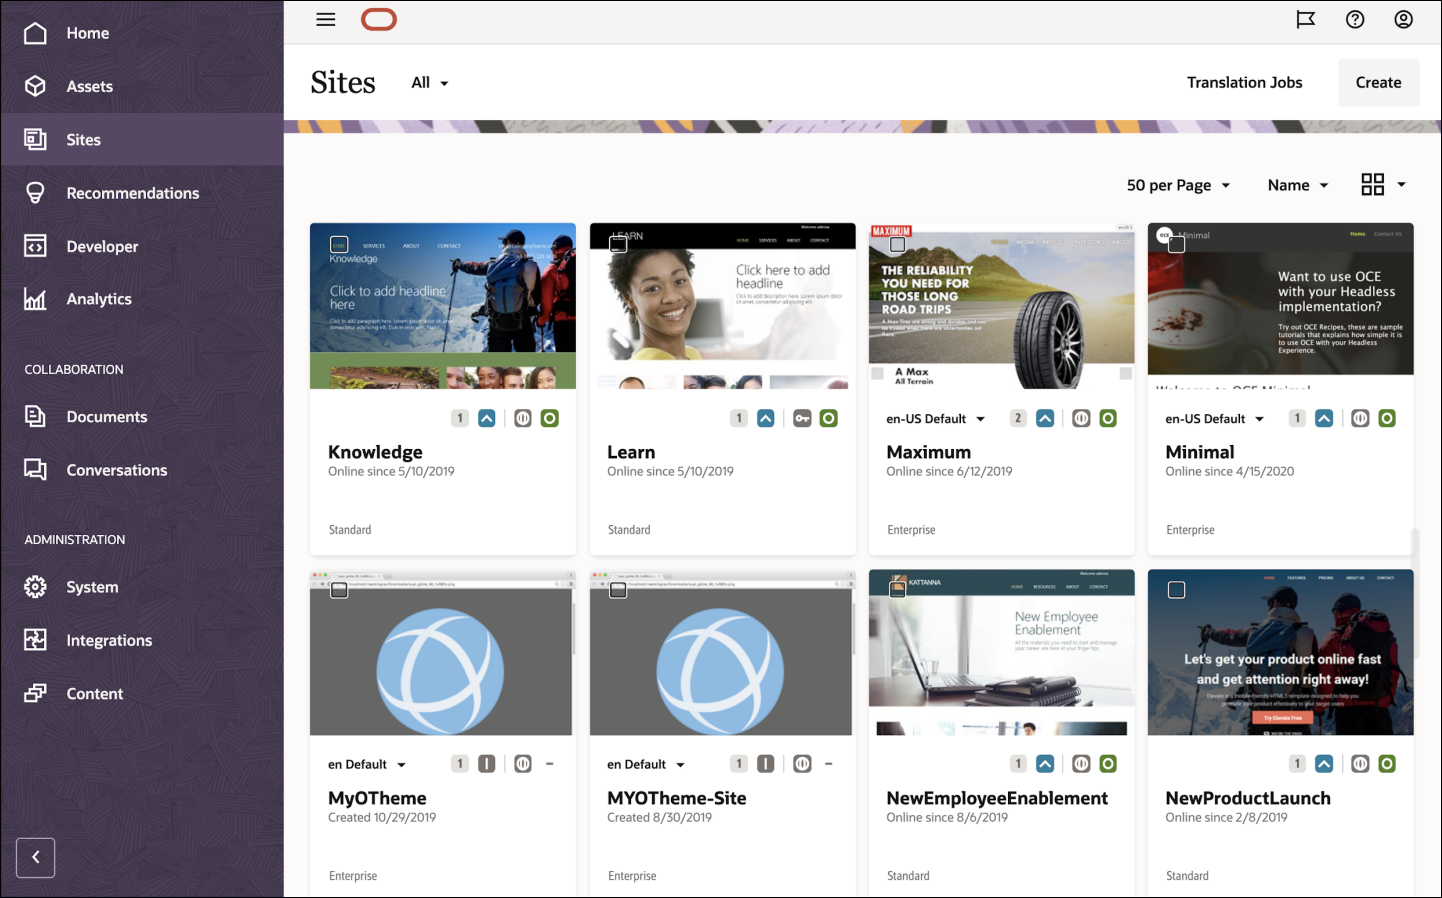
Click Sites in the left navigation menu.
In the Sites page, click Create in the upper right corner.
In the Create Site dialog, choose the CafeSupremoSalesEnablement template.
Complete the following fields:
Asset Repository — Select the asset repository you created earlier (for example, ‘CafeSupremoSalesEnablement Repository’).
Localization Policy — The localization policy is automatically selected because it’s available as part of the sample code and template.
Default Language — This field is set to English (United States) (en-US) by default.
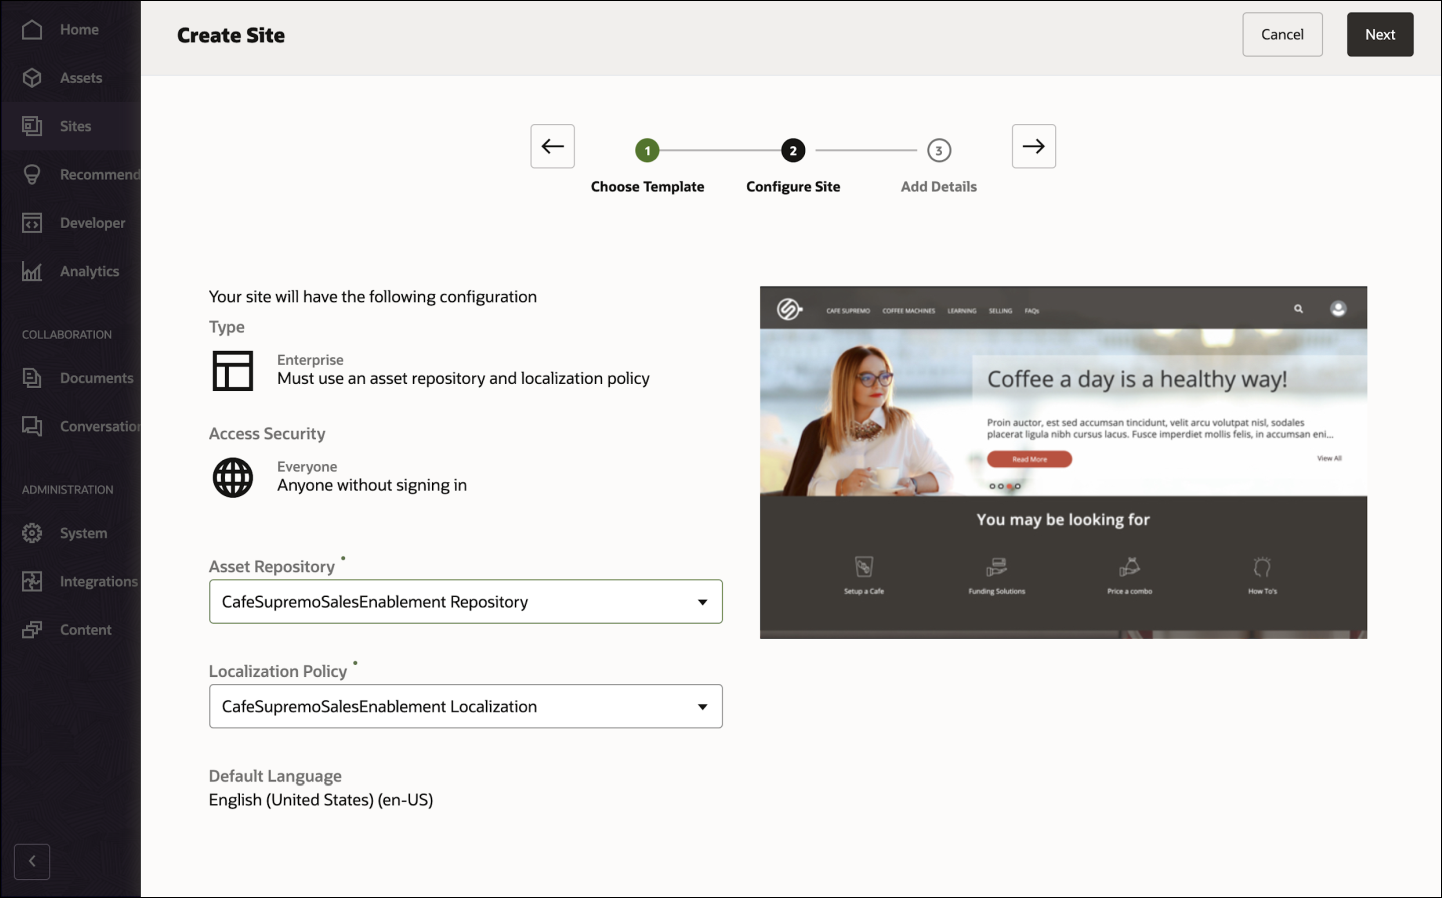
Click Next and add details for your site:
Name — Enter a name for your website (for example, CafeSupremoSalesEnablement).
Prefix for Friendly URL Values — This will be added to the friendly URL values for the content items.
Description — Provide an optional description of your site.
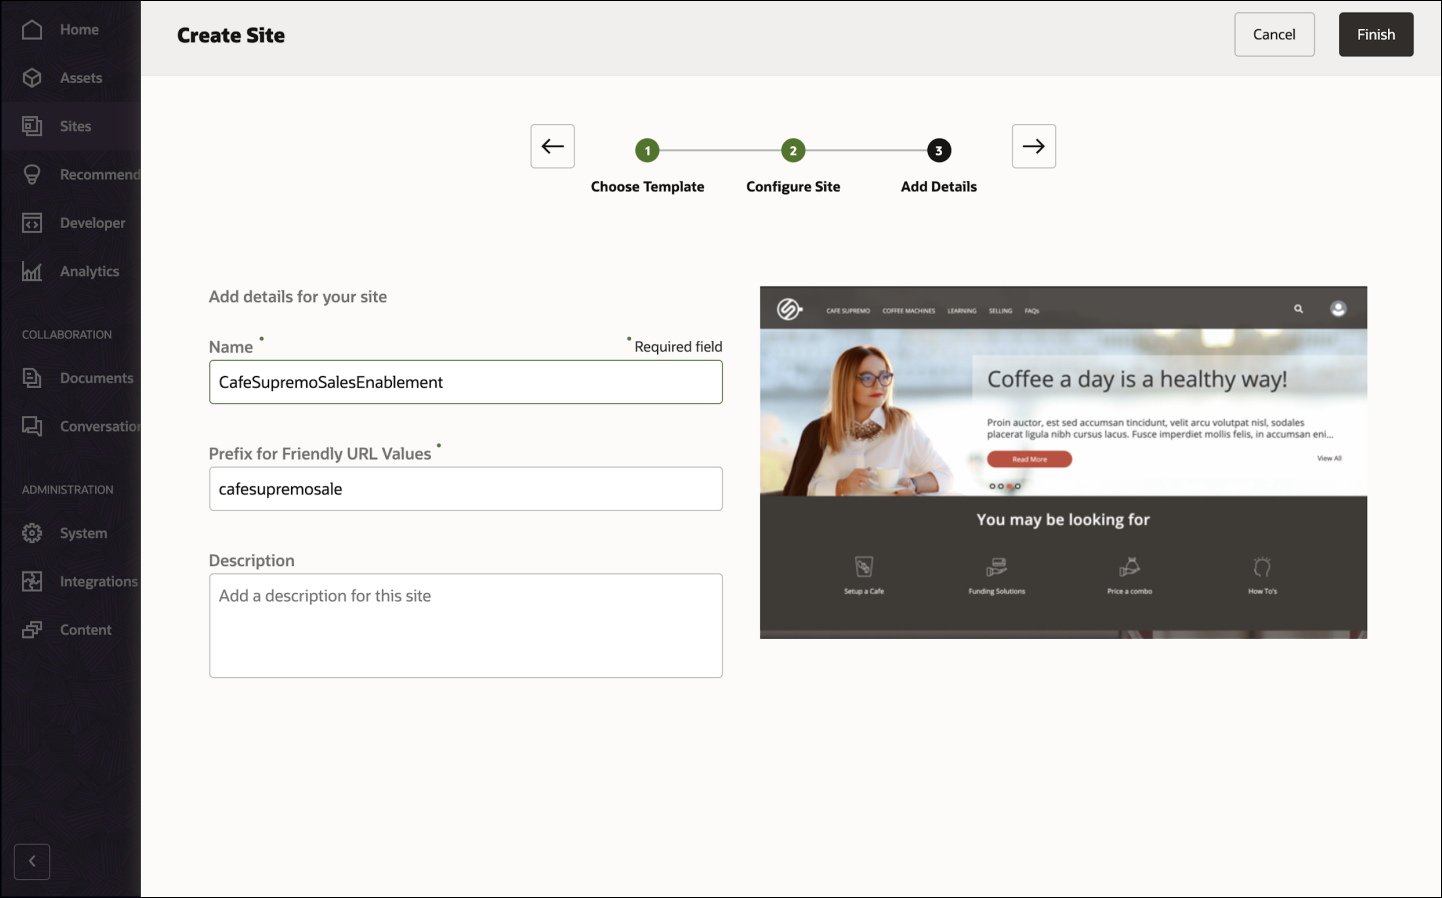
Click Create.
The sales enablement website has been created and is now listed on the Sites page.
Task 2: Build the Oracle Digital Assistant Skill
To consume our Oracle Content Management content in an ODA chatbot application, we can use the Oracle Content Management ODA chatbot sample, which is available in an open-source repository on GitHub.
Note: Remember that using the ODA chatbot sample is optional, and we use it in this tutorial to get you started quickly. You can also build your own chatbot application.
To build the chatbot skill in ODA:
- Clone the sample repository
- Import the ODA skill to your instance
- Set up and configure the custom component service
- Work with the Content SDK
- Use the Content SDK to fetch content
- Package and deploy the custom component service
Clone the Sample Repository
The Oracle Content Management ODA chatbot sample is available in an open-source repository on GitHub. You’ll first need to clone the sample repository from GitHub to your local computer and change your directory to work with this sample.
git clone https://github.com/oracle/oce-integration-samples.git
    cd oce-integration-samples/oce-oda-chatbot-sample/site-integration-chatbot-sample
Now that you have your code base, let’s have a closer look at the folders that you’ll be using in this tutorial:
The oda-custom-component folder is an ODA custom component.

The SalesEnablementChatbotIntegration folder is a chatbot skill.
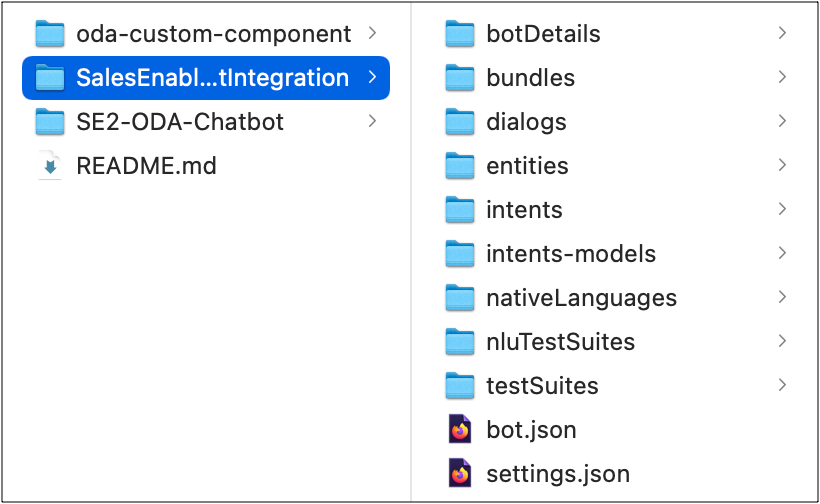
The SE2-ODA-Chatbot folder is an Oracle Content Management sites custom component.

Note: The headless-chatbot-sample folder is part of headless chatbot sample. You can learn more about this headless chatbot sample here.
Import the ODA Skill to Your Instance
The SalesEnablementChatbotIntegration folder is the ODA skill used in this tutorial. Follow these steps to create and train your skill on your ODA instance:
In your Oracle Digital Assistant instance, open the navigation menu on the left, then click Development, and then Skills.
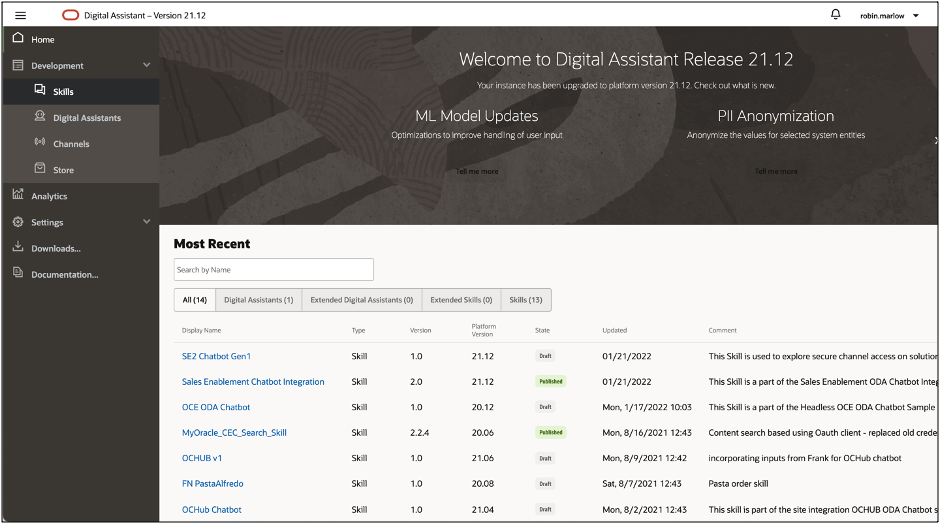
Search for the Sales Enablement Chatbot Integration skill.
Note: If your instance doesn’t have this skill, then select the contents of the SalesEnablementChatbotIntegration folder and compress them to a single zip file. On the Skills page in your ODA instance, click Import Skill and import the zip file that you just created. Directly compressing the SalesEnablementChatbotIntegration folder will result in an error upon import.
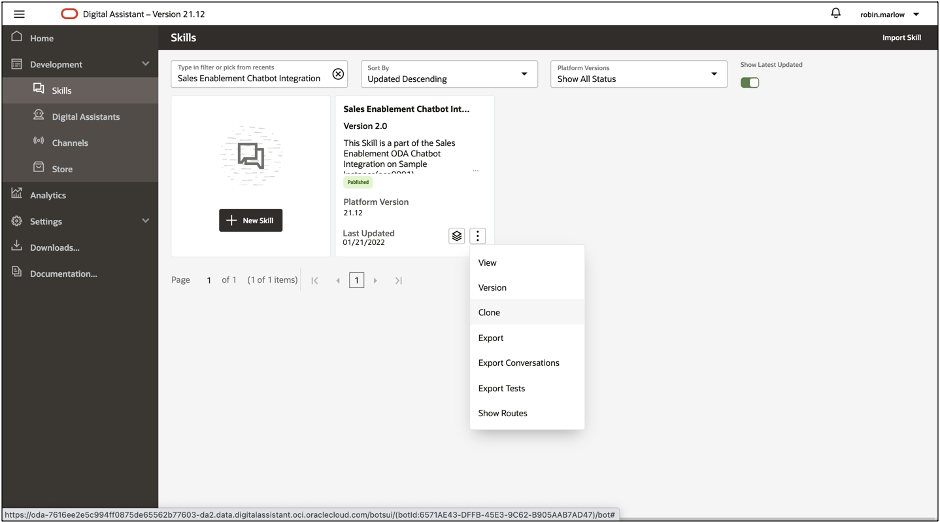
On the Sales Enablement Chatbot Integration skill card, click the options icon and then Clone.
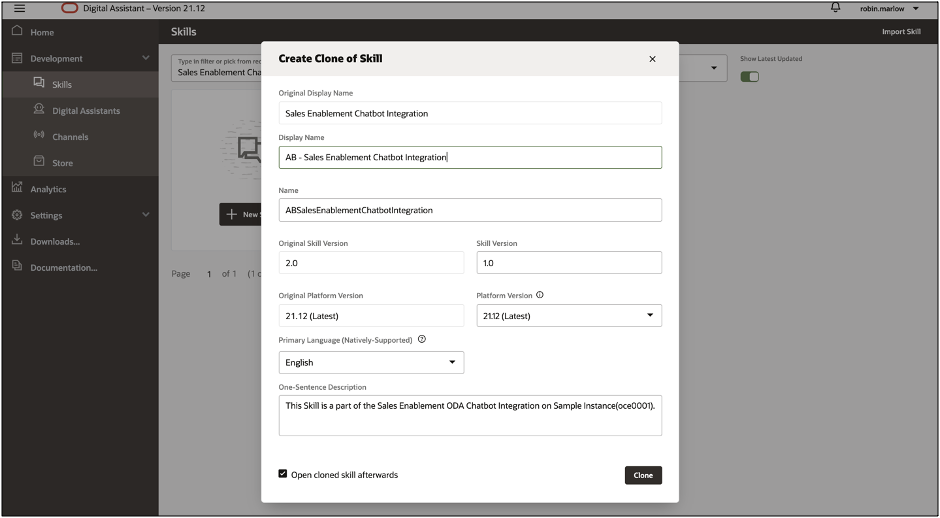
Give the cloned skill a unique display name; for example, add your initials at the beginning, such as ‘AB - Sales Enablement Chatbot Integration’. Leave all other values unchanged. Select Open cloned skill afterwards and then click Clone.
Note: The name must begin with a letter and may contain only letters, numbers, periods, and underscores. It can’t exceed 100 characters.
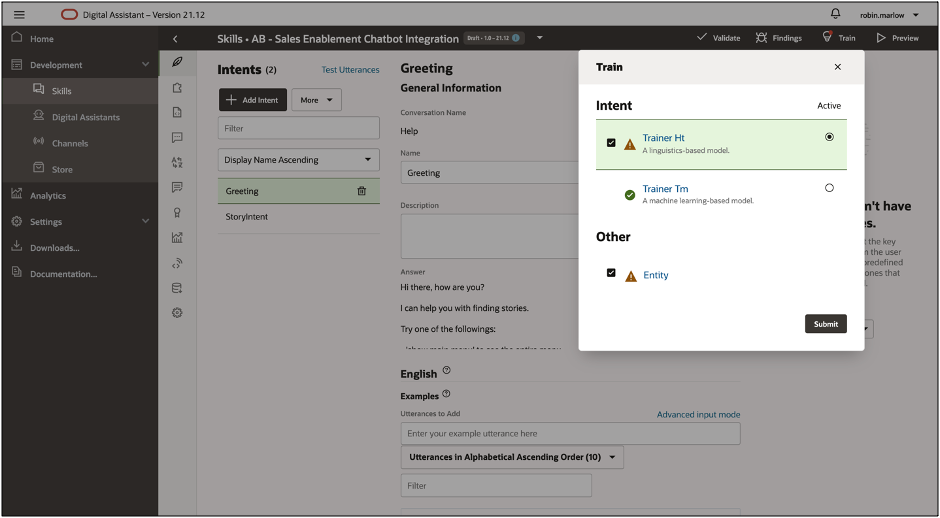
Click Train, make sure that Trainer Ht is selected, and then click Submit to train the skill.
Note: You use Ht training in this tutorial, which is quick but superficial. For production work, you should use Tm training, which results in better intent resolution.
Sales Enablement Chatbot Integration Skill
Skills are individual chatbots that are designed to interact with users and fulfill specific types of tasks, such as ordering food, making reservations, and changing contact information. The ODAChatbot skill helps a user find appropriate sales enablement announcements and stories through a combination of text messages and simple UI elements such as selection lists.
Before you dive into digital assistant and skill development, here are some concepts you’ll want to become familiar with:
Intents — Categories of actions or tasks users expect your skill to perform for them. In our skill, there are two intents:
- Greetings: This intent shows a welcome message to the user.
- StoryIntent: This intent shows appropriate menus and content items from Oracle Content Management.
Entities — Variables that identify key pieces of information from user input that enable the skill to fulfill a task. In our skill, there are seven entities:
- TopMenu: This is a value list entity containing the menu items.
- HomeMenu: This is a value list entity containing the categories from the Home menu.
- CafeSupremoMenu: This is a value list entity containing the categories from the Cafe Supremo menu.
- LearningMenu: This is a value list entity containing the categories from the Learning menu.
- SellingMenu: This is a value list entity containing the categories from the Selling menu.
- MenuBag: This is a composite bag entity of menu item entities; that is, the HomeMenu, CafeSupremoMenu, LearningMenu and SellingMenu entities.
- StoryCategory: This is a value list entity containing all the story categories.
Both intents and entities are common Natural Language Processing (NLP) concepts. NLP is the science of extracting the intention of text and relevant information from text.
Components — These provide your skill with various functions so that it can respond to users. These can be generic functions like outputting text, or custom components that can return information from a backend and perform custom logic. In our skill, there is one custom component service, sales-enablement-custom-component, which fetches the content items from Oracle Content Management via REST APIs.
Dialog flow — The definition for the skill-user interaction. The dialog flow describes how your skill responds and behaves according to user input.
Channels — Users can access digital assistants and skills through messaging platforms or through client messaging apps. A single digital assistant or skill can have several channels configured for it so that it can run on different services simultaneously. In this tutorial, we use the Oracle Web channel to access our skill in a web application.
To learn more about Oracle Digital Assistant and skills, check out the product documentation.
Set Up and Configure the Custom Component Service
The oda-custom-component folder in the code base is the ODA custom component which is used to fetch content from a secure channel on OCM. First, we need to download dependencies for this ODA custom component. Run the following command from the site-integration-chatbot-sample/oda-custom-component directory:
npm installNext, we need to configure a few pieces of information so that our Oracle Content Management Content SDK (and any other requests) can target the correct instance URL and API version with the correct channel token.
These values are used in components/server-config-utils.js to instantiate a new delivery client.
Open the server-config-utils.js file in a text editor. You’ll see the following:
    contentServer: "https://instance-name.cec.ocp.oraclecloud.com",
    contentVersion: "v1.1",
    channelToken: "4b7b22ad5f5245f28579641d5489a98f",
Change each key-value pair to reflect your instance URL, the API version you want to target, and the channel token associated with the publishing channel of the CafeSupremoSalesEnablement site.
Work with the Oracle Content Management Content SDK
Oracle Content Management offers an SDK to help discover and use content in your applications. The SDK is published as an NPM module, and the project is hosted on GitHub.
Learn more about the SDK here.
The SDK has been registered as a runtime dependency of the ODA custom component in the package.json file.
Use the Content SDK to Fetch Content
We can now leverage the Content SDK to fetch content for the chatbot skill through the ODA custom component.
The components/services.js folder contains the code for getting data from Oracle Content Management using the Content SDK.
The components/server-config-utils.js file imports the Content SDK and then creates a delivery client using the configuration specified in it.
The following command imports the SDK:
createDeliveryClient = require('@oracle/content-management-sdk');The following command creates the delivery client:
deliveryClient = createDeliveryClient(serverconfig);The components/services.js file contains all the code to get the content items for the chatbot. There’s one main function to fetch all the content for the chatbot.
The following functions are called to retrieve all of the data for a particular taxonomy category from the CafeSupremoSalesEnablement Repository:
function getStoryData(client, categoryName) {
     if (categoryName === 'Announcements') {
       return fetchItemsForAnnouncements(client, false)
         .then((topLevelItem) => {
           const { totalResults } = topLevelItem;
           const promises = [];
           // for each item, retrieve the result object and add it to the promise
           topLevelItem.items.forEach((item) => {
             promises.push(
               retrieveAnnouncementsObject(client, item.id)
                 .then((resultobject) => ({ ...resultobject })),
             );
           });
           // execute all the promises before returning the data
           return Promise.all(promises)
             .then((arrayOfItems) => ({
               totalResults,
               items: arrayOfItems.flat(),
             }));
         });
     }
     return fetchItemsForCategoryName(client, categoryName, false)
       .then((topLevelItem) => {
         const { totalResults } = topLevelItem;
         const promises = [];
         // for each item, retrieve the result object and add it to the promise
         topLevelItem.items.forEach((item) => {
           promises.push(
             retrieveResultObject(client, item.id)
               .then((resultobject) => ({ ...resultobject })),
           );
         });
         // execute all the promises before returning the data
         return Promise.all(promises)
           .then((arrayOfItems) => ({
             totalResults,
             items: arrayOfItems.flat(),
           }));
       });
    }
The getStoryData function makes two different sets of calls depending on whether the request is made for the announcements or a story category.
Announcements Data
It requires one data call to get all the content items for the announcements.
The getStoryData function calls fetchItemsForAnnouncements, which gets all the content items of type ‘SE2-Announcements’. Next, the retrieveAnnouncementsObject function is called and the title and summary fields of the result object are populated with the data from fetchItemsForAnnouncements.
function fetchItemsForAnnouncements(client, limit) {
     return client.getItems({
       q: '(type eq "SE2-Announcement")',
       fields: 'all',
       expand: 'all',
       limit: limit ? 4 : 100,
       totalResults: true,
     });
    }
Story Data
It requires several data calls to get all the content items for the Stories.
First, we get all the content items for the user requested category.
For each content item we get, we make a call to retrieve the media URL.
The getStoryData function calls fetchItemsForCategoryName, which gets all the content items of type ‘SE2-Story’ and taxonomy category name as specified by the user.
function fetchItemsForCategoryName(client, categoryName, limit) {
     return client.getItems({
       q: `(taxonomies.categories.name eq "${categoryName}" and type eq "SE2-Story")`,
       fields: 'all',
       expand: 'all',
       limit: limit ? 4 : 100,
       totalResults: true,
     });
    }
The content item fetched by fetchItemsForCategoryName has a media id field. The retrieveMediaURL function uses this media id to fetch the media URL.
function retrieveMediaURL(client, identifier) {
     return client.getItem({
       id: identifier,
       fields: 'all',
       expand: 'all',
     }).then((asset) => {
       let url = null;
       if (asset.fields && asset.fields.renditions && asset.fields.fileType !== 'mp4') {
         const object = asset.fields.renditions.filter((item) => item.name === 'Small')[0];
         const format = object.formats.filter((item) => item.format === 'jpg')[0];
         const self = format.links.filter((item) => item.rel === 'self')[0];
         url = self.href;
       } else {
         url = asset.fields.native.links[0].href;
       }
       return [url, asset.fields.fileType];
     });
    }
Package and Deploy the Custom Component Service
You can deploy custom components to either an embedded container for a skill, a remote Node server, or Oracle Mobile Hub. In this tutorial, you’ll deploy your custom component service to an embedded container. To accomplish this, you first need to package the custom component service into a deployable file:
Save your work in your JavaScript IDE.
Open a terminal window and navigate into the site-integration-chatbot-sample/oda-custom-component folder.
In the oda-custom-component folder, enter the following npm command
bots-node-sdk packBecause of the prepack script in the package.json file, the command first executes the prepack command to verify the package. The command then packages the Node project and its dependencies into a deployable tarball called oda-custom-component-1.0.0.tgz.
Your tarball must include all dependencies except for devDependencies.
In your chatbot skill on ODA instance, click the Components icon in the left bar to open the component service page. Click + Service to create a new service.
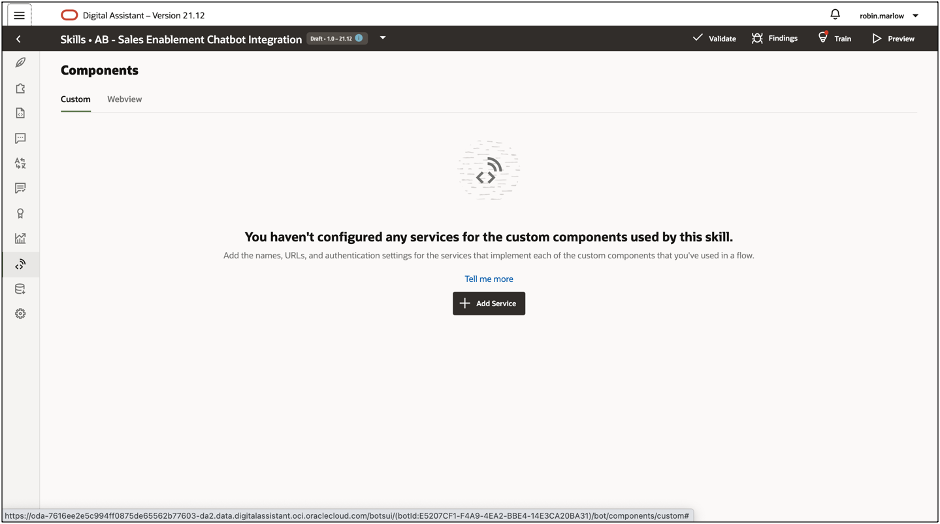
In the Create Service dialog, do the following:
In the Name field, enter SalesEnablementCustomComponent.
In the Description field, you can add an optional description.
Make sure that the Embedded Container option is selected.
Drag and drop or upload the oda-custom-component-1.0.0.tgz file into the Package File field.
Click Create.
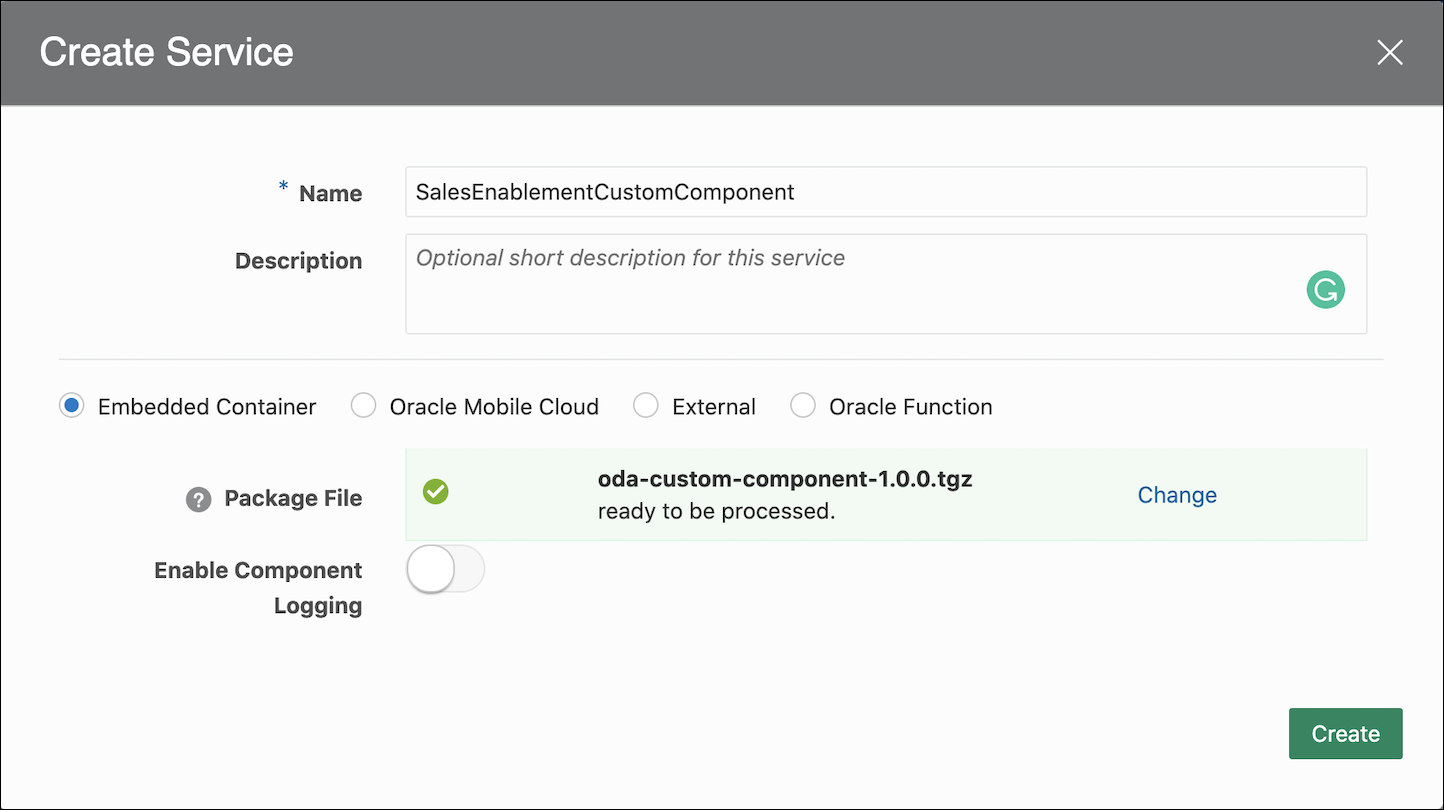
Wait for the Status field to show Ready, which may take a few seconds.
With the custom component service deployed to the skill’s embedded container, you are ready to test the component.
To learn more about Oracle Digital Assistant and custom components, check out the training documentation.
Create an Oracle Digital Assistant Web Channel
You’ll create an Oracle Digital Assistant user channel that enables an Oracle Web client to access your skill. To ensure that only your web clients can use this channel, you’ll configure it to require client authentication.
In your Oracle Digital Assistant instance, open the navigation menu on the left, then click Development, and then Channels.
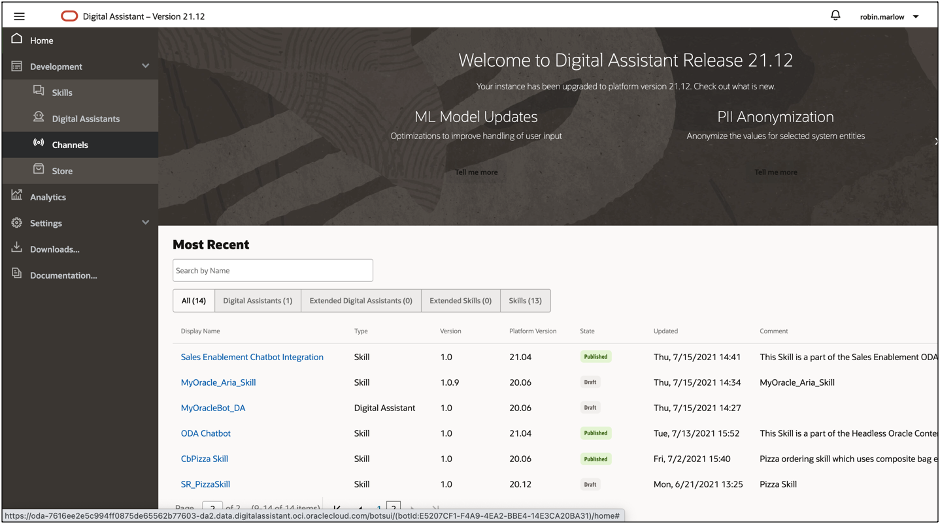
On the Channels page, click + Channel to add a channel.
On the Create Channels page, enter this information as shown in the screenshot below:
- Name: A unique name that begins with a letter and contains only letters, numbers, periods, and underscores (_), for example AB_SalesEnablementChatbotIntegration.
- Description: (Optional) What the channel is used for.
- Channel Type: Oracle Web.
- Allowed Domains: * (A single asterisk allows any domain.)
- Client Authentication Enabled: Leave it in the off position.
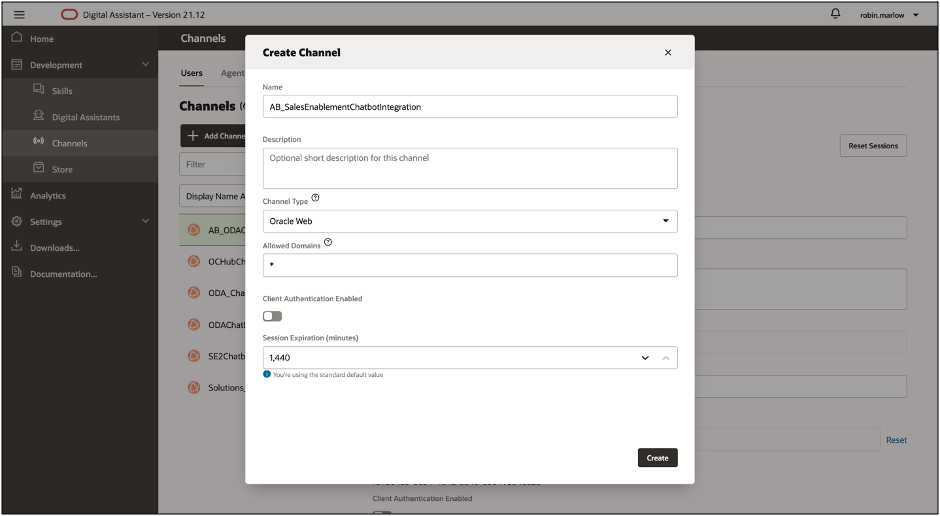
Click Create.
In the Route To dropdown list, select the skill that you created for this tutorial.
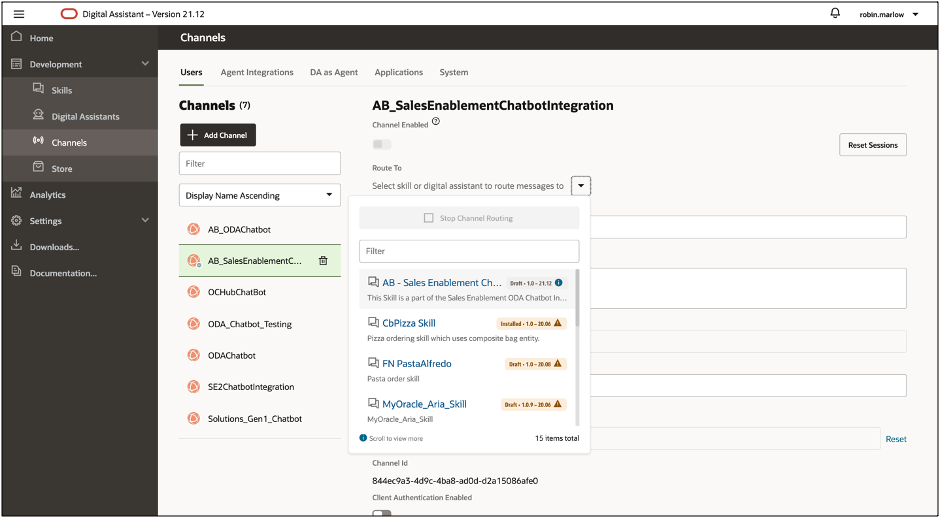
Switch the Channel Enabled option to On.
Note the channel ID that’s shown for this channel. Later in this tutorial, you’ll use this value in your web app.
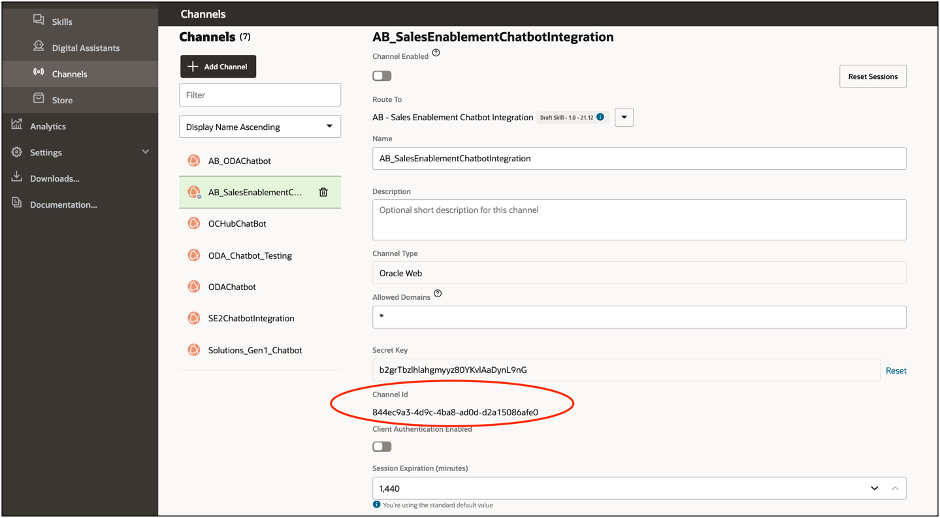
Also note the Oracle Digital Assistant host and domain (which is referenced as the fully-qualified domain name) from the instance URL that appears in your web browser’s address field, for example oda-xxxx.data.digitalassistant.oci.oraclecloud.com. You’ll use this value later in the tutorial.
Your instance is now set up for you to connect a chatbot on your website to the skill.
Task 3: Set Up the Oracle Content Management Custom Component
Now you need to import the SE2-ODA-Chatbot custom component into your Oracle Content Management instance.
Setting up the Oracle Content Management custom component is a three-step process:
- Add Oracle Digital Assistant Web SDK
- Import the SE2-ODA-Chatbot custom component
- Publish the SE2-ODA-Chatbot custom component
Add Oracle Digital Assistant Web SDK
We need to add ODA web-sdk.js file in the SE2-ODA-Chatbot custom component. The SDK connects to the Oracle Chat Server, which stands between Oracle Digital Assistant and the skill (or digital assistant). The chat server then passes messages to the skill for processing and delivers the skill’s response to the client.
Download the latest version of Oracle Web SDK and unzip into a folder of your choice. You can also go to the download page for this SDK from your Digital Assistant instance by opening the side menu and then clicking Downloads.
Copy native-client-sdk-js/web-sdk.js file from your Oracle Web SDK folder and put it in the SE2-ODA-Chatbot/assets/chatbot folder.

Import the SE2-ODA-Chatbot Custom Component
To import the SE2-ODA-Chatbot custom component:
Navigate to site-integration-chatbot-sample folder and compress the SE2-ODA-Chatbot folder to a zip file.
Log in to Oracle Content Management web interface as an administrator.
Click Developer in the left navigation menu and then click View All Components. If you don’t see the Developer option, you don’t have the required user roles.
On the Components page, click Create and choose Import Component.
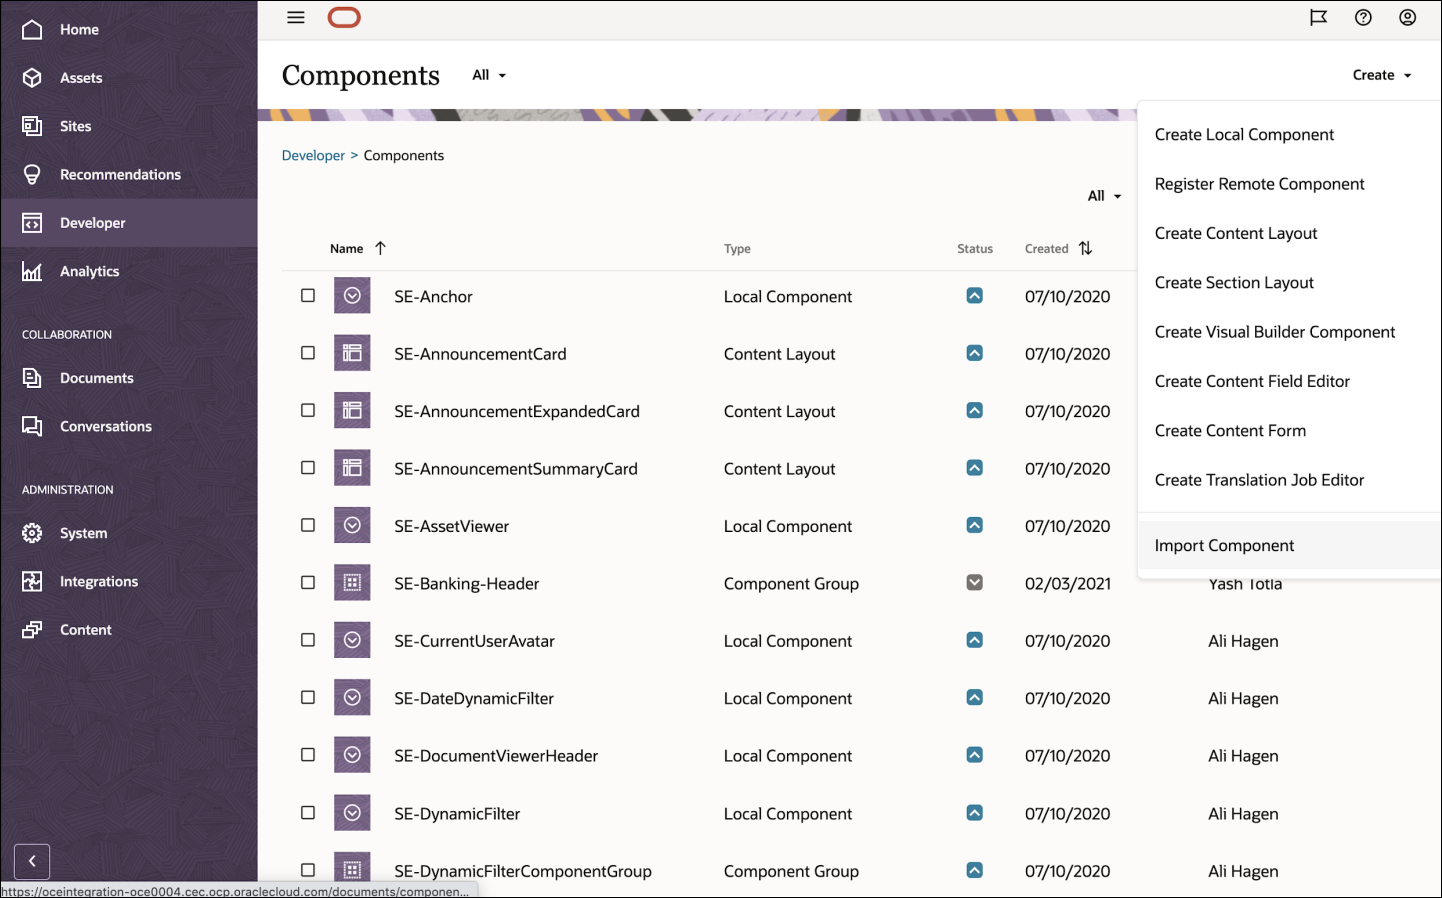
Go to the folder in your Oracle Content Management instance where you want to upload the component or create a new folder. Click Upload , then find the SE2-ODA-Chatbot.zip file and click Open.
Select the SE2-ODA-Chatbot.zip file and click OK.

If the component or layout name or ID already exists, you’re prompted to resolve the conflicts. You may need to create a new component or you can overwrite the existing component with the imported version.
After the SE2-ODA-Chatbot component has been uploaded successfully, it’s listed on the Components page.
Publish the SE2-ODA-Chatbot Custom Component
Now you need to publish the SE2-ODA-Chatbot component that you imported:
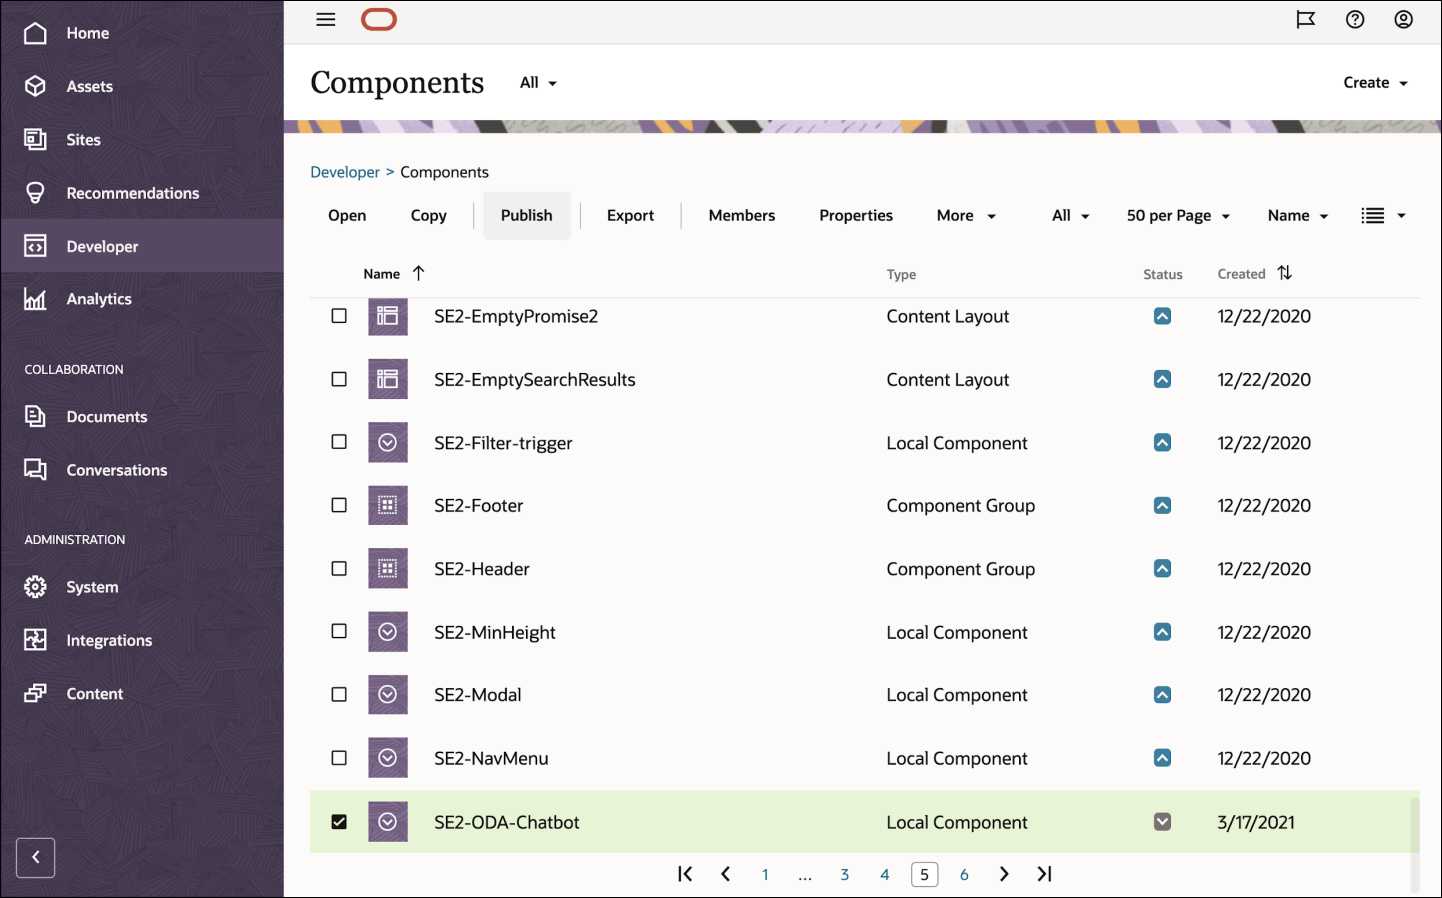
On the Components page, select the SE2-ODA-Chatbot component and click Publish from the actions bar or right-click menu.
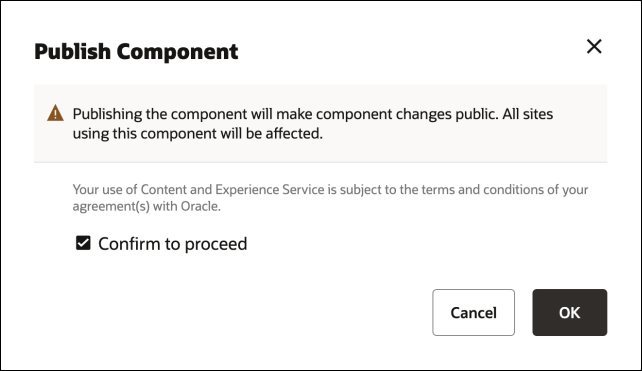
In the Publish Component dialog, select Confirm to proceed and click OK.
Once the SE2-ODA-Chatbot component has been published, a notification is displayed at the top of the page to confirm this.
Task 4: Add the Custom Component to the Website
As the final step, we’ll add the SE2-ODA-Chatbot custom component to the sales enablement site by dragging and dropping it in Site Builder.
Adding our chatbot to the sales enablement site is a two-step process:
Edit the Website
The first step is to add a chatbot to the sales enablement site using the SE2-ODA-Chatbot custom component:
Log in to the Oracle Content Management web interface and open the Sites page.
Select your newly created website and choose Open from the actions bar or right-click menu to open it in Site Builder.
Put the site into edit mode by toggling the View/Edit switch.
Enter a name for the update and click OK.
In the left sidebar, click Components and then Custom to show the list of custom components.
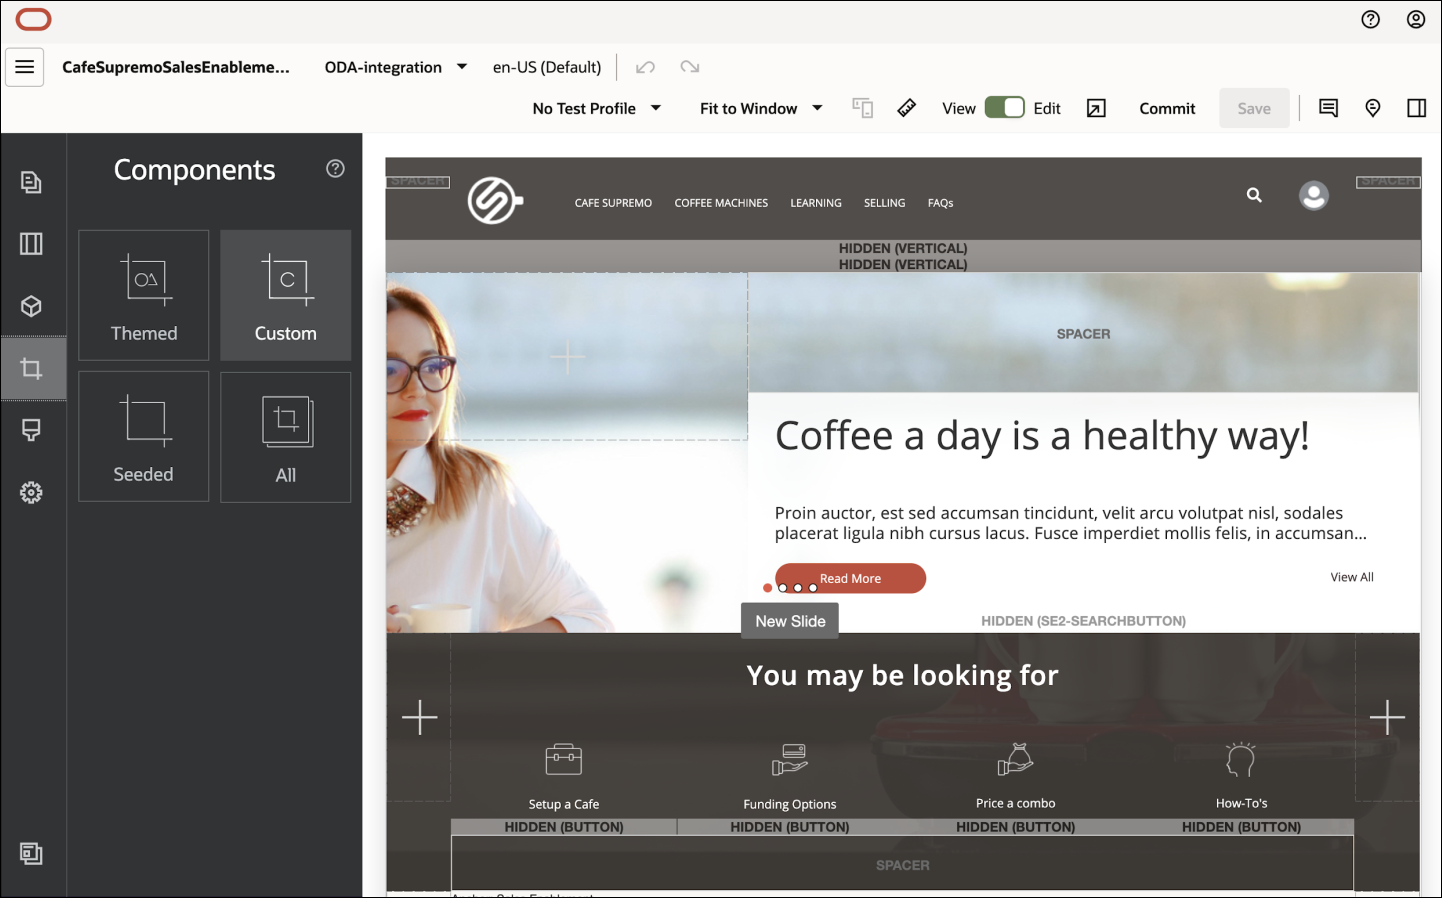
Now let’s add an ODA chatbot widget to the home page using the SE2-ODA-Chatbot custom component. Drag and drop the SE2-ODA-Chatbot component anywhere on the page. Click the title of the SE2-ODA-Chatbot component to make sure its parent is what you wanted. This is a useful way to see where any component resides within the structure of the web page.
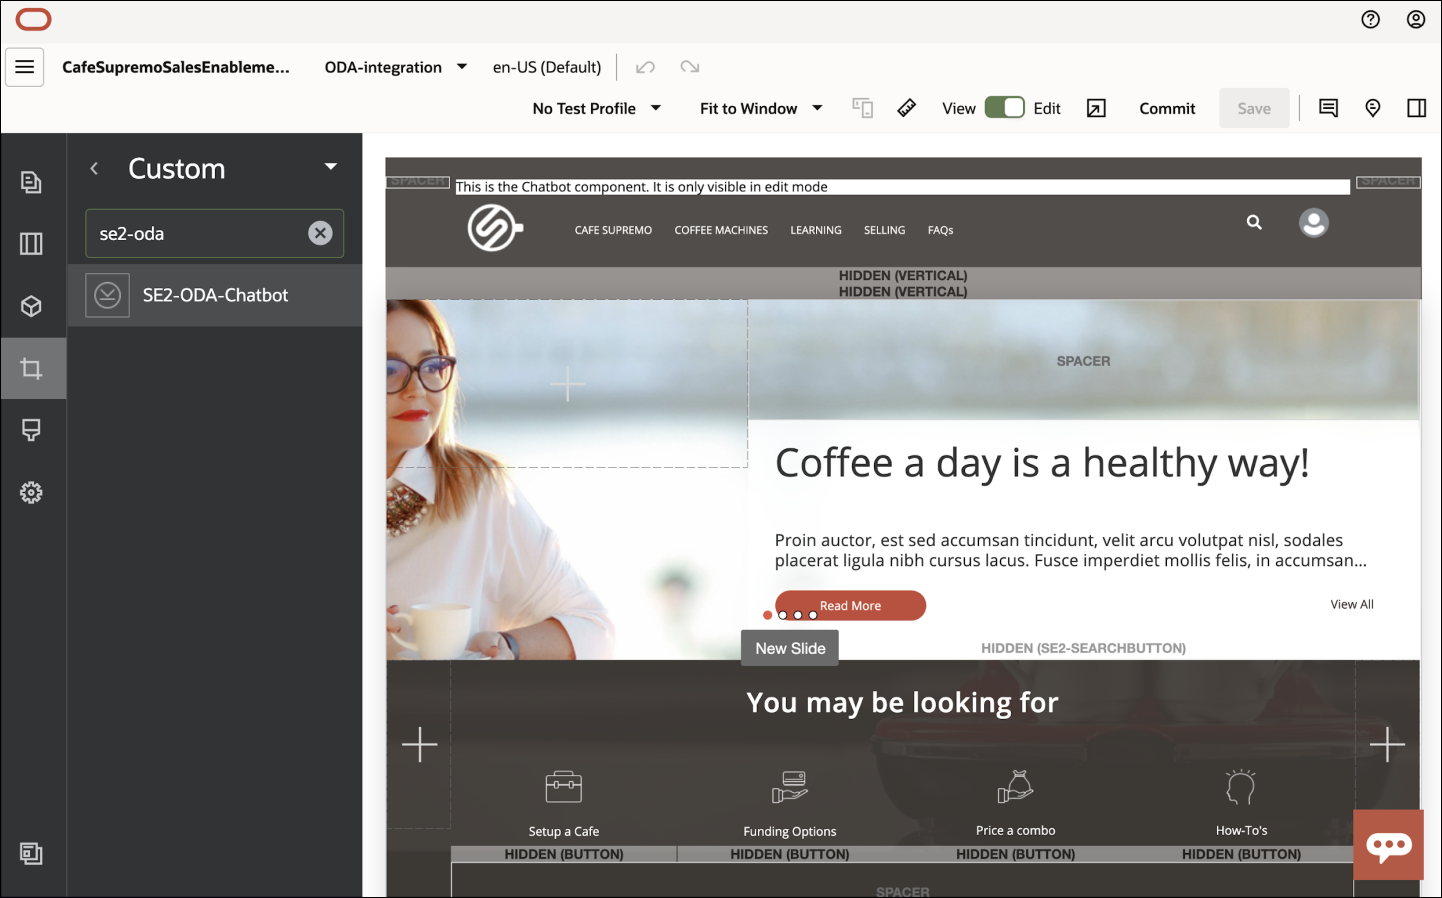
Complete the custom settings in the General tab:
- ODA URI: The ODA instance URL (without http://).
- Channel Id: The ODA web channel ID.
- Chatbot Title: The title of the chat widget that is displayed in the header.
- Chatbot Config: Optionally, provide any additional configuration for the ODA chatbot as a JSON object (use double quotes for any key and value strings).
Repeat the steps above to add the chatbot on any page of your website.
Publish the Website
Now that you’ve successfully added the chatbot to your website, you can publish it to make it available online for your users to see.
Once everything looks good, commit your changes to the base website by clicking Commit in the upper-right corner of Site Builder.
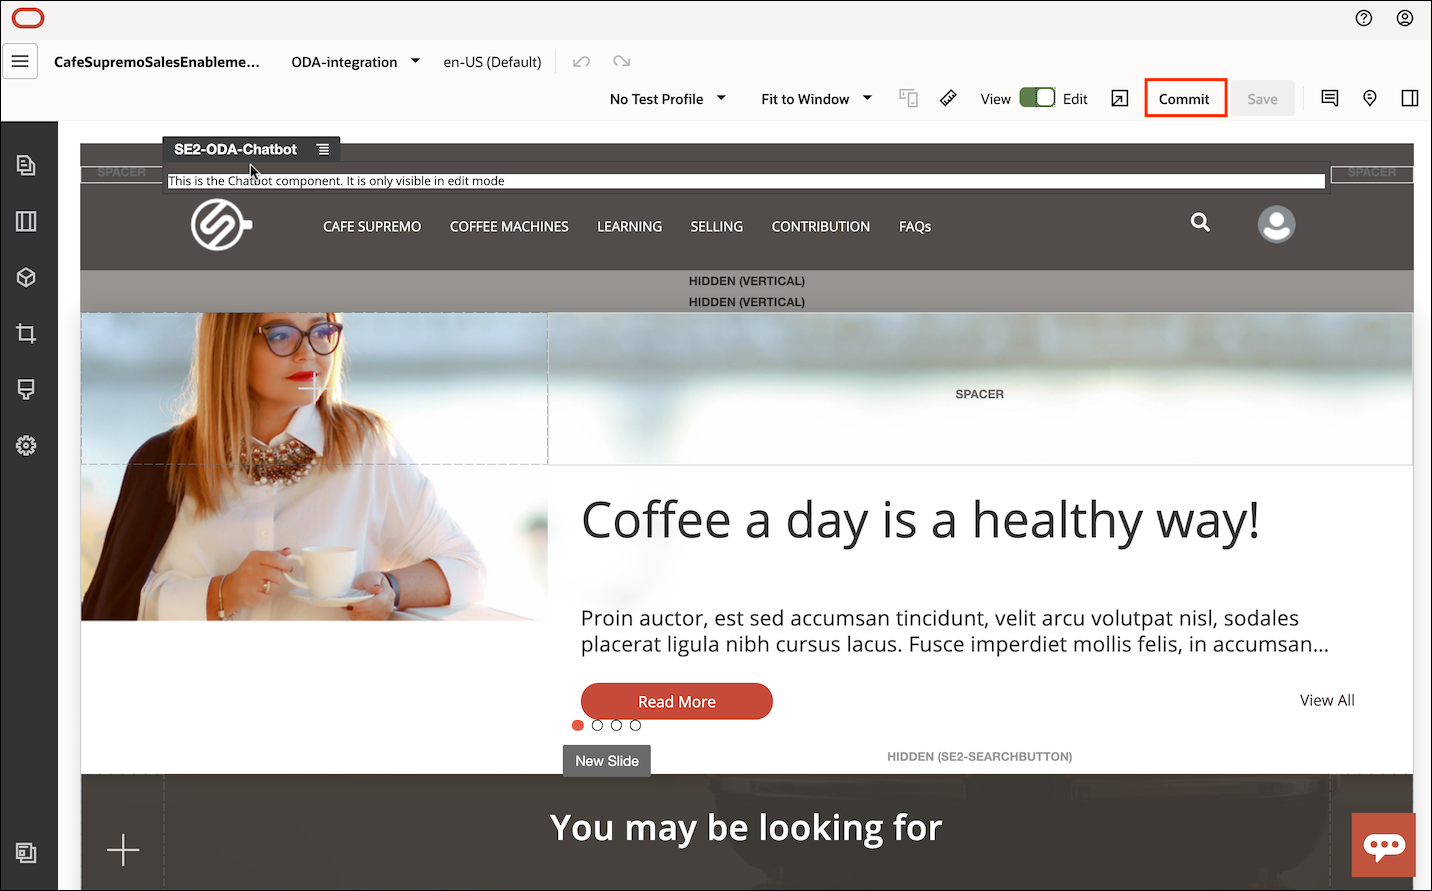
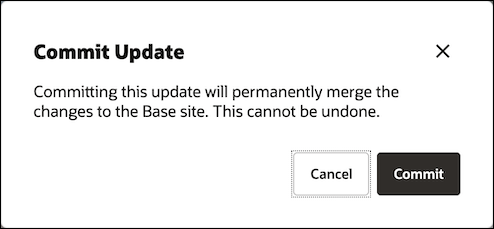
In the Commit Update dialog, click Commit.
Once the changes have been committed, the website is ready to be published. Close Site Builder.
Click Sites in the left navigation menu in the Oracle Content Management web interface and select the website.
Click Sidebar on the menu bar and then choose Properties or choose Properties from the right-click menu.
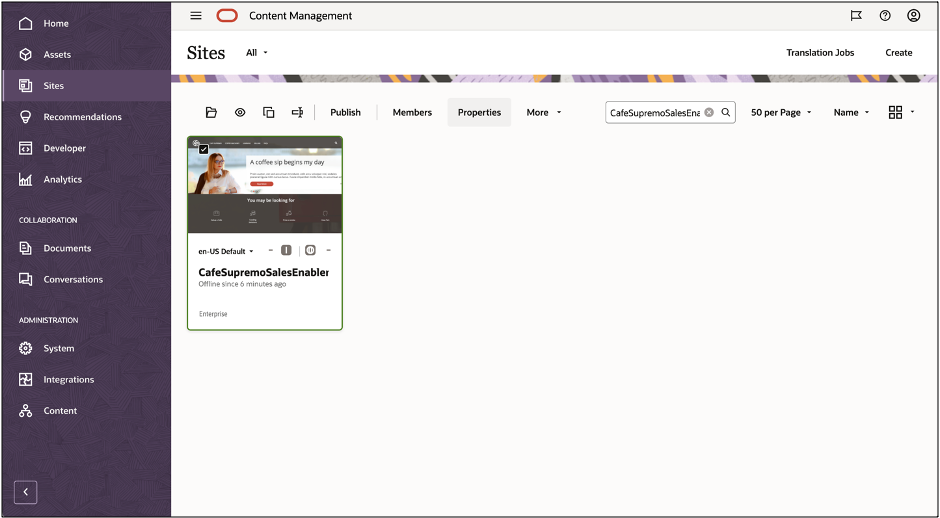
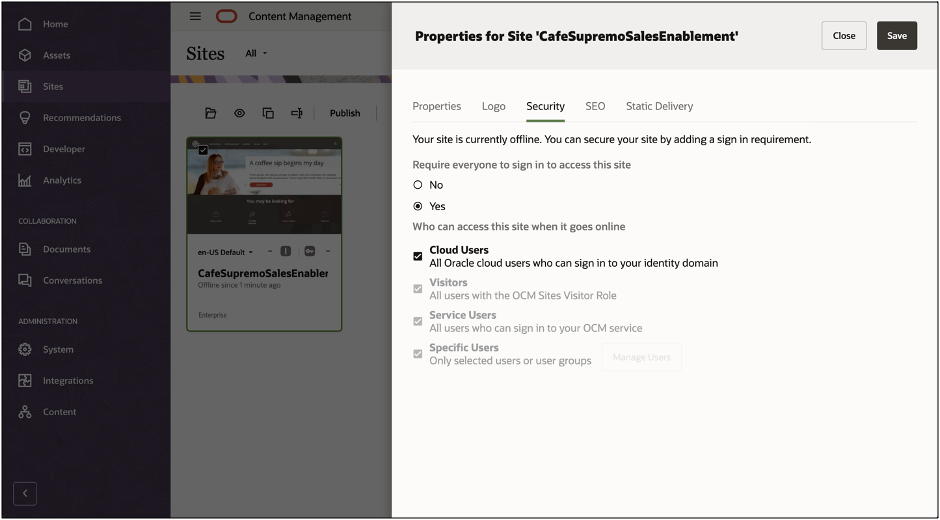
In the properties dialog, click the Security tab and then select Yes in the Require everyone to sign in to access this site field. In the Who can access this site when it goes online field, select the Cloud users check box and click Save.
Choose Publish from the actions bar or right-click menu.
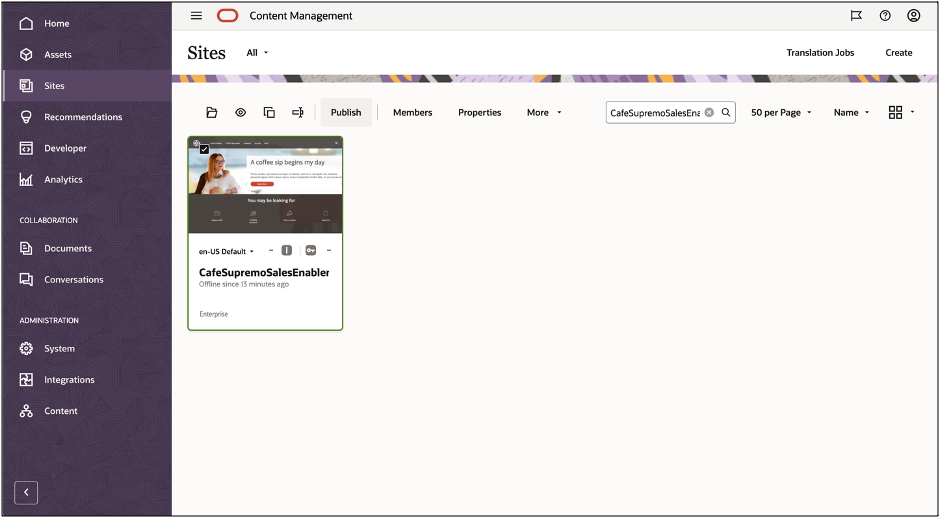
Once the website has been published, a notification is displayed at the top of the page to confirm this.
On the Sites page, select the website again, and then choose Bring Online from the actions bar or right-click menu. In the Bring Online dialog, choose Confirm to proceed and click Bring Online.
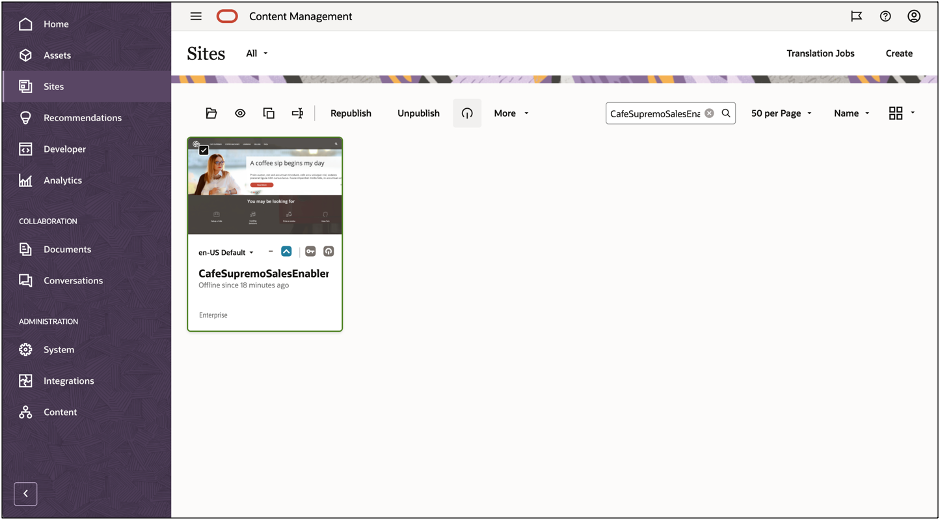
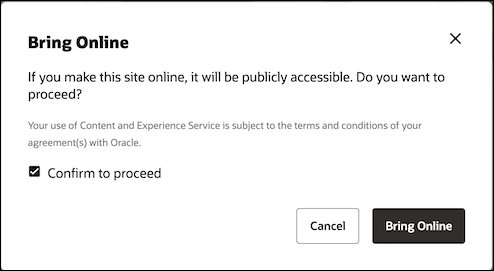
That’s it. Your website is now online and others can view it.
To view your website, select View from the actions bar or right-click menu, or open the URL in your web brower.
How to Use the Chatbot
Here are some ways that you can use the chatbot in your site:
Ask the bot for help to get started.
Ask the bot “how to use the bot.”
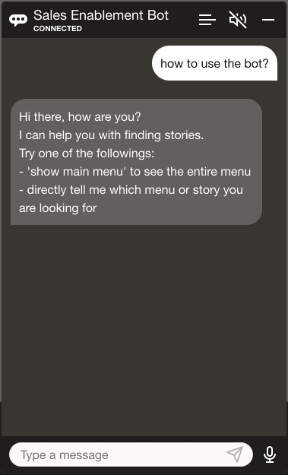
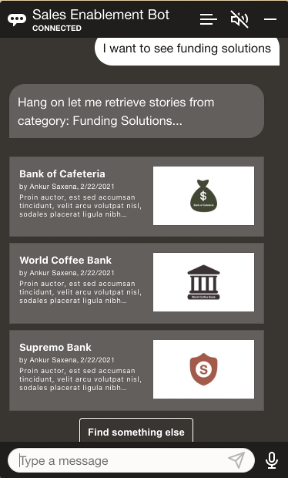
Find stories by typing a query.
Ask the bot “I want to see funding solutions” and click on any story card to open it in the website.
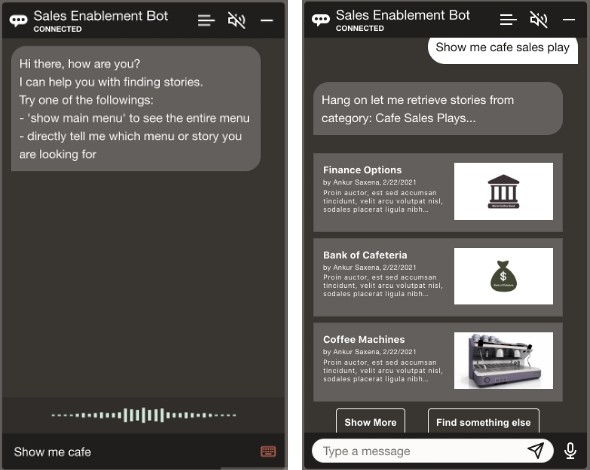
Find stories by simply speaking a query and get audio response.
Turn on audio response to use the audio input and say “Show me cafe sales plays.”
You can click, say, or type “show more” to see more stories in the category, or “find something else” to start a new query.
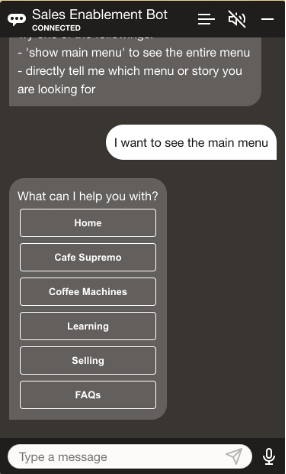
See the different menu items.
Ask the bot “I want to see the main menu.”
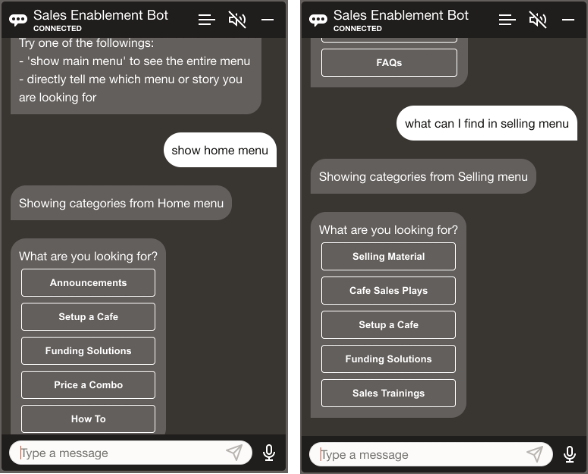
Learn more about a specific menu.
Ask the bot “show home menu” or click on any menu item from the main menu list, or type or say “what can I find in selling menu.”
Integrate Oracle Digital Assistant into a Website Built in Oracle Content Management
F41640-02
January 2022
Copyright © 2021, 2022, Oracle and/or its affiliates.
Primary Author: Oracle Corporation