Build an Oracle Content Management VBCS Public Gated Form Component
You can build a local Oracle Content Management component that uses REST APIs exposed by business objects in VBCS to deliver a simple, anonymous web form that captures visitor details to allow the visitor to download a document.
VBCS Configuration
-
Allow Cross-Origin Resource Sharing (CORS):
-
Choose Visual Builder , then Settings, and then Allowed Origins.
-
Click New Origin and enter the URL of your Oracle Content Management server for Origin Address.
-
Click the check mark to save.
-
-
Create a new Application.
-
Configure the app to allow anonymous access.
-
Open Application Settings .
.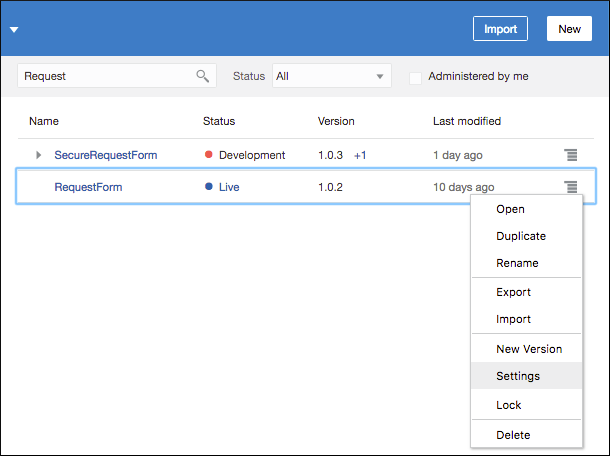
Description of the illustration vbcs_application_settings.png -
On the Settings page, choose User Roles.
-
Select Allow anonymous access.
-
-
Create a business object:
-
Add fields.
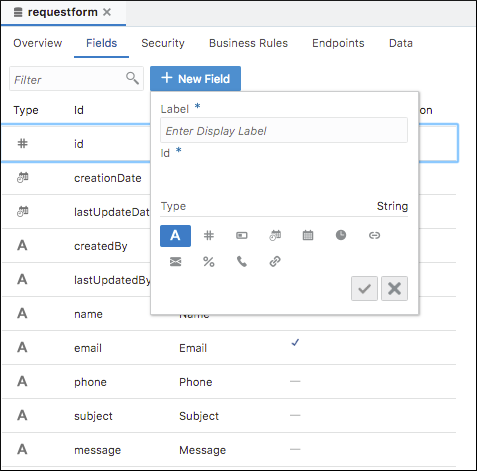
Description of the illustration vbcs_add_fields.png -
Enable role-based security.
-
Grant Anonymous User the Create permission.
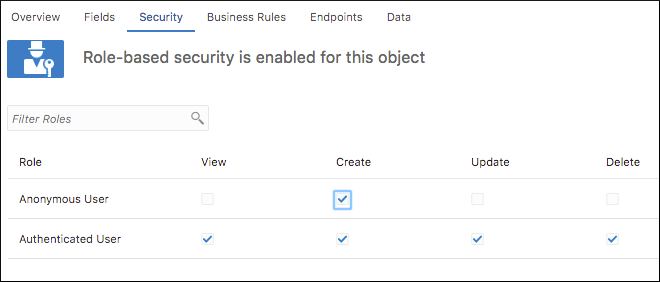
Description of the illustration vbcs_anonymous_user.png
-
Build an Oracle Content Management Local Component
Assumptions:
-
The VBCS app name is "RequestForm".
-
The business object name is "registration" and it contains the custom fields.
-
firstName (required)
-
lastName (required)
-
email (required)
-
phone
-
company
-
jobTitle
-
Modify assets/render.js
-
Define the component template as follows.
<!-- ko if: initialized --> div class="form"> <!-- ko if: !showDownload() --> <h1 style="text-align: center;">Fill out the form to access the document</h1> <!-- ko if: requestSuccessMsg --> <div class="request-msg green" data-bind="text: requestSuccessMsg"></div> <!-- /ko --> <!-- ko if: requestFailMsg --> <div class="request-msg red" data-bind="text: requestFailMsg"></div> <!-- /ko --> <label class="required-field" for="firstname">First Name</label> <input type="text" id="firstname" name="firstname" required placeholder="Your first name. . ." data-bind="value: firstName"/> <label class="required-field" for="lastname">Last Name</label> <input type="text" id="lastname" name="lastname" required placeholder="Your last name. . ." data-bind="value: lastName"/> <label class="required-field" for="email">Business E-mail</label> <input type="text" id="email" name="email" required placeholder="Your email. . ." data-bind="value: email"/> <label for="phone"></label>Phone</label> <input type="text" id="phone" name="phone" data-bind="value: phone"/> <label for="company">Company</label> <input type="text" id="company" name="company" data-bind="value: company"/> <label for="jobtitle"></label>Job Title</label> <input type="text" id="jobtitle" name="jobtitle" data-bind="value: jobTitle"/> <button data-bind="click: sendRequest, enable: canSubmit">Accept the document</button> <!-- /ko --> <!-- ko if: showDownload() --> <div class="download"> <h2>Thanks for your registration. Please click the button to download. </h2> <button data-bind="click: startDownload">Download</button> <button data-bind="click: closeDownload">Close</button> </div> <!-- /ko --> </div> <!-- note that the component has completed rendering into the page --> <div class="scs-hidden" data-bind="scsRenderStatus: {'id': id, 'status': 'complete'}"></div> <!-- /ko --> -
Create the observables for the fields in the Knockout ViewModel.
self.initialized = ko.observable(false);
self.requestSuccessMsg = ko.observable();
self.requestFailMsg = ko.observable();
self.VBCSServerUrl = ko.observable();
self.showDownload = ko.observable(false);

self.firstName = ko.observable();
self.lastName = ko.observable();
self.email = ko.observable();
self.phone = ko.observable();
self.company = ko.observable();
self.jobTitle = ko.observable();
self.canSubmit = ko.computed(function () { return self.firstName() && self.lastName() && self.email(); }, self); -
Handle required fields.
Enable the Submit button only after all required fields have values.
-
Obtain the VBCS connection.
After you configure a VBCS connection, there are two ways to get the connection:
-
From siteinfo at site runtime -
From Integrations in Site Builder
var getVBCSServerURL = function () { var serverPromise = new Promise(function (resolve, reject) { // First try to get from siteinfo var siteConnections = SCSRenderAPI.getSiteProperty('siteConnections'); var serverUrl = siteConnections && siteConnections.VBCSConnection; if (serverUrl) { console.log('Get VBCS server from siteinfo: ' + serverUrl); resolve({'url': serverUrl}); } else { // Get from integrations var configUrl = '/documents/web?IdcService=AF_GET_APP_INFO_SIMPLE&dAppName=VBCS'; $.ajax({ type: 'GET', dataType: 'json', url: configUrl, success: function (data) { var appInfo = data.ResultSets.AFApplicationInfo; var enabled; if (appInfo) { for (var i = 0; i < appInfo.fields.length; i += 1) { if (appInfo.fields[i].name === 'dAppEndPoint') { serverUrl = appInfo.rows[appInfo.currentRow][i]; } else if (appInfo.fields[i].name === 'dIsAppEnabled') { enabled = appInfo.rows[appInfo.currentRow][i]; } if (serverUrl && enabled) { break; } } if (enabled !== '1') { serverUrl = ''; } } console.log('Get VBCS server from Idc Service: ' + serverUrl); resolve({'url': serverUrl}); }, error: function (xhr, status, err) { console.log('Request failed: url:' + configUrl + ' status: ' + status + ' error: ' + err); resolve({'url': serverUrl}); } }); } }); return serverPromise; }; -
-
Submit the request.
self.sendRequest = function (data, event) { var vbcsServer = self.VBCSServerUrl(); var appName = 'requestform', appVersion = 'live', businessObject = 'Registration'; var url = vbcsServer + '/rt/' + appName + '/' + appVersion + '/resources/data/' + businessObject; var payload = { 'firstName': self.firstName(), 'lastName': self.lastName(), 'email': self.email(), 'phone': self.phone(), 'company': self.company(), 'jobTitle': self.jobTitle() }; $.ajax({ type: 'POST', url: url, beforeSend: function (xhr) { xhr.setRequestHeader('Content-type', 'application/vnd.oracle.adf.resourceitem+json'); }, data: JSON.stringify(payload), dataType: 'json', success: function (data) { self.requestFailMsg(''); self.requestSuccessMsg('Request has been submitted successfully'); self.firstName(''); self.lastName(''); self.email(''); self.phone(''); self.company(''); self.jobTitle(''); self.showDownload(true); }, error: function (jqXhr, textStatus, errorThrown) { console.log('Error:'); console.log(jqXhr); self.requestSuccessMsg(''); self.requestFailMsg('Failed to submit the request'); } }); }; -
Create a trigger to download a document.
{
	"id": "ECVBCS-Gated-Form",
	"settingsData": {
		"settingsHeight": 90,
		"settingsWidth": 300,
		"settingsRenderOption": "dialog",
		"componentLayouts": [],
		"triggers": [{
			"triggerName": "VBCSGatedFormSubmitted",
			"triggerDescription": "VBCS gated form submitted",
			"triggerPayload": [{
				"name": "payloadData",
				"displayName": "Document URL"
            		}]
        	}],
		"actions": []
	},
}
Register the trigger in
appinfo.json.self.raiseTrigger = function (triggerName) { SitesSDK.publish(SitesSDK.MESSAGE_TYPES.TRIGGER_ACTIONS, { 'triggerName': triggerName, 'triggerPayload': { 'payloadData': 'https://docs.oracle.com/en/cloud/paas/content-cloud/developer/developing-oracle-content-management-cloud.pdf' } }); }; self.startDownload = function (data, event) { console.log('Raise trigger: VBCSGatedFormSubmitted'); self.raiseTrigger("VBCSGatedFormSubmitted"); // matches appinfo.json };• Raise the trigger in
\render.js.
Modify styles/design.css
Add the following css to design.css.
.form {
    font-family: "Helvetica Neue", "Segoe UI", sans-serif-regular, Helvetica, Arial, sans-serif;
    font-size: 14px;
}
.form input[type=text] {
    width: 100%;
    padding: 12px 20px;
    margin: 8px 0;
    display: inline-block;
    border: 1px solid #ccc;
    border-radius: 4px;
    box-sizing: border-box;
}
.form textarea {
    width: 100%;
    padding: 12px 20px;
    margin: 8px 0;
    display: inline-block;
    border: 1px solid #ccc;
    border-radius: 4px;
    box-sizing: border-box;
}
.form button  {
    width: 100%;
    background-color: #4CAF50;
    color: white;
    padding: 14px 20px;
    margin: 8px 0;
    border: none;
    border-radius: 4px;
    cursor: pointer;
}
.form button:hover {
    background-color: #45a049;
}
.form button:disabled {
    background-color: #dddddd;
}
.required-field::after {
  content: "*";
  color: red;
  margin-left:2px
}
.request-msg {
	padding: 5px;
	font-size: 18px;
	font-weight: bold;
	text-align: center;
	margin-bottom: 20px;
}
.green {
	background-color: #81BA5E;
}
.red {
	background-color: red;
}
Use the Form Component on Oracle Content Management
-
Configure the VBCS connection:
-
Choose Administration, then Integrations, and then Applications.
-
Click the Visual Builder Cloud Service Integration check box.
-
Enter the URL, and click Save.
-
-
Import the component:
-
Choose Developer and then Components.
-
Choose Create and then Import Component.
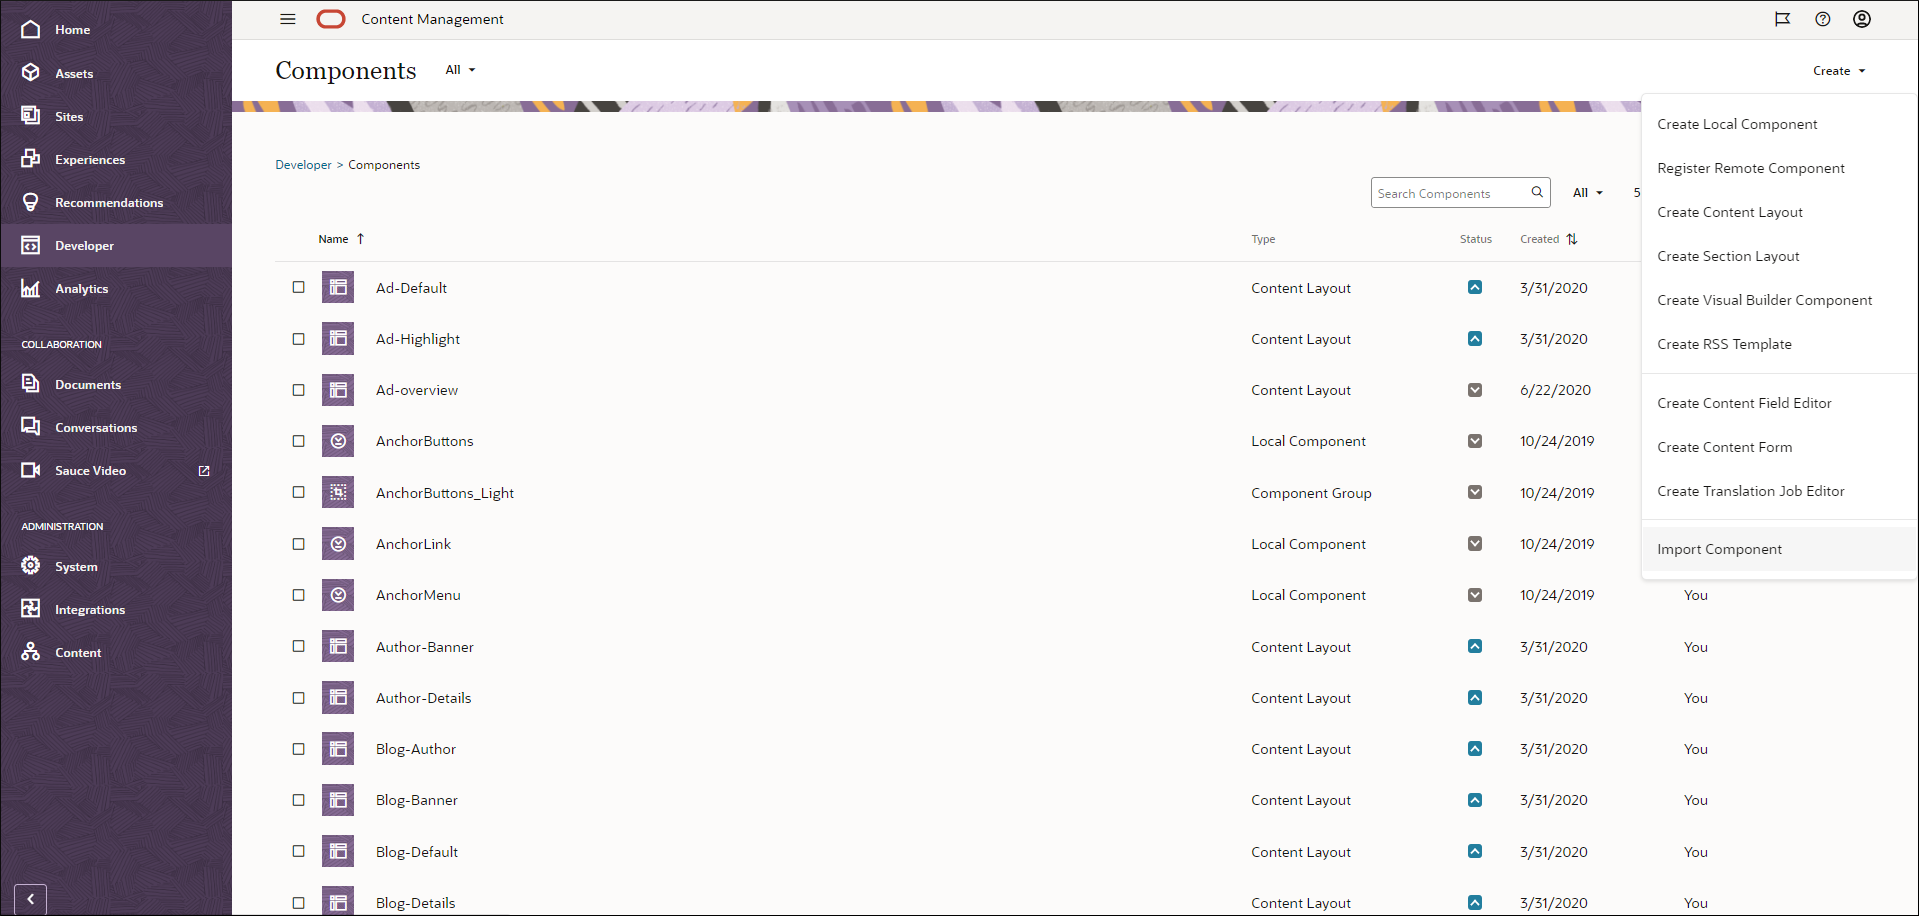
Description of the illustration vbcs_import_component.png
-
-
Add the component to a page:
-
Edit a new or existing site.
-
In Site Builder, choose Components and then Custom.
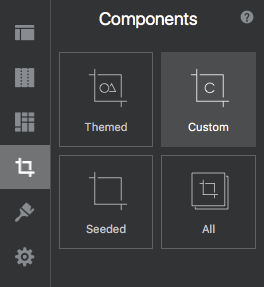
Description of the illustration vbcs_components_custom.png -
Drag the component onto the page.
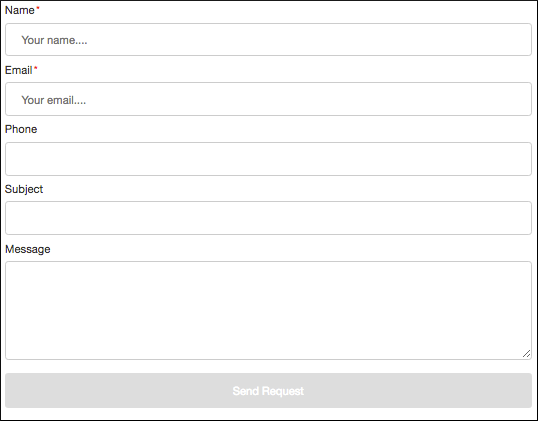
Description of the illustration vbcs_public_form.png
-
Note:
This VBCS public form component can be used on public or secure sites.