 Connecting ODI Studio to Oracle Data Integration Platform Cloud
 Before You Begin
This tutorial shows you how to patch Oracle Data Integrator (ODI) Studio in an Oracle Compute VM to use with repositories hosted in Data Integration Platform Cloud (DIPC).
Background
You may find the need to run ODI Studio in Oracle Public Cloud on compute instances in order to support larger, more diverse development teams. To use ODI Studio with repositories hosted in a Data Integration Platform Cloud instance, you first have to patch your ODI Studio, and then modify a few configuration files.
What Do You Need?
To perform the steps in this tutorial, you'll need:
- An Oracle Cloud subscription with instances provisioned for Data Integration Platform Cloud and Oracle Cloud Infrastructure Compute Classic (Linux with GUI desktop or Windows)
- Networking/Access rules configured that allow connectivity:
- From your Compute instance to your Oracle Database Cloud Service (DBCS) instance where the DIPC repositories are hosted
- From your Compute instance to your DIPC VM and ODI agent port
- An installation of ODI Studio 12.2.1.2.6 on your Compute instance VM. See Installing the Oracle Data Integrator Software.
NOTE: Oracle Single Sign-On from Oracle Public Cloud is disabled by default. To enable access to Oracle Technology Network (OTN) to download software from your Compute instance, you have to add the following to your hosts file:
209.17.4.8 login.oracle.com
 Patch ODI Studio
ODI Studio requires a patch and post-patch configuration to connect to DIPC ODI repositories.
- From the Compute instance where ODI Studio is installed, sign in to Oracle Support.
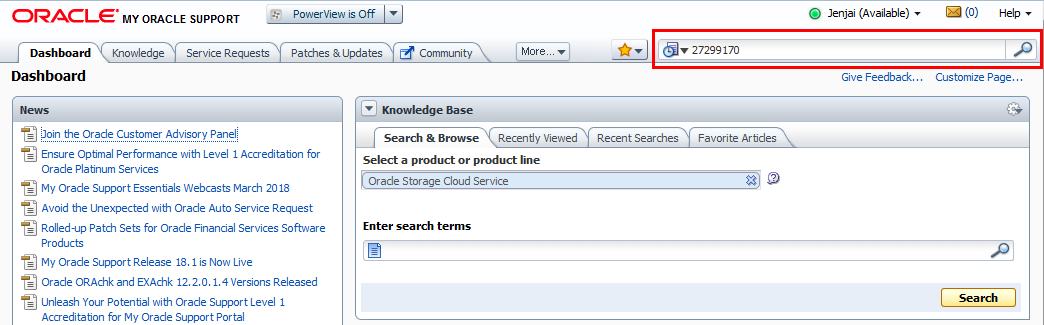
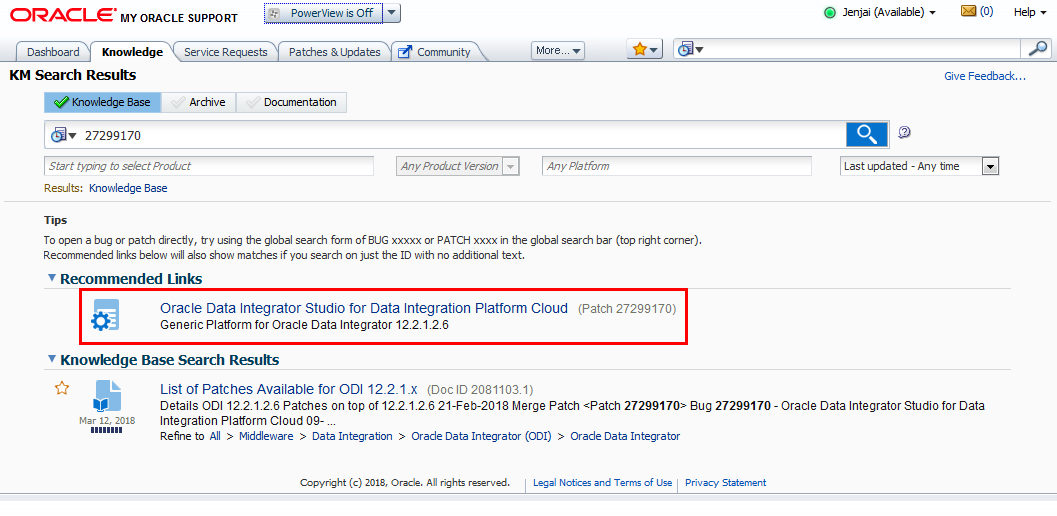
- In the Search field, enter
27299170, and then click Global Search. - Under Recommended Links, select Oracle Data Integrator Studio for Data Integration Platform Cloud.
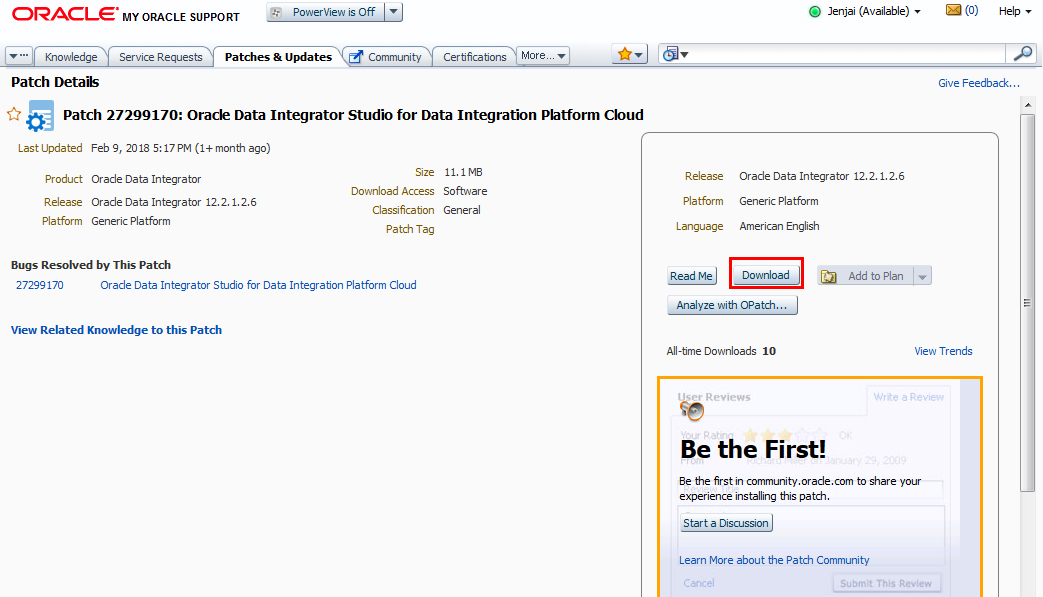
- Click Download.
- In the File Download dialog, click p27299170_122121_Generic.zip, and then save the file to your machine.
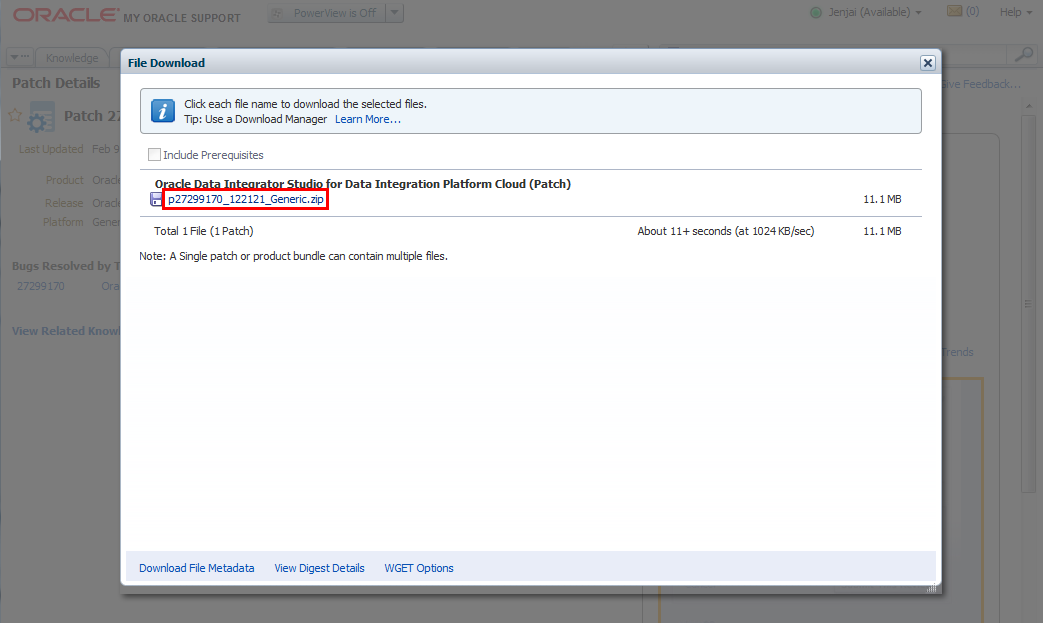
Description for this image S1_005_file_download.png - If ODI Studio is running, close it, and then delete the System 12.2.1.2.6 folder before applying the patch.
- For Windows, go to
%APPDATA%\odi, and then delete the System 12.2.1.2.6 folder. - For Linux, go to
~/.odi, and then delete the system12.2.1.2.6 folder. - Unzip the file, and then apply the patch:
- For Linux:
- Set the environment variable, ORACLE_HOME, to your ODI home location:
- Change directories to the patch location:
- Run the patch
- For Windows:
- Right-click My Computer and select Properties.
- Click Advanced system settings and then click Environment Variables in the System Properties dialog.
- In the Environment Variables dialog, click New for System variables.
- In the New System Variable dialog, enter
ORACLE_HOMEfor Variable Name, and the path to ODI for Variable value, then click OK. - Open a cmd window as administrator.
- List the OPatch inventory as:
- Apply the patch as:
- Start ODI Studio.
- Open the About Oracle Data Integrator Studio 12c dialog and verify that the build number is ODI_12.2.1.2.8CLOUD_GENERIC_171029.2316.
cd ~/.odi
rm -R system12.2.1.2.6setenv ORACLE_HOME path_to_ODI_homecd patch_location$ORACLE_HOME/OPatch/opatch apply%ORACLE_HOME%/OPatch/opatch lsinventorycd unzipped_patch_directory
%ORACLE_HOME%/OPatch/opatch apply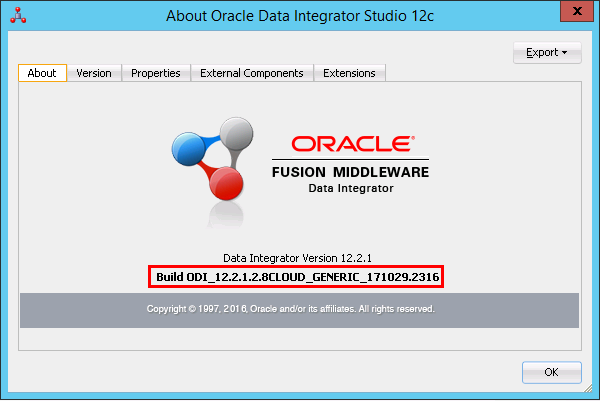
 Obtain Data Integration Platform Cloud Configuration Files
ODI Studio requires a few configuration files from your DIPC instance to enable authentication through Oracle Identity Cloud Service (IDCS).
- SSH to your DIPC instance. See Connect to ODI Studio with VNC Server.
- Open a terminal window and set user to Oracle:
- Find and change directories to the location of your DIPC configuration files:
- Zip the files to
/tmp/odi_dipc_config.zip. - (Optional) Verify the contents of the zip:
- Download the /tmp/odi_dipc_config.zip file and copy it to the Compute VM running ODI Studio.
sudo su oraclecd "$(find /u01/data/domains/*/config/fmwconfig -name jps-config-jse.xml -printf "%h")"zip /tmp/odi_dipc_config.zip jps-config-jse.xml bootstrap system-jazn-data.xml audit-store.xml -runzip -l /tmp/odi_dipc_config.zip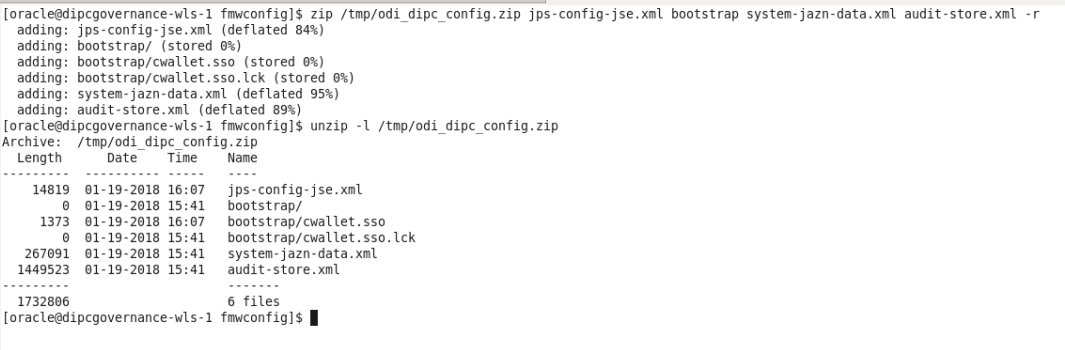
 Configure ODI Studio to Connect to Data Integration Platform Cloud
You have to configure ODI Studio to use external authentication (in this case, Identity Cloud Service) to connect to your DIPC instance. After you've copied the odi_dipc_config.zip to your Compute VM, do the following:
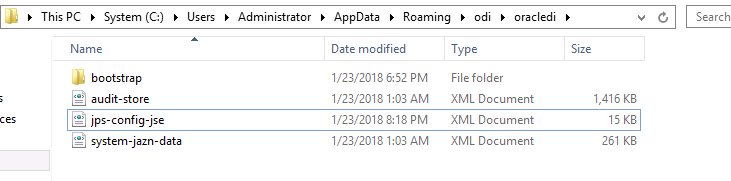
- Unzip the files to:
- For Linux:
~/.odi/oracledi - For Windows:
%APPDATA%/odi/oracledi
NOTE: If the location does not exist, start ODI Studio, and then close it. Starting ODI creates the locations listed above.
- Navigate to your ODI installation directory (
Install_Directory/odi/studio/bin). - Open odi.conf in a text editor and add the following line:
- Save your changes.
- Start ODI Studio.
- Click Connect to Repository...
- Follow the steps in Connecting to ODI Studio with VNC Server: Connecting to the ODI Repository to determine the ODI repository username for the Login screen.
- Click OK.
AddVMOption -Doracle.security.jps.config=[DIRECTORY_PATH_TO_JPS-CONFIG-JSE.XML]\jps-config-jse.xmlNOTE: If you don't have access to the DBCS instance using it's HOSTNAME, you can add a value to your hosts file, so the hostname is resolved to the public IP address. Alternatively, you can use the public or private IP addresses depending on your Cloud network configuration. If you use the IP address, you also have to edit the jps-config-jse.xml file and replace the hostname with the IP address in any jdbc:oracle:thin entry.
You're not connected to your DIPC instance's ODI repository. The same configuration can be used to connect to any DIPC instance within the same identity domain.
NOTE: Once patched, this instance of ODI Studio can't connect to a non-DIPC ODI repository. This means you won't be able to connect to an on-premises ODI respository, for example.
If you have any issues with connectivity, see our troubleshooting guide.