Configuring Link Rules
In a project, you can define rules to convert plain text to URL links automatically when the text is entered in commit comments and merge request comments. For example, when you enter an email address or a URL in a merge request comment, it will be automatically converted to a link.
From the Links page, you can create and manage link rules that convert plain text to URL links automatically.
You can use Regular Expressions, also called as RegExp, to define the link rules. Some pre-defined built-in link rules are available in the Links page. To create a custom rule, you can either copy an existing link rule or create a blank rule. For more information bout RegExp, see http://www.regular-expressions.info.
Creating a Link Rule
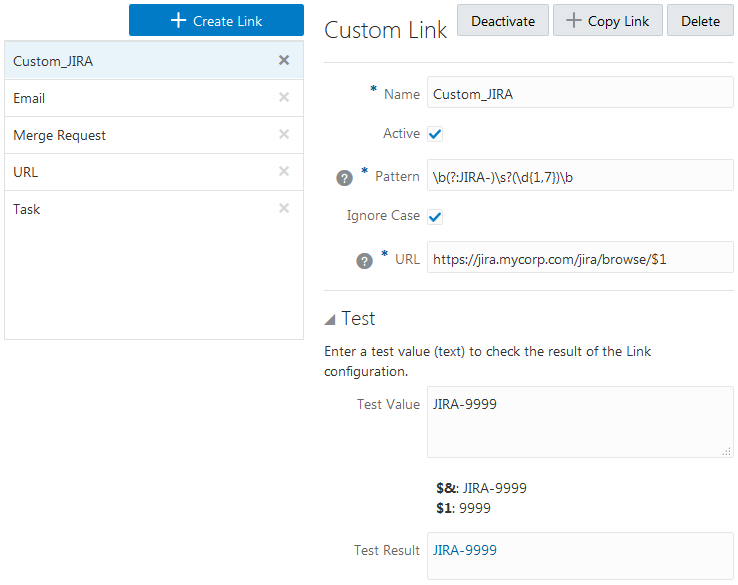
To create a link rule, you would need to define the RegExp pattern of the link text and the URL where the link would point to.
The following illustration shows an example of a custom link rule.
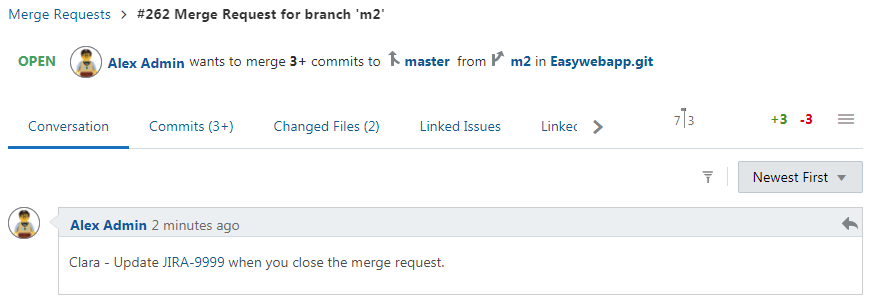
The following illustration shows an example of the link in a merge request comment.
Editing a Link Rule
Click the link rule in the left list of the Links page to edit it.
Note:
You cannot edit a built-in link rule. You may create a copy of built-in rule and edit it, and if required, disable the original pre-configured rule.- In the navigation bar, click Project Settings.
- Click Links.
- In the link rule list on the left, click the rule to view its details on the right.
- Edit the fields on the right. For more information about the fields, see Creating a Link Rule.
- Open another link rule or navigate to a different page to save the rule.
Activating or Deactivating a Link Rule
Open the link rule in the edit mode to activate or deactivate it. If deactivated, the text that matches the rule is not converted to a link.
Deleting a Link Rule
Open the link rule in the edit mode to delete it. You cannot delete a built-in link rule.
- In the navigation bar, click Project Settings.
- Click Links.
- In the link rule list on the left, click the rule to view its details on the right.
- On the right side of the page, click the Delete button.

