Eclipse IDE
You can use the Eclipse IDE and the Oracle Enterprise Pack for Eclipse (OEPE) to access Oracle Developer Cloud Service (DevCS) projects, its Git repositories, issues, and builds.
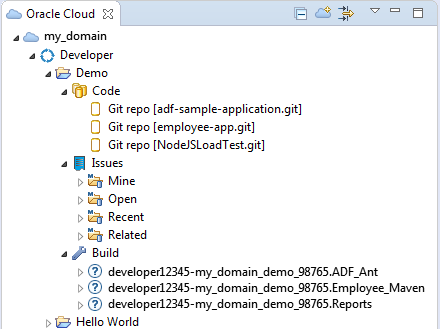
You use the Oracle Cloud view of the Eclipse IDE to access projects. The IDE uses Mylyn (a plugin) to access issues and EGit to access Git repositories.
Sign In to DevCS from the Eclipse IDE
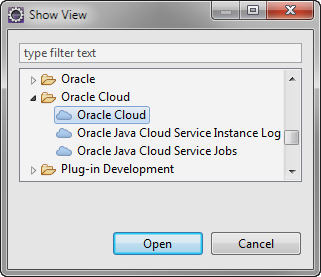
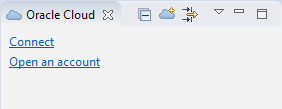
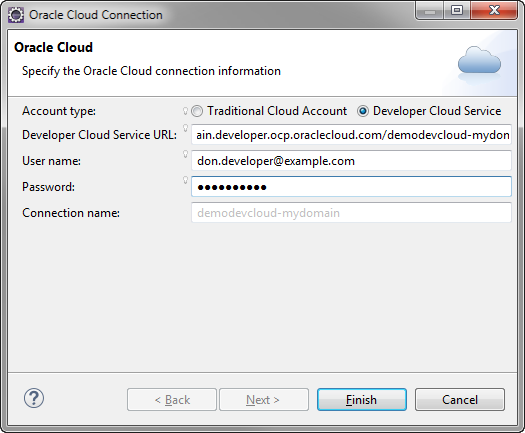
To access DevCS from Eclipse IDE, set up the IDE and create an Oracle Cloud connection.
Connect to DevCS from the Eclipse IDE
After the connection is successful, expand the identity domain node in the Oracle Cloud view, and then expand the Developer node to view projects that are assigned to you.
Tip:
The Oracle Cloud view is visible in the Java and Java EE perspective, by default. To open the Java EE perspective, from the Window menu, select Perspective, then Open Perspective, and then Java or Java EE.
Use the Oracle Cloud View
The Oracle Cloud view shows all projects of which you’re a member and provides links to access DevCS features. Some of these links open the DevCS web page, while others open the native IDE interface.

You can perform these actions from the Oracle Cloud view.
| Action | How To |
|---|---|
|
Open the Oracle Cloud portal |
Select the identity domain node, right-click, and select Open Cloud Portal. |
|
Open the Identity Manager console |
Select the identity domain node, right-click, and select Open IDM Console. |
|
Edit the connection’s properties |
Select the identity domain node, right-click, and select Properties. |
|
Open the DevCS page in a web browser |
Select the Developer node, right-click, and select Open Service Console. |
|
View all project |
By default, the Oracle Cloud view shows the projects which you’re a member of. To see all projects, select the Developer node, right-click, and select Show All Projects. |
|
Open a project |
Expand the Developer node and double-click the project.
|
Open a DevCS Project as an Eclipse IDE Project
You can open a DevCS project in the Eclipse IDE and add or edit the files of the project’s Git repositories from the IDE. To access files of a DevCS project Git repository, you must clone the repository to the IDE workspace.
Upload an Eclipse IDE Project to DevCS
You can upload local Eclipse project application source code files to an empty Git repository of a DevCS project.
Before you proceed, create an empty Git repository in the project where you want to upload files. You must be a project owner to create the Git repository.
| Action | How To |
|---|---|
|
Upload the Eclipse IDE project using drag-and-drop action |
Wait for some time to upload the files. Eclipse IDE adds all files of the IDE project to the Git repository index, commits all files to branches, and pushes the commits to the DevCS project’s Git repository. Open the Git page of the DevCS project in the web browser and verify the files. |
|
Use Git actions to upload the Eclipse IDE project |
Open the Git page of the DevCS project in the web browser and verify the files. |
|
Upload a project that’s saved in a local Git repository to the DevCS project |
Open the Git page of the DevCS project in the web browser and verify the files. |
Use Git in the Eclipse IDE
Using Git tools in the Eclipse IDE, you can create and merge branches, commit files, and push commits to the project Git repository.
Eclipse IDE uses EGit to manage Git repositories. To know more about EGit, see http://eclipse.org/egit/ and the EGit documentation at http://wiki.eclipse.org/EGit/User_Guide.
You can view and manage Git repositories from the Oracle Cloud view and the Git Repositories view (Window > Show View > Other). The Git Repositories view shows activated repositories only.
This table describes some common actions you can perform to manage Git repositories.
| Action | How To |
|---|---|
|
View Git repositories of a project |
In the Oracle Cloud view, expand the Code node. |
|
Access branches of a project Git repository |
In the Oracle Cloud view, double-click the Git repository and expand the Branches node to see local and remote branches. |
|
Checkout a branch |
Right-click the Branches node, select Switch To, and then select the branch name. |
|
Create a branch |
Right-click the Branches node, select Switch To, and then select New Branch. In the Create Branch dialog box, enter a branch name, configure other options, and click Finish. |
|
Add a file to Git index |
In the File Explorer, right-click the file, select Team, and the Add to Index. |
|
Commit files |
Right-click the Branches node and select Commit. In the Git to Stage view, verify files and stage them, enter a commit message, and click Commit. |
|
Push commits to the project’s Git repository |
Right-click the repository and select Push or Push branch. In the Push dialog box, verify the details, specify any additional configuration, and submit. |
Manage DevCS Issues in the Eclipse IDE
In the Eclipse IDE, you can manage DevCS issues, create issues, update issues, and create a search query. Eclipse uses Mylyn, a built-in plugin, to manage issues.
To know more about Mylyn, see https://wiki.eclipse.org/Mylyn/User_Guide.
To view and update DevCS issues of a project, you must activate the Tasks node. You can double-click the Tasks node, or right-click and select Activate.
This table describes common actions you can perform to manage issues from the Eclipse IDE.
| Action | How To |
|---|---|
|
View issue filters of the project |
Expand the Tasks node. By default, the Tasks node displays issues of these filters:
|
|
See issues of a query |
Expand the Tasks node and then expand the issue query. |
|
Open and update an issue |
Expand the Tasks node, expand the query, and double-click the issue. The issue’s details display in a new tab of the IDE. Update the issue’s properties and click Submit. |
|
Create an issue |
Right-click the Issues node and select New Issue. Update the details and click Submit. The issue is automatically synchronized with the DevCS project is available to other project members. |
|
Create a query |
Right-click the Issues node and select New Query. Enter the search criteria and click Finish. Issue matching the search criteria display under the new query node in the Oracle Cloud view. |
|
Synchronize a query |
To manually synchronize a query, get new issues or updates from DevCS, or send issue updates from the IDE, expand the Tasks node, select the query, right-click, and select Synchronize. |
Associate an Issue with a Commit
When you commit files, you can associate an issue with a commit. To associate the issue, you must activate it first.
Monitor a Project’s Builds in Eclipse IDE
You can view your project build jobs from the Build node in the Oracle Cloud view. You can’t create, edit, or delete a job from the Oracle Cloud view.
To view build jobs of a project, you must activate the Build node. You can double-click the Build node, or right-click and select Activate. When activated, the Build node shows all jobs and builds of your project. There are no filters available.
This table describes common actions you can perform to manage builds from the Eclipse IDE.
| Action | How To |
|---|---|
|
View jobs of the project |
Expand the Build node. |
|
View builds of a job |
Expand the Build node and then expand the job. The job node displays its builds along with their status. |
|
See a build’s details |
Expand the Build node, expand the job, select the build, right-click, and select Open. The build’s details along with its status, artifacts, test results, console, and SCM changes log display in a new tab of the IDE. |
|
Run a build of a job |
Expand the Build node, select the job, right-click, and select Run build. You may want to refresh the job in the Build node to see the running build. Right-click the job node and select Refresh. You can also open a build and click Run Build |
|
Abort a running build |
Double-click the build node to open its details in the tab and click Abort Build |
|
Open the Build page in a web browser |
Right-click the Build node and select Open in Browser. |


