Prerequisites for Creating a Connection

Satisfy the following prerequisites appropriate to your environment for creating a connection with Oracle Integration.

Download the Credentials Wallet and Obtain Database Details

You must download the credentials wallet and obtain database details.

  1. Download the client credentials wallet from the Oracle Autonomous Transaction Processing instance. See Download Client Credentials (Wallet) of Getting Started with Oracle Autonomous Database for Transaction Processing and Mixed Workloads.
  2. Ensure that the target database is accessible.
  3. Ensure that you have write permissions to the database.
  4. Ensure that you have the required permissions to run stored procedures and SQL statements.
  5. Know the database service name.
  6. Know the database service username and password for connecting to the database.

Satisfy Bulk Data Import Operation Prerequisites

If you want to use the bulk data import operation, you must configure the Oracle Autonomous Transaction Processing Adapter to use the JDBC With OCI Signature security policy on the Connections page. Before you can successfully configure this security policy on the Connections page, you must complete the following prerequisites.

  1. Create an object storage bucket in Oracle Cloud Infrastructure and obtain the OCID value of the compartment in which you create the storage bucket. You need this value when configuring the security policy on the Connections page.

    You specify the OCID of the object storage user on the Connections page when configuring the JDBC With OCI Signature security policy. This user should have the manage bucket and manage object privileges. Set the following policies to manage privileges on the bucket and object in the object storage:

    Allow group group_name to manage buckets in compartment compartment_name
    
    Allow group group_name to manage objects in compartment compartment_name 
    

    See How Policies Work and Policy Reference.

  2. Obtain the tenancy OCID and user OCID details in the Oracle Cloud Infrastructure Console. You need these values when configuring the security policy on the Connections page. When you sign up for Oracle Cloud Infrastructure, Oracle creates a tenancy for your company, which is a secure and isolated partition within Oracle Cloud Infrastructure where you can create, organize, and administer your cloud resources.
    1. Sign in to the Oracle Cloud Infrastructure Console.
    2. In the upper left corner, select hamburger menu, then select Home > Governance & Administration > Tenancy Details.
    3. In the Tenancy Information section, click Show to display the OCID tenancy value.
    4. Copy the value. You need this value when configuring the security policy on the Connections page.
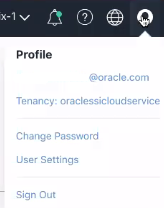
    5. In the upper right corner, click the Profile icon and select User Settings.
      Profile menu with selections for Change Passwords, User Settings, and Sign Out

      Note:

      You can also select hamburger menu in the upper left corner, then select Identity > Users to access the user profile.
    6. Click Show to display the OCID user value.
    7. Copy the value.
  3. Create an API signing key. You then specify the signing key in Oracle Cloud Infrastructure.
    1. Sign in to the Oracle Cloud Infrastructure Console to upload the public key.
    2. In the upper left corner, select hamburger menu, then select Identity > Users.
    3. On the Users page, click the link of the user name to use.
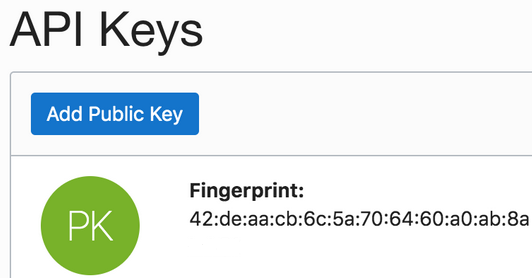
    4. Scroll down to the API Keys section, and click Add Public Key.

      Note:

      Only a private key without a pass phrase/password is supported.
    5. In the Add Public Key dialog, enter the contents of the public key you created, and click Add.
    6. Copy the finger print value generated by Oracle Cloud Infrastructure. You need this value when configuring the JDBC With OCI Signature security policy on the Connections page.
      API Keys section with an Add Public Key link and fingerprint value.

Migrate from an Oracle Database Classic Cloud Service Database Instance to an Oracle Autonomous Transaction Processing or Oracle Autonomous Data Warehouse Database Instance

Perform the following steps if you want to migrate from an Oracle Database Classic Cloud Service database instance to an Oracle Autonomous Transaction Processing or Oracle Autonomous Data Warehouse database instance.

  1. Migrate all the required database objects, stored procedures, wrapper procedures, and tables to the destination Oracle Autonomous Transaction Processing or Oracle Autonomous Data Warehouse database instance.
  2. Change the Oracle Database Cloud Service Adapter connection details to point to an Oracle Autonomous Transaction Processing or Oracle Autonomous Data Warehouse database instance.
    1. Go to the Connection page for the Oracle Database Cloud Service Adapter.
    2. Click Configure Connectivity.
    3. Specify the new host name.
    4. Specify the new service name and click OK.
    5. Click Configure Security.
    6. Select the Oracle Wallet security policy.
    7. Upload the wallet.
    8. Specify the wallet password and reconfirm it.
    9. Specify the database service username.
    10. Specify the database service password, reconfirm it, and click OK.
    11. Delete the agent from the connection.
  3. Test the connection.
  4. Once the test is successful, click Save to save the connection details.
  5. Reactivate the integrations.