Configure the Action Chain to Invoke the Integration
Now that your page is ready, let’s define how the integration will be invoked. In our case, the integration will be invoked when the GetWeatherInformation button is clicked in the application.
Create an Event to Invoke the Integration
First, let’s create the event to invoke the integration.
-
On the main-start page, click the GetWeatherInformation button on the canvas.
-
In the Button pane, click the Events tab.
-
Click New Event, then Quick Start: ‘click’.
-
On the main-start/ButtonClickAction page, from the General category in the Actions pane, drag the Call REST Endpoint action and drop it below the Start icon on the canvas.
The callRestEndpoint1 object is added to the page.
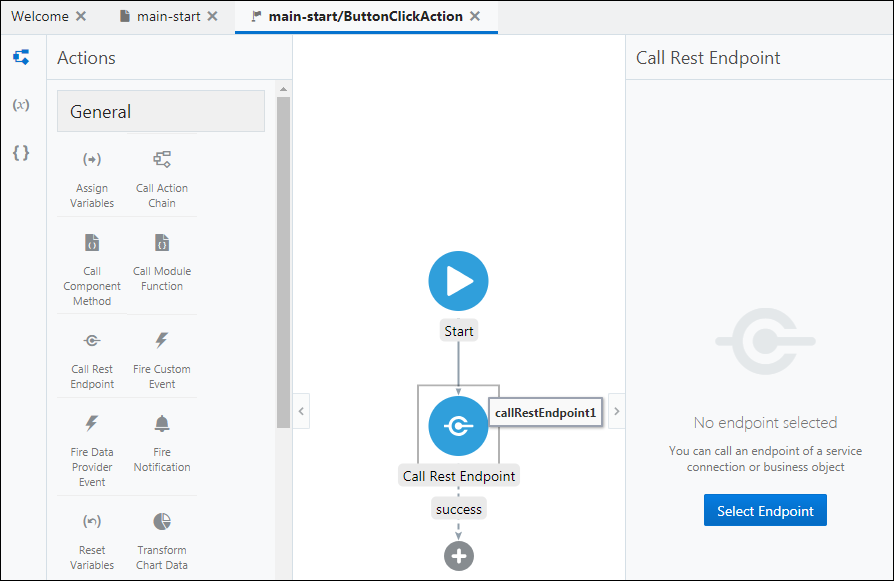
Description of the illustration action_chain_event_endpoint.png -
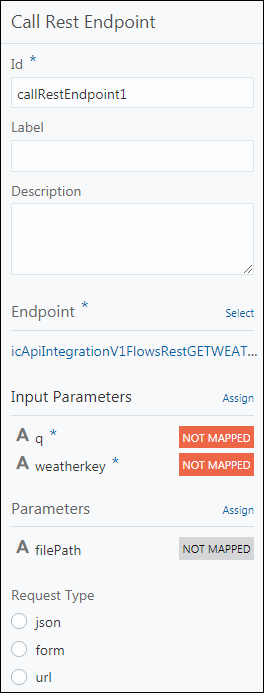
In the Call Rest Endpoint pane, click Select Endpoint.
-
In the Select Endpoint dialog, select your integration as the endpoint. Expand Service Connections, then your service connection, then select /weather.
-
Click Select.
The service connection shows the input parameters from the getWeather integration.
-
In the Call Rest Endpoint pane, click Not Mapped for either the q or weatherkey parameter.
The Map Variables to Parameters dialog is displayed. The Source pane shows the variables you added to your page, and the Target pane shows the input parameters defined in the integration. You’ll now map the integration parameters to the corresponding page variables.
-
From the Source pane, drag the location variable to the q parameter in the Target pane.
-
In the Target pane, select the weatherkey variable. Then in the Expression for box at the bottom of the screen, enter the API application key as a constant within quotation marks.
-
Click Save.
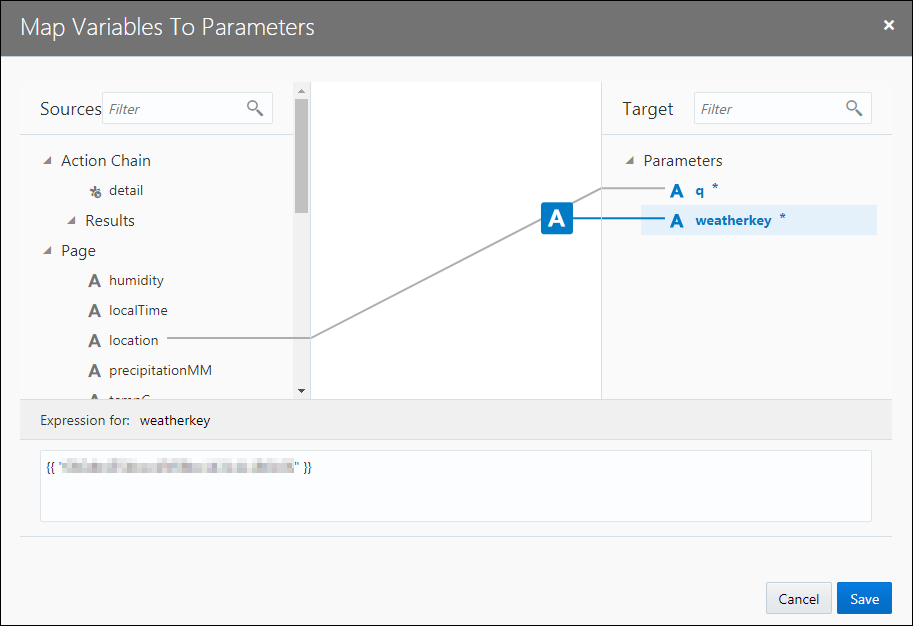
Description of the illustration action_chain_event_mapper.png -
The input parameters now appear mapped. Select json as the Request Type.
Map Response Data to Page Variables
Your integration will receive weather forecast from the weather API and pass on the information to the Visual Builder application. So, now map the response data from the weather API to your page variables.
-
From the Actions pane, drag the Assign Variables action to the plus icon below the call REST endpoint on the action chain.
-
In the Assign Variables pane, click Assign.
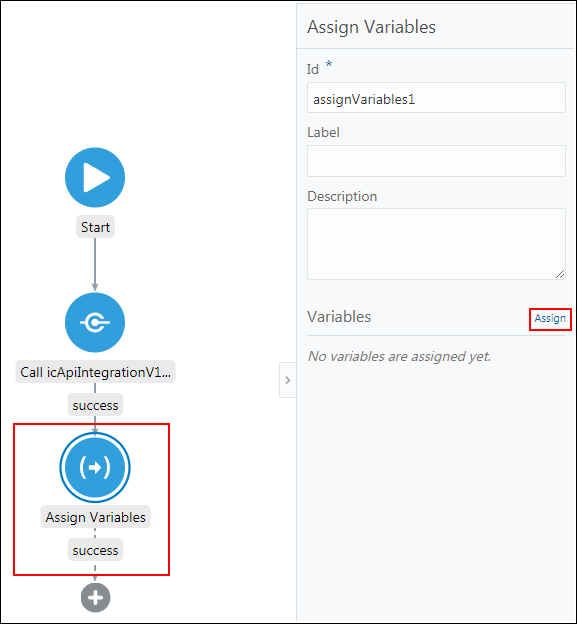
Description of the illustration vb_assign_variables.pngThe Map Variables To Parameters dialog is displayed. The Target pane displays the page variables defined in your Visual Builder application.
-
In the Source pane, under Action Chain, under Results, expand callRestEndpoint1, then expand body.
The Source pane now displays the parameters defined in your integration. You had defined these parameters in the sample payload of the trigger connection of your integration.
-
From the Source pane, drag the humidity attribute and drop it onto the humidity parameter in the Target pane. A connecting line between the two parameters represents the mapping.
-
Similarly, map all the variables as listed in the following table.
Source Pane Variables Target Pane Variables humidityhumiditylocaltimelocalTimeprecipMMprecipitationMMtemp_CtempCtemp_FtempFWeatherDesc, valueweatherDescriptionwinddir16PointWindDirectionwindspeedKmphwindSpeedKmwindspeedMileswindSpeedMilesThe parameters are now mapped.
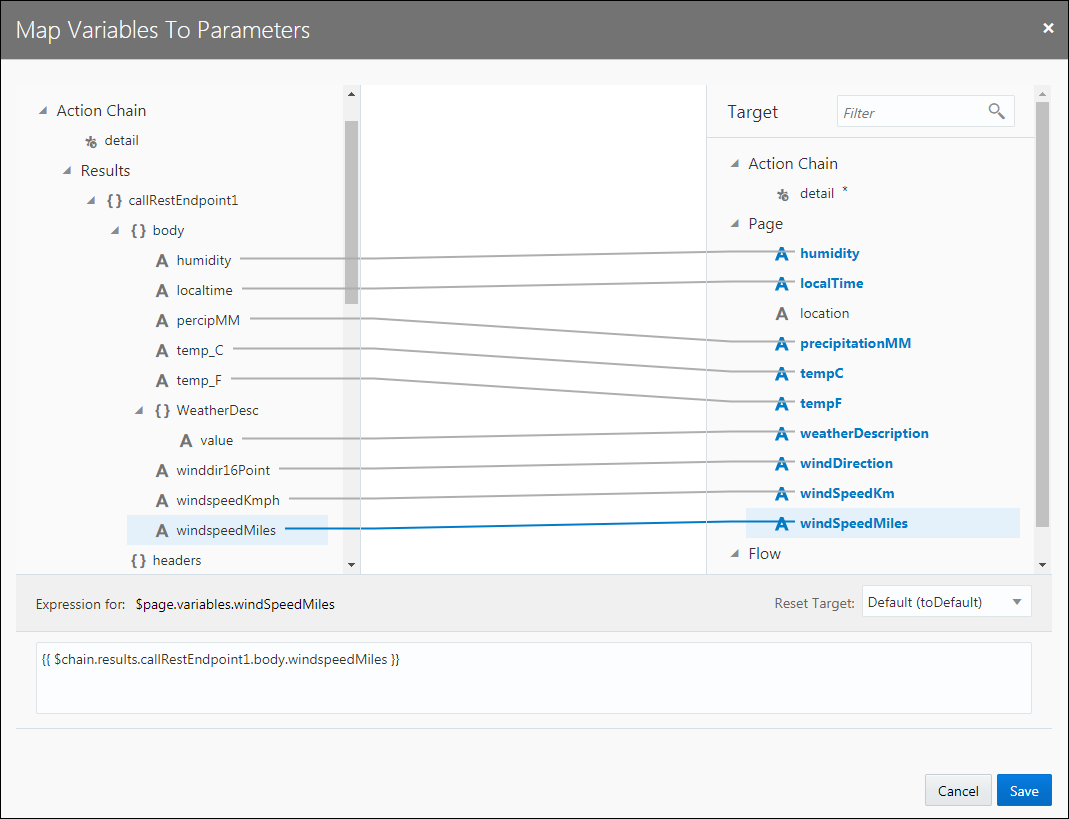
Description of the illustration vb_responsedata_pagevariables_map.png -
Click Save to save the mapping.
In the Assign Variables pane, all the variables are now listed as Mapped.
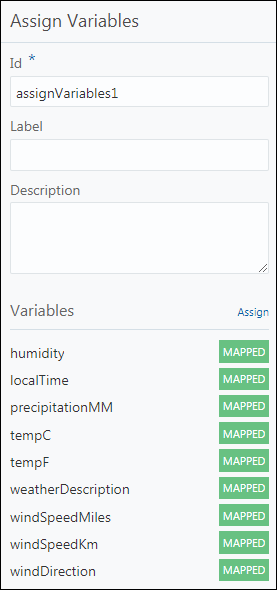
Description of the illustration mapped_variables.pngYour application is now ready to invoke the integration to retrieve weather information.
