Inbound Message Processing
This section describes the high-level steps involved in processing an inbound B2B message.
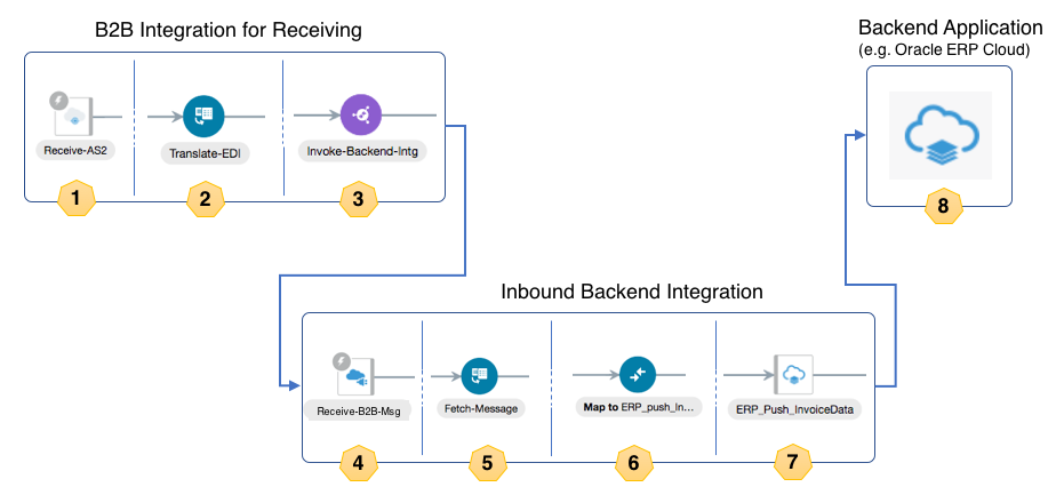
| Step | Description |
|---|---|
| 1 | A message sent or a file dropped in an FTP location by your trading partner arrives at the adapter endpoint (AS2 or FTP). It receives and unpacks the message. |
| 2 | The message is translated from EDI to a canonical XML format and persisted in the Oracle Integration persistence store. A unique ID is assigned to it. |
| 3 | Based on the current message type and the inbound agreements defined for the trading partner, an appropriate inbound backend integration is triggered. The message ID is handed to it. |
| 4 | The backend integration instance starts and receives the message ID at its REST trigger endpoint. |
| 5 | The backend integration, given the message ID, retrieves the translated canonical XML message from the Oracle Integration persistence store. It uses the B2B fetch message operation to retrieve it. |
| 6 | The canonical XML is further transformed to a backend application message. |
| 7 | Using an application adapter, the backend application message is sent to your backend application. |
| 8 | Your backend application now consumes the business transaction sent by your trading partner. Further processing is performed. |
Design an Inbound Backend Integration
- The integration must have a REST Adapter trigger configured for OAuth 2.0.
- The REST Adapter trigger must use
/as the resource URI (that is, a root resource URI). - The REST Adapter trigger must use a specific request payload schema, given in step 1(e).
- The REST Adapter trigger must not return a response; it must be asynchronous. This allows the B2B integration for receiving messages to be unblocked quickly and continue processing, even though the backend integration may take time to process.
This backend integration is given a collection of message IDs, in the form of repeating b2b-message-reference elements. A collection is necessary when your trading partner sends a batched message (that is, in one message or file, there may be multiple business documents). The B2B integration for receiving messages automatically splits the message into multiple documents and returns one b2b-message-reference element for each one. A maximum chunk of 200 records is provided at a time to the backend integration. If the inbound message has more documents, the backend integration may be called multiple times with chunks of 200.
- Create the integration and configure the REST Adapter trigger.
- Select an App Driven Orchestration integration pattern.
Give it any name. For this example,
 Backend - Inbound Purchase
                                Orders
is used). - Add a REST Adapter trigger using the Sample REST Endpoint Interface (or using any other REST Adapter trigger connection that uses the OAuth 2.0 Or Basic Authentication security policy).
- Enter
Receive-B2B-Msg(or any other name) as the name of the trigger connection. - On the Resource Configuration page, enter
/as the resource URI, select the POST action, and enable the Configure a request payload for this endpoint checkbox.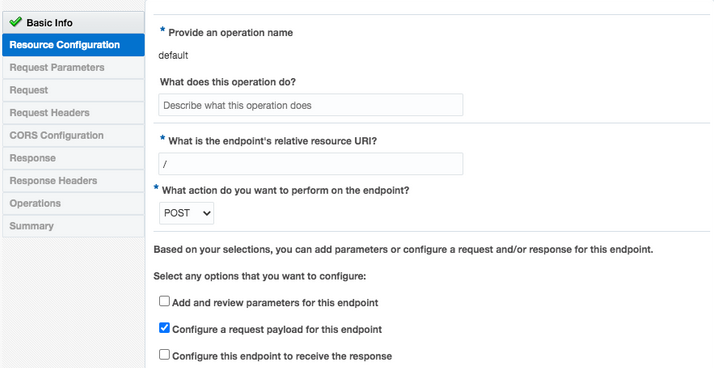
- On the Request Parameters page, select
JSON Sample and paste the JSON provided below
as an inline sample.
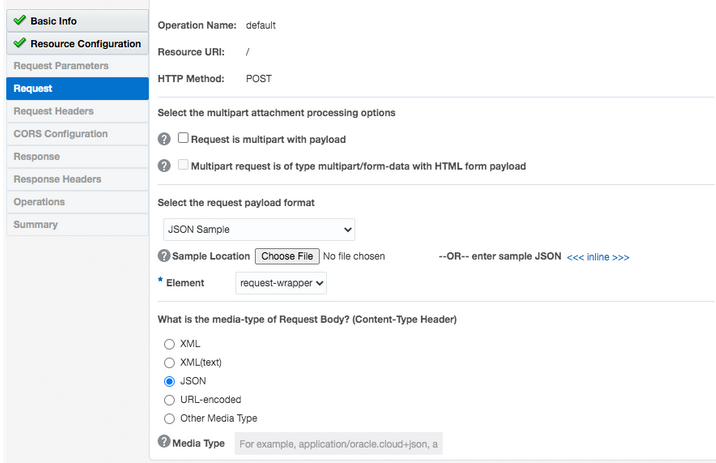
{
  "type": "MSG",
  "id": "12345",
  "direction": "INBOUND",
  "trading-partner": "ACME",
  "document-definition": "PO_850",
  "message": [
    {
      "b2b-message-reference": "biz:0AC400D117503A8246000000347849EB"
    },
    {
      "b2b-message-reference": "biz:0AC400D117503A8246000000347849EA"
    }
  ]
}
Note:
In the above JSON sample, the structure is important. The values are just placeholders or representative values. - Click Next to access the Summary page to review your selections, then click Done.
- Select an App Driven Orchestration integration pattern.
Give it any name. For this example,
- Place a for-each action after the REST Adapter trigger.
- Select request-wrapper >
message as the Repeating
Element and enter
Current-Msgas the Current Element Name value.
- Add a scope inside the for-each action and name it (for this
example, named
Handle-One-Message). - Add a B2B action configured with a Fetch Message operation inside
the scope. The B2B action appears in the palette under
Actions > Data.
- Enter a name (for this example, named
Fetch-Message), select B2B Trading Partner mode, and click Next.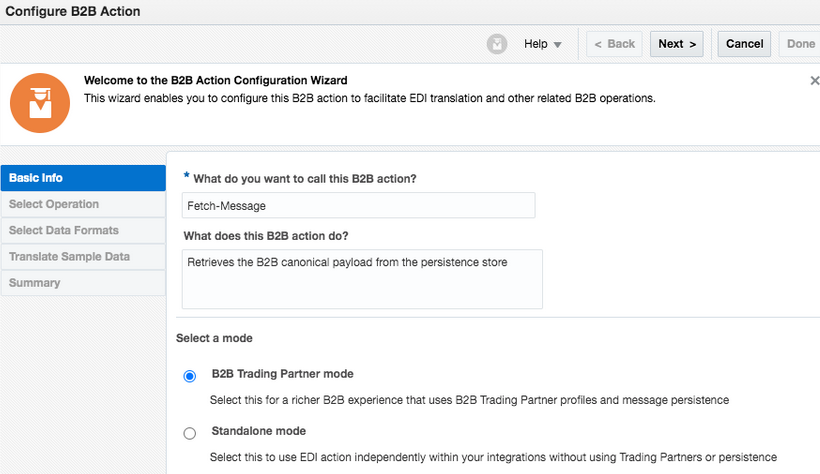
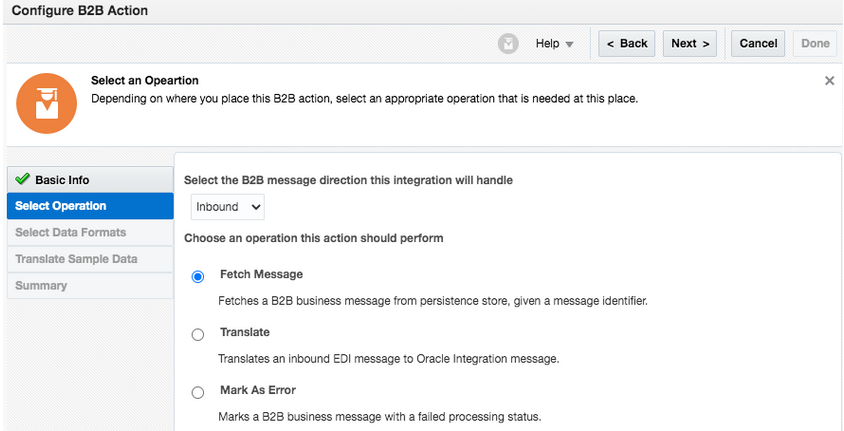
- Select Inbound as the direction and
Fetch Message as the operation. Click
Next.
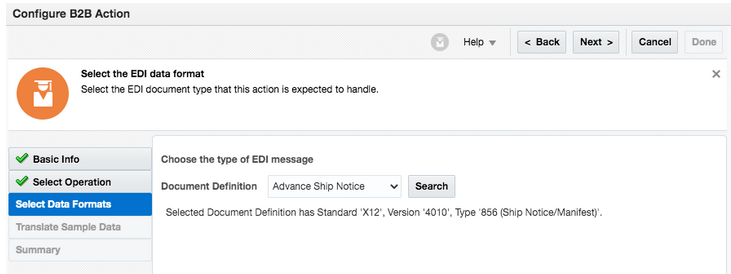
- On the Select Data Formats page, select a document
definition from the drop-down list that this backend integration is
handling.
Existing B2B documents are displayed in the drop-down list for selection. Alternately click Search to select a B2B document by document standard, version, and type.
- Click Next once you make the selection.
- In the Summary Page, review your selections, and click
Done.
The integration looks as follows.

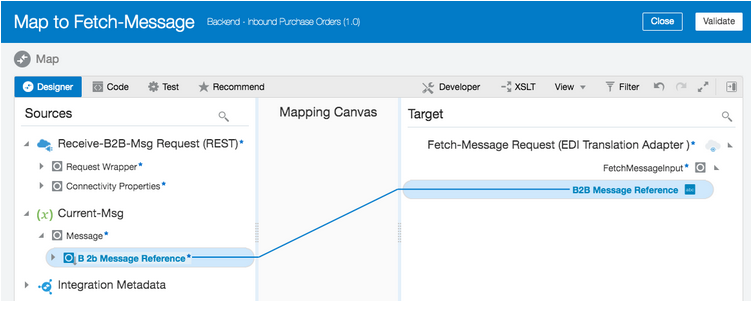
- Configure the mapper to
Fetch-Message.
Expand Current-Msg and map its B 2b Message Reference to the B2B Message Reference of FetchMessageInput.
- Close and apply changes to the mapper.
- Enter a name (for this example, named
- Add a scope level fault handler.
This handler is added so that if the message fails to be processed by the backend application, the corresponding transaction is marked as Failed in the B2B Tracking > Business Messages view (instead of Success).
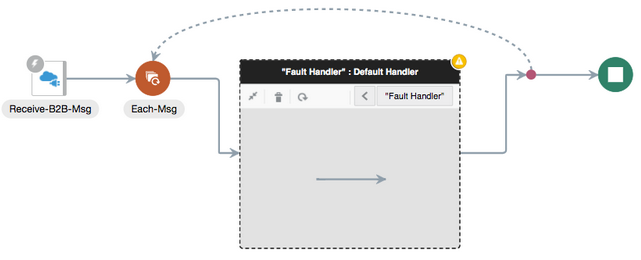
- Click Fault Hander >
Default Handler for the scope. Initially it
is empty, as shown below.
- Place a B2B action inside the fault handler and name it (for
this example,
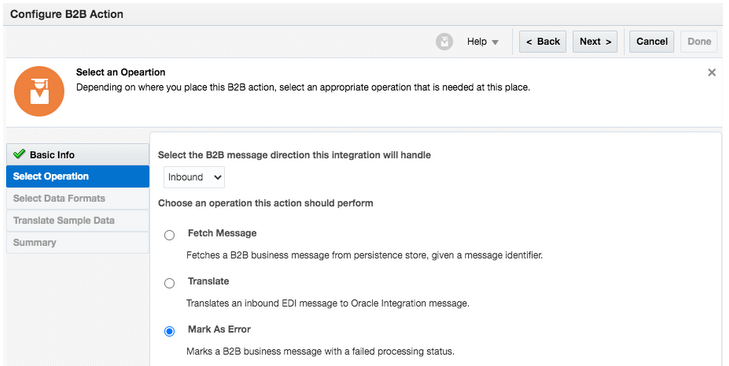
Mark-As-Error). Click Next. - Select Inbound as the direction and
Mark As Error as the operation. Click
Next.
- On the Summary page, review your selections, and click
Done.
The fault handler now looks as follows.

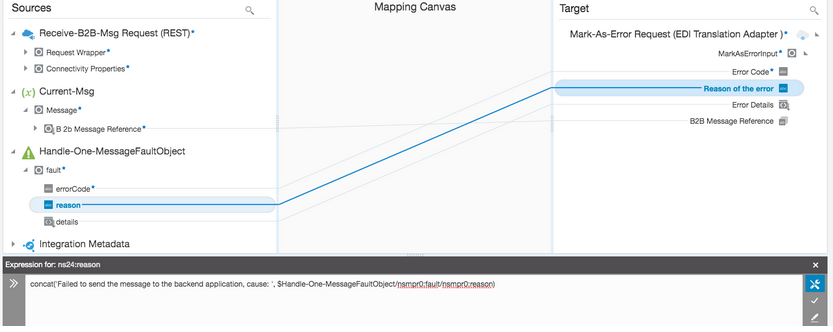
- Configure the mapper to
Mark-As-Error by mapping the following
elements:
- Source Current-Msg > Message > B 2b Message Reference to target MarkAsErrorInput > B2B Message Reference.
- Source Handle-One-MessageFaultObject > errorCode to target MarkAsErrorInput > Error Code.
- Source
Handle-One-MessageFaultObject >
reason to target
MarkAsErrorInput >
Reason of the error, and in the
Expression Builder,
enter:
concat('Failed to send the message to the backend application, cause: ', $Handle-One-MessageFaultObject/nsmpr0:fault/nsmpr0:reason) - Source
Handle-One-MessageFaultObject >
details to target MarkAsErrorInput >
Error Details.
- Save and apply the mapping.
- Exit the fault handler by clicking
 .
.
- Click Fault Hander >
Default Handler for the scope. Initially it
is empty, as shown below.
- Add actions to call a backend application.
Add one or more actions inside the scope to send the business message to a backend application.

In the example above, a REST Adapter invoke connection sends the message to a backend application. To use with your specific backend application, you have many application adapters provided in Oracle Integration that can interface with several popular backend applications. You can also use technology adapters, including REST, SOAP, JMS, AQ, File, and so on.
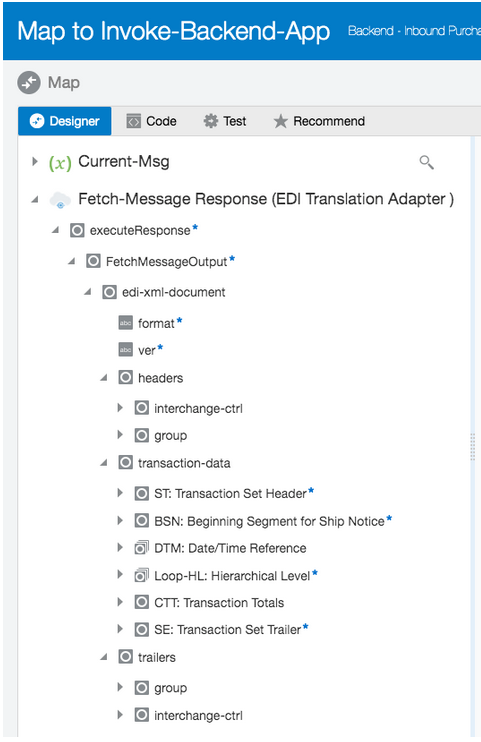
The Fetch-Message Response (EDI Translation Adapter) provides you with a B2B canonical XML from which to map. Its edi-xml-document is the key element that contains the canonical form of the inbound EDI document. See Schema Elements for Inbound EDI.
You must design the data mapping to prepare the message prior to the backend invoke. This can be a complex task. On the left-hand side is the B2B canonical XML format, represented by the edi-xml-document. On the right-hand side (not shown below) is your backend application schema for the business document. You must create mappings for the elements on the left-hand side (B2B canonical XML) to the right-hand side (backend application schema). The mappings cannot be generalized since the right-hand side is specific to a target backend application.
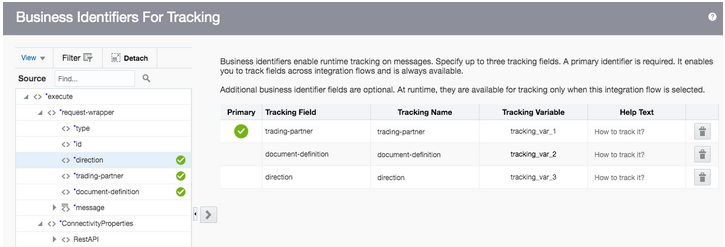
- Add identifiers for integration tracking.
Select fields from the input schema for integration tracking to complete the integration.
- Save and then activate the backend integration.
Design a Backend Integration to Handle Multiple Types of Documents
The detailed steps assume you create one backend integration for each document definition that you want to handle. You can clone the integration for other document types because the basic pattern is identical.
If you want to design a single integration that handles multiple
document types, add a switch action in your integration and specific routes for each
document definition or trading partner. The request schema provides these
elements.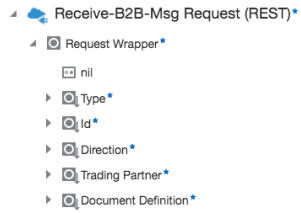
- Deactivate the backend integration that handles the purchase order document.
- Fix the mapping.
- Reactivate the integration.
If you had separate backend integrations for each document type, you are isolating the impact to one specific integration. Whereas, if everything is built into a single integration, you have a wider impact in a production deployment, for example.