When creating a connection to a web service using Process, you specify a WSDL file that is stored locally on your machine or available online. For a secure web service, you can ensure that only users with the proper credentials can access it.
If you’re connecting to a secure web service outside of Process, you must obtain the credentials according to the instructions for that web service.
When you deploy a process beginning with a message start event, the process is exposed as a web service. The WSDL file URL is displayed when you select
Web Services from the Actions menu on the Manage Deployed Applications page. You can then connect to the process just as you would to any other web service. See
Communicate Between Processes and
Administrator Basics.
To configure credentials for a process exposed as a web service, you must have administrator privileges in
Process. You can create a security key in two ways:
-
When you create a web service connector in Process
-
When you select My
Tasks in the Oracle Integration navigation pane, click Workspace, and then click Administration.
Want to learn more about configuring credentials in Workspace? See
Configure Credentials for Web Services
- Create a web service connector in any one of the following ways:
To add a connector from the Application Home tab:
-
On the Application Home tab, click Integrations and select the Integrations view.

Description of the illustration connector-definition2.png
-
Click Link to an Integration and then select Create a SOAP connector.
Optionally, click Create, click External, and then select SOAP.
To add a connection from the Properties dialog box of a service task:
-
Add or open a service task in the process. In its properties, implement a service call to a web service.
-
Click Add  .
.
- Select the source for the WSDL or Zip file, then click Next:
Note:
When you click
Next, the system automatically validates your selected files before importing.
- In the Basic Properties dialog box, provide the following information:
- Click Create to create your web service connector now, or Next to open the Advanced Properties page.
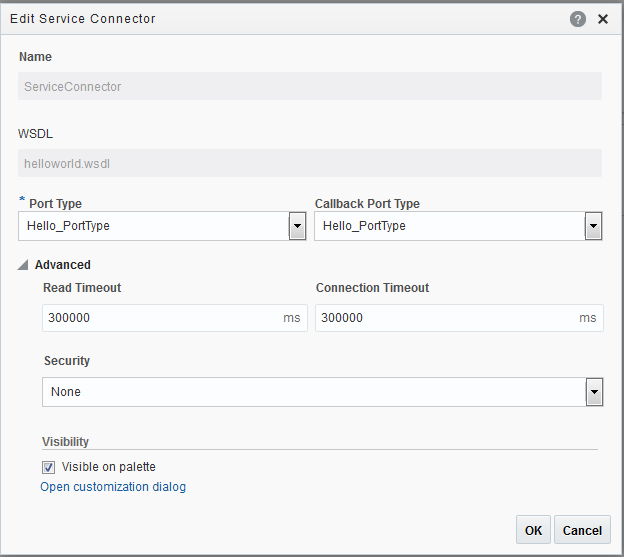
- If you clicked Next, complete the Advanced Properties settings, and click Create:
- Read Time Out: Specify the time out for reading the WSDL file in milliseconds.
- Connection Time Out: Specify the time out for connecting to the web service in milliseconds.
- Security: Select None, APP Id – Basic Auth, APP Id – Username Token, or APP Id — Username Token With Message Protection from the drop-down list.
- Certificate: If the Security is set to APP Id — Username Token With Message Protection, select New Certificate Alias from the drop-down list and click Add Certificate to upload a certificate.
Want to learn more about how to add certificates? See Manage Security Certificates During Design Time and Apply Message Security to Integrations.
- Keystore Credential: If Security isn’t set to None, select a key from the drop-down list.
You can also select [New Key] and type a name, username, and password.
For an existing key, the Username and Password values are automatically populated.
- Visibility on palette: In the Visibility section, select Visible on palette to display the connector in the elements palette. If you choose to display the connector in the palette, click Open customization dialog to customize the name of the connector to be displayed in the palette. Enter a name and click Apply.
After you create a web service connector, you can only change the port types and the advanced settings. To change other settings, you must delete and recreate the web service connection.
You can’t create business objects based on in-line types defined in a WSDL file. However, read-only business objects are automatically created from the WSDL file when you create a web service connector. You can create data objects based on these read-only business objects. Want to learn more about business objects and data objects? See Manage Application Data.
