- Device Connectivity Guide for Oracle Fusion Cloud IoT Intelligent Applications
- Develop Device Software Using the Client Software Libraries
- Use the Java SE Client Software Libraries
- Set Up Your Development Environment to Use the Java SE Client Software Libraries
Set Up Your Development Environment to Use the Java SE Client Software Libraries
Before you can develop applications that let your devices to communicate with Oracle Fusion Cloud IoT Intelligent Applications, you first download, install, and configure the Java SE client software libraries.
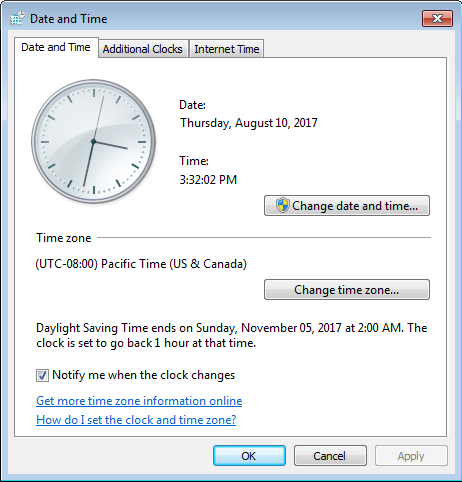
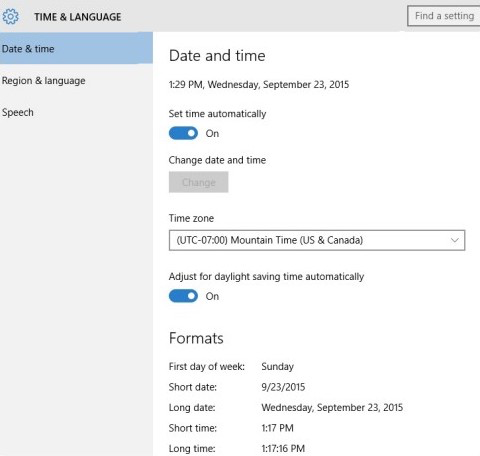
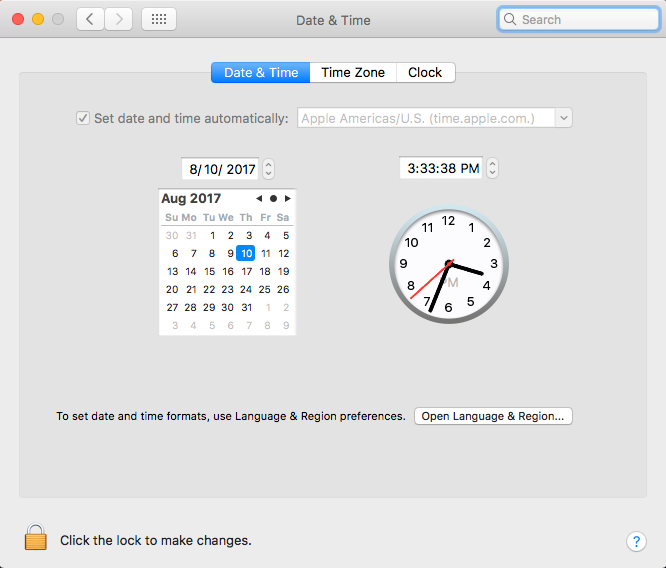
- Ensure that the time in your system is current. If the date and time must be adjusted, do the following:
- For the Windows 7 and 8 platform, click the time and date in the lower right corner of the desktop. When the resulting popup window opens, select Change Date and Time Settings... at the bottom. Use the Date and Time dialog, shown below, to reset the date and time.
- For the Windows 10 platform, right click the time and date in the lower right corner of the desktop, and select Adjust Date and Time from the popup menu. Use the Time and Language settings panel, shown below, to reset the date and time.
- For the Mac platform, select System Preferences... from the Apple menu in the upper left corner of the desktop, then choose Date and Time. Reset the date and time accordingly.
- For the Linux platform, open a command prompt and use the date command, such as the following:
date -s "19 APR 2017 11:14:00"
- Download and install Gradle. Instructions on installation for various platforms can be found on the Gradle website.
- Open a web browser and browse to the Oracle Fusion Cloud IoT Intelligent Applications client software libraries download site.
- Scroll to Java SE Client Software Library and download the Binaries, Source Code and Samples zip files from the Java SE Client Software Library table. This table describes the contents of each zip file:
Filename Description iotcs-csl-javase-bin-<version>.zipContains the Java SE client software library binary files.
iotcs-csl-javase-src-<version>.zipContains the Java SE client software library binary file source code.
iotcs-csl-javase-samples-<version>.zipContains the Java SE sample applications.
- Extract the contents of the zip files. The files are saved to these directories:
Filename Directory iotcs-csl-javase-bin-<version>.zipiotcs/csl/javase/biniotcs-csl-javase-src-<version>.zipiotcs/csl/javase/srciotcs-csl-javase-samples-<version>.zipiotcs/csl/javase/samples - Set the
CL_HOME,GRADLE_HOME, and,JAVA_HOMEenvironment variables to their appropriate values. Sample values for the Linux platform are listed in the following table.System Variable Name Example CL_HOME/home/<user>/iotcs/csl/javase/GRADLE_HOME/opt/gradle-<version>JAVA_HOME/usr/java/jdk<version>- For the Windows 7 platform, open the Control Panel and select System. Then, choose Advanced System Settings in the upper left of the dialog. In the System Properties dialog, choose the Advanced tab, then press the Environment Variables button. Add the new environment variables to either the user or system section.
- For the Windows 10 platform, open Settings and select System. Then, select the About tab on the left side, and choose Advanced System Settings in the upper right of the dialog. In the System Properties dialog, choose the Advanced tab, then press the Environment Variables button. Add the new environment variables to either the user or system section.
- For the Mac platform, create or edit the file
~/.bash_profileand add one line for each entry, such as the following examples:export CL_HOME=~/iotcs/csl/javase/ export GRADLE_HOME=/opt/local/share/java/gradle export JAVA_HOME=/Library/Java/JavaVirtualMachines/jdk1.8.0_65.jdk/Contents/Home - For the Linux platform, create or edit the file
~/.profile(or equivalent for the command line shell) and add one for each entry, as in the Mac example.
- Modify the
PATHvariable to include the path to the Java and Gradle executables. Use the instructions for each platform in the previous step to access the environment variables for each operating system.For example, in the Linux environment, you can add the following to the existingPATHvariable.export PATH=$JAVA_HOME/bin:$GRADLE_HOME/bin:$PATH - If your computer is on a Virtual Private Network, or behind a firewall:
- Open the
gradle.propertiesfile, located in the Gradle user home directory and add these lines:systemProp.http.proxyHost=<your_proxy_server.com> systemProp.http.proxyPort=<your_proxy_port> systemProp.https.proxyHost=<your_proxy_server.com> systemProp.https.proxyPort=<your_proxy_port> - Save your changes and close the
gradle.propertiesfile.
- Open the
- Start your favorite IDE and install the Gradle Support plugin.
- Register your device, record the password, and download the provisioning file. See Registering and Activating Devices.
- Using the web interface, create a new application named JavaSECLApp. See Creating a New Application.
- Associate the humidity and temperature sensor device models with the JavaSECLApp application. See Assign a Device Model to a Cloud Service.
- Add an integration named JavaSECLApp to the application. See Integrating Enterprise Applications with Oracle IoT Cloud Service.
- Download the provisioning file for the integration:
- Log in to your Oracle Fusion Cloud IoT Intelligent Applications instance.
- Click the Menu (
 ) icon adjacent to the Oracle Fusion Cloud IoT Intelligent
Applications title on the Management Console.
 - Click Applications and then Browse Applications.
- Click JavaSECLApp and then Integration.
- Select the JavaSECLApp integration and click the Edit (
 ) icon.
 - Click the Overview tab.If you are using Oracle Fusion Cloud IoT Intelligent Applications version 16 4.1 or earlier, record the ID and Shared Secret values. These values are required when you run the provisioning tool to create the trusted assets store .
- Enter a password in the File Protection Password field to encrypt the provisioning file that contains the configuration and credentials to activate your integration.
- Enter the password again in the Confirm Password field.
- Click Download Provisioning File.
- Click Save File.
- Browse to a directory and then click Save.
- Prepare your device for the installation of the Java SE client software libraries. See Prepare an Embedded Device to Use the Java SE Client Software Library.
- Run the Java SE client software library sample applications. See Create the Java SE Client Software Library Sample Applications.


