Create a New Map

A map is a virtual fencing over a geographical area to define boundaries. The maps help you in defining boundaries over a specific area and then use it to analyze the data for your business. Based on the data you analyze, you can use the data to improve your business performance.

To create a new map:
  1. From the Management Console’s Home menu, click Applications.
    Description of applications-menu.jpg follows
    Description of the illustration applications-menu.jpg
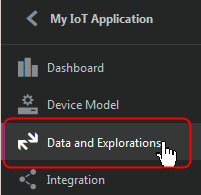
  2. Click the IoT Application’s name to go to its home page and then click Data and Explorations.
    Description of select-exploration.jpg follows
    Description of the illustration select-exploration.jpg
  3. From the Data and Explorations page, click Explorations and in the Maps section, click Add.
  4. In the Add dialog, enter a name for the map in the Name text field.
  5. (Optional) Modify the default value in the Description text field.
  6. Click Confirm.
    A new table with a row for the new map is added in the Maps section
  7. Select the row for the newly created map and click Edit to define its boundaries.
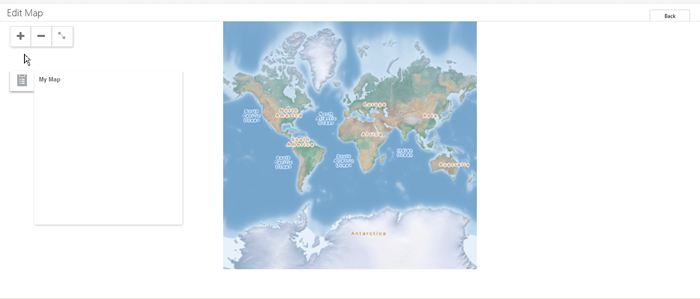
    The Edit Map page, similar to the following image, is displayed if you opted to not share your current location.Description of edit-map-initial-page.jpg follows
    Description of the illustration edit-map-initial-page.jpg
  8. Use the zoom in and zoom out controls to change the view of the map.
  9. Use the polygon tool control to define the boundaries.
    1. Click the polygon tool icon. Polygon Tool icon
    2. Click on an initial point on the map to begin defining the boundaries of the Geo-fence.
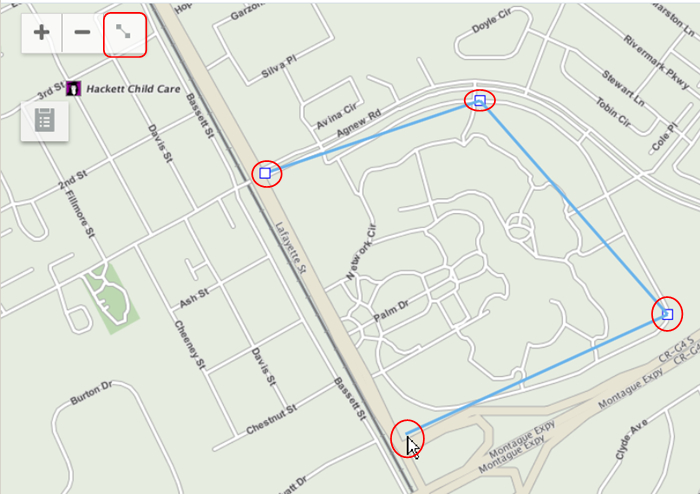
    3. Continue clicking specific points to create the boundaries of the geo-fence..
      Description of edit-map-add-boundaries.jpg follows
      Description of the illustration edit-map-add-boundaries.jpg
    4. Complete the geo-fence by clicking on the initial point again.
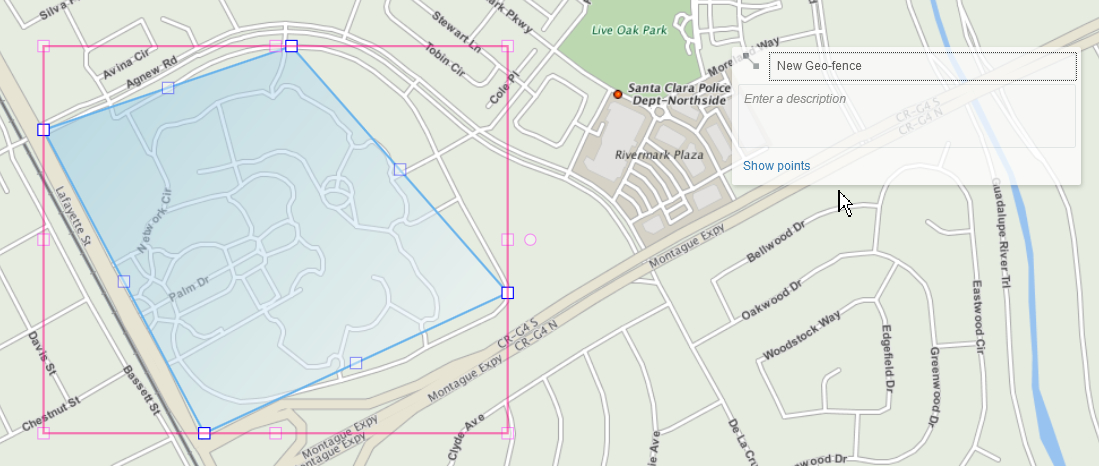
      The map is updated with the new geo-fence and the polygon tool dialog.Description of edit-map-geofence-created.jpg follows
      Description of the illustration edit-map-geofence-created.jpg
    5. Use the polygon tool dialog to enter a name and description for the new geo-fence.
    6. Click Show points to display the coordinates used for the geo-fence.
The map is now ready for you to use with your exploration. See Use Maps to Create Explorations.