- Developing Applications with Oracle Internet of Things Cloud Service
- Integrate with External Services
- Integrate Oracle Storage Cloud Service with Oracle IoT Cloud Service
Integrate Oracle Storage Cloud Service with Oracle IoT Cloud Service
An integration with your Oracle Storage Cloud Service instance enables you to store the streams of device data sent by your devices to your Oracle IoT Cloud Service instance using CSV or JSON formatted files.
You must already have access to an Oracle Storage Cloud Service instance before you can define an integration with your IoT application.
- From the Management Console’s Home menu, click Applications.

Description of the illustration applications-menu.jpgThe Applications menu is displayed and lists all the existing IoT applications. - Click the name of the existing IoT application that you want to integrate with your Oracle Storage Cloud Service instance.
- Create the integration with your Oracle Storage Cloud Service instance.
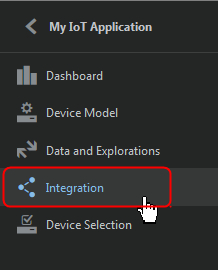
- Click Integration on the left navigation area, as shown below.

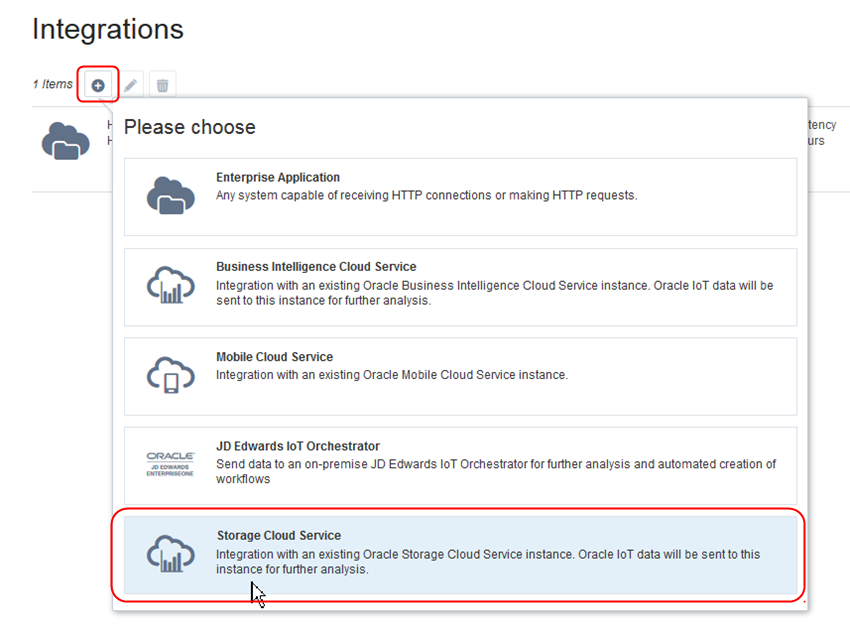
Description of the illustration select-integration.jpg - If you don’t have any integration configured yet, click Create Integration. If you have at least one integration already set up, click Add (+ icon).
- Select Storage Cloud Service, as shown in the image below.
- In the Storage Cloud Service dialog, enter the information required to create the integration with your Oracle Storage Cloud Service instance.
-
Name - alphanumeric name of your choice for the integration
-
URL - REST API endpoint URL of your Oracle Storage Cloud Service instance.
-
Identity Domain - the identity domain for your Oracle Storage Cloud Service instance .
-
Username - the username assigned to you for your Oracle Storage Cloud Service subscription.
-
Password - the password assigned to you for your Oracle Storage Cloud Service subscription.
-
Container Name - alphanumeric name for the folder that will store your data. Clicking in the field provides a default name of MyStorageCSIntegrationContainer.
-
Data Format - the data format to use when storing the data. Use the drop list to choose either a CSV or a JSON format.
-
- (Optional) Click Verify Connectivity to test the connection between Oracle Internet of Things Cloud
Service instance and the target service or application.The connectivity test can include:
-
DNS Resolution Test: Checks whether the server name resolves to an IP address.
-
Connectivity Test: Checks whether the IP address is reachable.
-
IP/Port test: Checks whether you can talk to the target URL on the specified port.
-
SSL Verification Test: Checks whether you have a secured, or trusted, connection to the target. Applies only if the target is an SSL endpoint.
-
Authentication Test: Checks whether you can exchange messages with the target.
-
- Click Create.
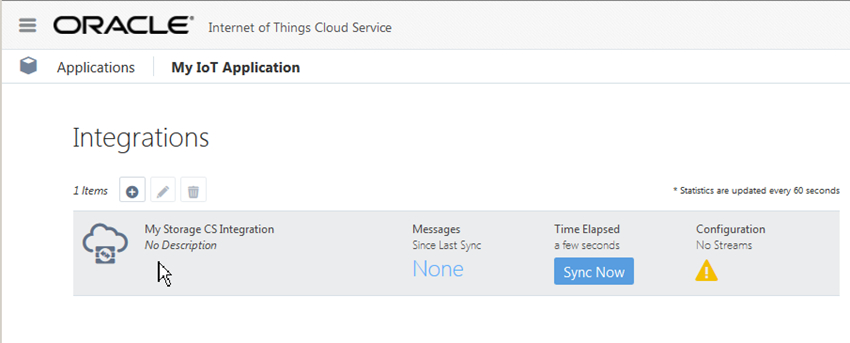
The new integration is created and a new row is listed in the Integrations page, as shown in the image below.
Description of the illustration integration-scs-created.jpg - Click Integration on the left navigation area, as shown below.
- Configure the data streams to use for the new integration
- From the Integrations page, select the newly created Oracle Storage Cloud Service integration.
- Click Streams.
- Click Create Stream.
- From the Message Format drop list, select a message format to use for the stream.
- In the Object Base Name text field, type the base name to use when creating the files that will contain the data that will be sent to Oracle Storage Cloud Service. The Object Base Name can be no more than 30 ASCII characters in length.
- Click in the Annotations text field if you want to add an annotation. Select from the list of metadata types to add to the outgoing stream.
If you previously created custom metadata keys for your devices and streams, then these also appear in the list of annotations.
You can also type a new annotation name and select the data type for the annotation.
- Click the + icon if you want to add another stream. An integration can have multiple streams, but only one message format used per stream.
- Click Save.
- Back in the Integrations page, select the row for the Oracle Storage Cloud Service integration again.
- Click Synchronize Now to start synchronizing the data.
The synchronization of data from Oracle IoT Cloud Service to Oracle Storage Cloud Service can be done manually or automatically. Automatic synchronization can be set by specifying a synchronization schedule ranging from 1 hour to 1 day. Once the process has been triggered, Oracle IoT Cloud Service begins to synchronize data that is available for each data stream that was created since the last successful synchronization event in Oracle IoT Cloud Service.
- Click the Synchronization tab to automatically synchronize the data.
- Click the Automatic Synchronization check box to enable automatic batch synchronization. If the check box is unchecked, it indicates that automatic synchronization is disabled.
- Click the Synchronization Interval drop down list and select a value to specify the interval at which data is to be synchronized. There are different time intervals ranging 1 hour to 1 day. Note that there is a possibility that even though the entire synchronization process has been completed, there may be certain data streams that don’t get updated as part of that process.The synchronization operation may take some time to complete. A progress indicator will be displayed to give you status.
- Click Messages to view any messages that are being sent through the integration.
Once the synchronization is complete, the Messages tab is updated with data messages that are streaming from the devices that are online.
- Click Save to store any changes you made in the Oracle Storage Cloud Service integration.
