Using Visual Studio Code Extension for Development
The Oracle NoSQL Database Cloud Service provides an extension for Microsoft Visual Studio Code which lets you connect to a running instance of Oracle NoSQL Database Cloud Service.
You can use Oracle NoSQL Database Visual Studio (VS) Code extension to:
-
View the tables in a well-defined tree structure with Table Explorer.
-
View information on columns, indexes, primary key(s), and shard key(s) for a table.
-
View column data in a well-formatted JSON Structure.
-
Create tables and child tables using form-based schema entry or supply DDL statements.
-
Create JSON Collection tables using Advanced DDL Input mode and insert, update rows using Advanced JSON Input mode.
-
Drop tables, columns, rows, or indexes.
-
Add new columns and indexes using form-based entry or supply DDL statements.
-
Add new rows using a form-based entry or use Advanced JSON Input mode.
-
Run SELECT SQL queries on a table and view query results in tabular format.
-
Run DDL statements to manage regions, namespaces, and roles.
-
Run DML statements to update, insert, and delete data from a table.
-
Calculate recommended cache and storage settings by using the JeCacheSizingTool.
-
Download SELECT query results as a JSON file or as individual JSON files per row.
-
Use Prettify SQL to improve readability.
This article has the following topics:
Installing Oracle NoSQL Database Visual Studio Code Extension
You can install the Oracle NoSQL Database VS Code extension from the Visual Studio Marketplace for online installation.
Before you can install the Oracle NoSQL Database Visual Studio (VS) Code extension, you must install Visual Studio Code. You can download Visual Studio Code from here.
For installation:
-
In Visual Studio Code, click the Extensions icon in the left navigation.

Alternatively, you can open the Extensions view by pressing:
-
(Windows and Linux) Control + Shift + X
-
(macOS) Command + Shift + X.
-
-
Search Oracle NoSQL Database Connector in the extension marketplace.
-
Click Install on the Oracle NoSQL Database Connector extension
Connecting to Oracle NoSQL Database Cloud Service or Oracle NoSQL Database Cloud Simulator from Visual Studio Code
Oracle NoSQL Database Visual Studio (VS) Code extension provides two methods to connect to Oracle NoSQL Database Cloud Service or Oracle NoSQL Database Cloud Simulator.
You can either provide a config file with the connection information or fill in the connection information in the specific fields. If you are using a driver, for example, a Node.js driver and already have connection details saved in a file or want to create one, use the Use Configuration File option to connect to the Oracle NoSQL Database Cloud Service. Otherwise, if you are creating a new connection, use the Advanced option.
-
In Visual Studio Code, click the Oracle NoSQL DB view in the Activity Bar.

-
Open the Oracle NoSQL DB Show Connection Settings page from the Command Palette or the Oracle NoSQL DB view in the Activity Bar.
- Open from Command Palette
-
Open the Command Palette by pressing:
-
(Windows and Linux) Control + Shift + P
-
(macOS) Command + Shift + P
-
-
From the Command Palette, select OracleNoSQL: Show Connections Settings.
Tip:
Enter
oraclenosqlin the Command Palette to display all of the Oracle NoSQL DB commands you can use.
-
- Open from Command Palette
- Open from Oracle NoSQL DB View
  1. Expand the **TABLE EXPLORER** pane in the left navigation if it's collapsed.

  2. Click **Add Connection** to open the Oracle NoSQL DB **Show Connection Settings** page.
-
In the Show Connection Settings page, click Cloud or CloudSim to connect to Oracle NoSQL Database Cloud Service or Oracle NoSQL Database Cloud Simulator.
-
Click Add New Connection and enter the connection information. Click Add.
Table - Cloud Connection Parameters
Field Description Sample Value Connection Name: A unique name, for the connection specification is mandatory from the plugin version 4.0.0. Updating the Connection Name field is recommended after upgrading the plugin from version 3.0.0 or lower.
Note: You can add multiple connections and the stored connection specifications are persistent.Region/Endpoint: A Region Identifier or Service Endpoint to access the Oracle NoSQL Database Cloud Service. See, Data Regions and Associated Service URLs for a list of Region Identifiers and Service Endpoints. us-ashburn-1orhttps://nosql.us-ashburn-1.oci.oraclecloud.com(for the Ashburn Oracle NoSQL Database Cloud Service region identifier in the North America region).Tenant OCID: Tenancy’s OCID for your Oracle NoSQL Database Cloud Service. See Where to Get the Tenancy’s OCID and User’s OCID in Oracle Cloud Infrastructure Documentation. ocid1.tenancy.oc1..<unique_ID>User OCID: User’s OCID for your Oracle NoSQL Database Cloud Service. See Where to Get the Tenancy’s OCID and User’s OCID in Oracle Cloud Infrastructure Documentation. ocid1.user.oc1..<unique_ID>Fingerprint: Fingerprint for the private key that was added to this user.<p>The fingerprint of the signing key is created while generating and uploading the API Signing Key. See How to Get the Key’s Fingerprint in Oracle Cloud Infrastructure Documentation. 12:34:56:78:90:ab:cd:ef:12:34:56:78:90:ab:cd:efPrivate Key File: Browse to the location where private key is stored. See How to Generate an API Signing Key to generate the signing key with an optional pass phrase. /home/user/.oci/oci_api_key.pemPassphrase: Passphrase you specified when creating the private key. The pass phrase of the signing key is created while generating and uploading the API Signing Key. See How to Get the Key’s Fingerprint in Oracle Cloud Infrastructure Documentation.
Required, only if the key is encrypted.Compartment: The name or OCID of the compartment for your Oracle NoSQL Database Cloud Service schema. If you do not provide any value, the field defaults to the
rootcompartment.You create compartments in Oracle Cloud Infrastructure Identity and Access Management (IAM). See Setting Up Your Tenancy and Managing Compartments in Oracle Cloud Infrastructure Documentation .
- Compartment name: mycompartment
- Compartment name qualified with its parent compartment:parent.childcompartment
- Compartment OCID:ocid1.tenancy.oc1...<unique_ID>Table - CloudSim Connection Parameters
Field Description Sample Value Connection Name: A unique name, for the connection specification is mandatory from the plugin version 4.0.0. Updating the Connection Name field is recommended after upgrading the plugin from version 3.0.0 or lower.
Note: You can add multiple connections and the stored connection specifications are persistent.Endpoint: Service Endpoint URL of the Oracle NoSQL Database Cloud Simulator instance. http://myinstance.cloudsim.com:8080
If you do not specify the value, it defaults tohttp://localhost:8080.Tenant Identifier: Unique identifier to identify the tenant. Tenant01
If you do not specify the value, it defaults toTestTenant.Note: The connection processing has changed starting with version 4.0.0. If you are using an older version of the plugin, then only the most recently used connection will be migrated during the upgrade process to version 4.0.0. The plugin will automatically assign the name
cloud_old0to the migrated connection. You can change the connection name using the Modify Connection option in the Connections Setting page. -
The connection details are saved. To modify existing connections, select the connection from the Connections drop-down. Click Modify Connection. Make the desired changes in the Connection Parameters and click Save.
-
Click the Web Icon in the TABLE EXPLORER to view the list of all the connections (on-premises and Cloud) present in the plugin. The connections are displayed in the dropdown in the format:
Connection Name:Endpoint: Compartment(if specified).Choose the connection from the list and select Connect. The Visual Studio Code plugin connects to Oracle NoSQL Database Cloud Serviceor Oracle NoSQL Database Cloud Simulator and displays all its tables in the Table Explorer window.
-
If you don’t have a config file, create one, for example, config.json or a file with the JSON object. The config file format for connecting to Oracle NoSQL Database Cloud Service or Oracle NoSQL Database Cloud Simulator is as shown below.
Table - Configuration Templates
Oracle NoSQL Database Cloud Service Oracle NoSQL Database Cloud Simulator Configuration template to connect using OCI configuration file
Configuration template to connect using IAM authentication credentials{ "region": "", "compartment": " ", "auth": { "iam": { "configFile": " ", "profileName": " " } } } { "region": "", "compartment": " ", "auth": { "iam": { "tenantId": " ", "userId": " ", "fingerprint": " ", "privateKeyFile": " ", "passphrase": " " } } } { "endpoint": "http://myinstance.cloudsim.com:8080", "auth" : "Bearer" } -
Open the Oracle NoSQL DB Show Connection Settings page from the Command Palette or the Oracle NoSQL DB view in the Activity Bar.
-
Open from Oracle NoSQL DB View
-
Expand the Table Explorer pane in the left navigation if it’s collapsed.
-
Click Add Connection to open the Oracle NoSQL DB Show Connection Settings page.
-
In the Show Connection Settings page, click Cloud to connect to Oracle NoSQL Database.
-
Enter the connection information and click Add.
Table - Cloud Connection Parameters
Field Description Sample Vaue Connection Name: A unique name, for the connection specification is mandatory from the plugin version 4.0.0. Updating the Connection Name field is recommended after upgrading the plugin from version 3.0.0 or lower.
Note: You can add multiple connections and the stored connection specifications are persistent.Region/Endpoint: A Region Identifier or Service Endpoint to access the Oracle NoSQL Database Cloud Service. See, Data Regions and Associated Service URLs for a list of Region Identifiers and Service Endpoints. us-ashburn-1orhttps://nosql.us-ashburn-1.oci.oraclecloud.com(for the Ashburn Oracle NoSQL Database Cloud Service region identifier in the North America region).Configuration File: Browse to the location where the OCI configuration file is stored. /home/user/security/config/oci.configProfile: Name of the configuration profile to be used to connect to the Oracle NoSQL Database Cloud Service. If you do not specify this value, the field defaults to the DEFAULTprofileADMIN_USER Compartment: The name or OCID of the compartment for your Oracle NoSQL Database Cloud Service schema. If you do not provide any value, the field defaults to the
rootcompartment.You create compartments in Oracle Cloud Infrastructure Identity and Access Management (IAM). See Setting Up Your Tenancy and Managing Compartments in Oracle Cloud Infrastructure Documentation.
- Compartment name
mycompartment
- Compartment name qualified with its parent compartment
parent.childcompartment
- Compartment OCID
ocid1.tenancy.oc1...
- Compartment name
-
-
Note: The connection processing has changed starting with version 4.0.0. If you are using an older version of the plugin, then only the most recently used connection will be migrated during the upgrade process to version 4.0.0. The plugin will automatically assign the name cloud_old0 to the migrated connection. You can change the connection name using the Modify Connection option in the Connections Setting page.
-
Open from Command Palette:
-
Open the Command Palette by pressing:
-
(Windows and Linux) Control + Shift + P
-
(macOS) Command + Shift + P
-
-
From the Command Palette, select Oracle NoSQL: Connect via Config File.
Note: Enter
oraclenosqlin the Command Palette to display all of the Oracle NoSQL DB commands you can use. -
Browse to the location where the
*.configfile is stored and click Select.
-
-
The connection details are saved. To modify existing connections, select the connection from the Connections drop-down. Click Modify Connection. Make the desired changes in the Connection Parameters and click Save.
-
Click the Web Icon in the TABLE EXPLORER to view the list of all the connections (on-premises and Cloud) present in the plugin. The connections are displayed in the dropdown in the format:
Connection Name:Endpoint: Compartment(if specified).Choose the connection from the list and select Connect. The Visual Studio Code plugin connects to Oracle NoSQL Database Cloud Serviceor Oracle NoSQL Database Cloud Simulator and displays all its tables in the Table Explorer window.
Creating applications using Oracle NoSQL Java SDK from Visual Studio Code
Learn to create applications from Visual Studio Code extension using the Oracle NoSQL Java SDK package.
After connecting to the Oracle NoSQL Database Cloud Simulator or Oracle NoSQL Database Cloud Service, you can create applications using Oracle NoSQL Java SDK.
Perform the following steps:
Set up the Maven Project
-
Open Visual Studio Code.
-
Install the Java Extension Pack:
-
Open the Extensions view by clicking the Extensions icon in the left sidebar.
-
Search for Java Extension Pack in the Extensions Marketplace.
-
Click the Install button to install the Java Extension Pack
-
-
On the View tab, select Command Palette and press Ctrl+Shift+P.
-
Search for Java: New Project.
-
Choose the project template as Maven.
-
Enter the project details:
-
Project name.
-
Project location (default is the current workspace folder).
-
Package name (For example,
com.example.myproject).
-
-
Set the Java path in your environment variable.
-
Visual Studio Code creates the project directory structure and files.
-
Open the pom.xml file from the project directory and add the Oracle NoSQL Java SDK dependency as follows. Use the latest version. See Oracle NoSQL Java SDK.
<dependency>
<groupId>com.oracle.nosql</groupId>
<artifactId>nosqldb-driver</artifactId>
<version>5.4.22</version>
</dependency>
Create and run a sample application program
-
Create a sample application code as follows. Update your region in
<your_region_identifier>and compartment OCID in<ocid_of_your_compartment>placeholders.Note: This application retrieves authentication details from the OCI configuration file. For more information about the configuration file and its contents, see Authentication to connect to Oracle NoSQL Database.
package org.oracle.nosqljavasdk; import oracle.nosql.driver.NoSQLHandle; import oracle.nosql.driver.NoSQLHandleConfig; import oracle.nosql.driver.NoSQLHandleFactory; import oracle.nosql.driver.iam.SignatureProvider; import oracle.nosql.driver.ops.GetRequest; import oracle.nosql.driver.ops.GetResult; import oracle.nosql.driver.ops.PutRequest; import oracle.nosql.driver.ops.PutResult; import oracle.nosql.driver.ops.TableLimits; import oracle.nosql.driver.ops.TableRequest; import oracle.nosql.driver.ops.TableResult; import oracle.nosql.driver.values.MapValue; public class JavaVSCodeCloud { /* Name of your table */ final static String tableName = "TestSDK"; static NoSQLHandle handle; /* replace the placeholder with the name of your region for example Region.US_ASHBURN_1*/ /* String region ="<your_region_identifier>"; */ public static void main(String[] args) throws Exception { String region ="<your_region_identifier>"; String compId ="<ocid_of_your_compartment>"; handle = generateNoSQLHandleCloud(region,compId); try { createTable(handle); writeRows(handle); readRows(handle); /* Uncomment this if you want to drop the table */ //dropTable(handle); } catch (Exception e) { System.err.print(e); } finally { handle.close(); } } /* Create a NoSQL handle to access the cloud service */ private static NoSQLHandle generateNoSQLHandleCloud(String region, String compId) throws Exception { SignatureProvider ap = new SignatureProvider(); NoSQLHandleConfig config = new NoSQLHandleConfig(region, ap); /* set your default compartment */ config.setDefaultCompartment(compId); NoSQLHandle handle = NoSQLHandleFactory.createNoSQLHandle(config); return handle; } /** * Create a simple table with an integer key * and a single string data field * and set your desired table capacity */ private static void createTable(NoSQLHandle handle) throws Exception { String createTableDDL = "CREATE TABLE IF NOT EXISTS " + tableName + "(employeeid INTEGER, name STRING, " + "PRIMARY KEY(employeeid))"; TableLimits limits = new TableLimits(1, 2, 1); TableRequest treq = new TableRequest() .setStatement(createTableDDL).setTableLimits(limits); System.out.println("Creating table " + tableName); TableResult tres = handle.tableRequest(treq); /* The request is async, * so wait for the table to become active. */ System.out.println("Waiting for " + tableName + " to become active"); tres.waitForCompletion(handle, 60000, /* wait 60 sec */ 1000); /* delay ms for poll */ System.out.println("Table " + tableName + " is active"); } /** * Construct a row and add it to the table */ private static void writeRows(NoSQLHandle handle) throws Exception { MapValue value = new MapValue().put("employeeid", 1).put("name", "Tracy"); PutRequest putRequest = new PutRequest().setValue(value).setTableName(tableName); PutResult putResult = handle.put(putRequest); if (putResult.getVersion() != null) { System.out.println("Wrote " + value); } else { System.out.println("Put failed"); } } /** * Set a key and read the row from the table */ private static void readRows(NoSQLHandle handle) throws Exception { MapValue key = new MapValue().put("employeeid", 1); GetRequest getRequest = new GetRequest().setKey(key).setTableName(tableName); GetResult getRes = handle.get(getRequest); System.out.println("Read " + getRes.getValue()); } /** * Drop the table and wait for the table to move to dropped state */ private static void dropTable(NoSQLHandle handle) throws Exception { System.out.println("Dropping table " + tableName); TableRequest treq = new TableRequest() .setStatement("DROP TABLE IF EXISTS " + tableName); TableResult tres = handle.tableRequest(treq); System.out.println("Waiting for " + tableName + " to be dropped"); tres.waitForCompletion(handle, 60000, /* wait 60 sec */ 1000); /* delay ms for poll */ System.out.println("Table " + tableName + " has been dropped"); } } -
Run the Java program. You can press F5 or select the desired option from the Run menu.
Note: If you have network proxies, include them in the settings.xml file located in the maven directory.
-
You can view the output in the Visual Studio Code terminal.
The application code above creates the table TestSDK, adds a row to the table, and reads the row from the table.
Sample output:
----------------< com.oracle.nosql.example:NoSQLOperation >-----------------
Building NoSQLOperation 1.0-SNAPSHOT
  from pom.xml
--------------------------------[ jar ]---------------------------------

--- resources:3.3.1:resources (default-resources) @ NoSQLOperation ---
Using platform encoding (UTF-8 actually) to copy filtered resources, i.e. build is platform dependent!
skip non existing resourceDirectory C:\Users\ramya\javaVSCode\src\main\resources

--- compiler:3.8.0:compile (default-compile) @ HelloWorld ---
Changes detected - recompiling the module!
File encoding has not been set, using platform encoding UTF-8, i.e. build is platform dependent!
Compiling 1 source file to C:\Users\ramya\javaVSCode\target\classes

--- exec:3.1.0:exec (default-cli) @ NoSQLOperation ---
Creating table TestSDK
Waiting for TestSDK to become active
Table TestSDK is active
Wrote {"name":"Tracy","employeeid":1}
Read {"employeeid":1,"name":"Tracy"}
------------------------------------------------------------------------
BUILD SUCCESS
------------------------------------------------------------------------
Total time:  8.013 s
Finished at: 2025-11-24T17:01:24+05:30
------------------------------------------------------------------------
You can also view the table from your Visual Studio Code Table Explorer. For details, see Managing Tables Using Visual Studio Code Extension.
Managing Tables Using Visual Studio Code Extension
After you connect to your deployment using Oracle NoSQL Database Visual Studio (VS) Code extension, use the TABLE EXPLORER located on the left navigation to:
-
Explore your tables, columns, indexes, primary keys, and shard keys.
-
Create new tables.
-
Create child tables.
-
Drop existing tables.
-
Create Indexes.
-
Drop Indexes.
-
Add columns.
-
Drop columns.
-
Insert data into table.
-
Run SELECT SQL queries.
-
Refresh tables.
-
View table DDL.
You can also:
-
Manage Replicas.
-
Edit Reserved Capacity.
-
Freeze and Unfreeze schema.
Explore tables, columns, indexes and keys
When you expand an active connection, Oracle NoSQL Database VS Code shows the tables in that deployment.
-
Click the table name to view its columns, indexes, primary key(s), and shard key(s). The column name displays along with its data type.
-
You can refresh the schema or table at any time to re-query your deployment and populate Oracle NoSQL Database Cloud Service with the most up-to-date data.
-
In the TABLE EXPLORER, locate the connection and click the Refresh icon to reload the schema. Alternatively, you can right-click the connection and select Refresh Schema.
-
In the TABLE EXPLORER, locate the table name and click the Refresh icon to reload the table. Alternatively, you can right-click the table name and select Refresh Table.
-
In the TABLE EXPLORER you can verify the data type of a particular column. Locate the particular column and the data type is followed by the column name.
Perform DDL operations using Visual Studio Code
You can use Visual Studio Code to perform DDL operations.
Some of the DDL operations that can be performed from inside the Visual Studio Code plugin are:
CREATE TABLE
You can create the Oracle NoSQL Database table in two modes:
-
Simple DDL Input: You can use this mode to create the Oracle NoSQL Database table declaratively, that is, without writing a DDL statement.
-
Advanced DDL Input: You can use this mode to create the Oracle NoSQL Database table using a DDL statement.
-
Hover over the Oracle NoSQL Database connection to add the new table.
-
Click the Plus icon that appears or right-click on the database connection name and click Create Table
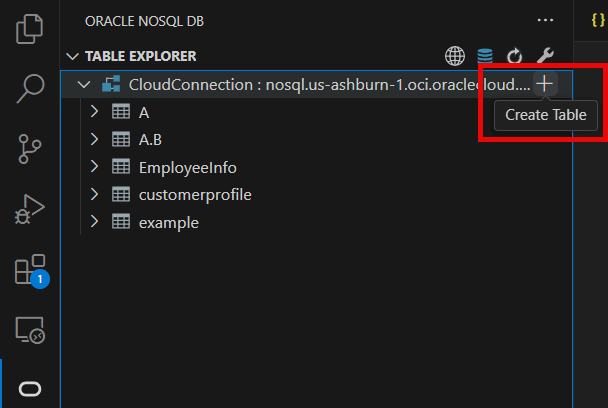
-
In the Create Table page, select Simple DDL Input.
Table - Create an Oracle NoSQL Database Table
Field Description Table Name: Specify a unique table name. Column Name Specify a column name for the primary key in your table. Column Type Select the data type for your primary key column. Set as Shard Key Select this option to set this primary key column as shard key. Shard key is to distribute data across the Oracle NoSQL Database cluster for increased efficiency, and to position records that share the shard key locally for easy reference and access. Records that share the shard key are stored in the same physical location and can be accessed atomically and efficiently. Remove Click this button to delete an existing column. + Add Primary Key Column Click this button to add more columns while creating a composite (multi-column) primary key. Column Name Specify the column name. Column Type Select the data type for your column. Default Value (optional) Specify a default value for the column.
Note: Default values cant be specified for binary and JSON data type columns.Not Null Select this option to specify that a column must always have a value. Remove Click this button to delete an existing column. + Add Column Click this button to add more columns. Unit Select the unit (Days or Hours) to use for TTL value for the rows in the table. Value Specify expiration duration for the rows in the table. After the number of days or hours, the rows expire automatically, and are no longer available. The default value is zero, indicating no expiration time.
Note: Updating Table Time to Live (TTL) does not change the TTL value of any existing data in the table. The new TTL value applies only to those rows that are added to the table after this value is modified and to the rows for which no overriding row-specific value has been supplied. -
Click Create.
-
You have an option to the view the DDL statement before and after creating a table.
-
Before creating the table - Click Show DDL in the Create Table screen to view the DDL statement formed based on the values entered in the fields in the Simple DDL input mode. This DDL statement gets executed when you click Create.
-
After creating the table - Right click on the existing table. Choose View Table DDL.
-
CREATE CHILD TABLE
To create a child table, right click on the desired table and choose Create Child Table. You can create a child table for an already existing Oracle NoSQL Database table in one of the two modes:
-
Simple DDL Input: You can use this mode to create a child table by simply entering a table name along with other required details.
-
Advanced DDL Input: You can use this mode to create a child table using a DDL statement. Click Create to create a child table.
For more details on child tables, see Table Hierarchies in Oracle NoSQL Database Cloud Service Guide.
DROP TABLE
-
Right-click the target table.
-
Click Drop Table.
-
Click Yes to drop the table.
CREATE INDEX
-
Locate the Table Explorer, and click the Refresh Schema icon to reload the schema.
-
Right click on the table where index need to be created. Choose Create Index.
-
In the Create Index panel, you have an option to create index in two modes:
-
Simple Input: Specify the name of the index and the columns to be part of the index. If the column type is JSON, you see an additional field called “JSON Path to Index Field”. Enter the path to the location of the JSON field, and choose the data type for it.
-
Using Advance DDL: Enter a valid DDL statement to create an index on any column(s). It can also include complex data type i.e. array, map, and record.
-
-
Click Add Index.
-
You have an option to the view the Index DDL statement. Right click on the existing index. Choose View Index DDL. Click OK to close the dialog box.
DROP INDEX
-
Locate the Table Explorer, and click the Refresh Schema to reload the schema.
-
Click on the table where the index needs to be removed. The list of indexes are displayed below the column names.
-
Right click on the index to be dropped. Click Drop Index.
-
A confirmation window appears, click Ok to confirm the drop action.
ADD COLUMN
-
Locate the Table Explorer, and click the Refresh Schema to reload the schema.
-
Right click on the table where column needs to be added. Click Add columns.
-
In the Add Column(s) Panel, you have an option to add column in two modes:
-
Simple DDL Input: Specify the name of the column and define the column with its properties - datatype, default value and whether it is nullable. In case of binary or fixed binary select the data type as
Binary. For fixed binary enter the size of the file in theSizefield and keep the field null in case of binary data type. -
Advanced DDL Input: You can use this mode to add new columns into the table by supplying a valid DDL statement, as well as, create columns with complex data type (e.g. array, map, or record and also in nested format).
-
-
Click Add New Columns.
DROP COLUMN
-
Locate the Table Explorer, and click the Refresh Schema to reload the schema.
-
Expand the table where column needs to be removed.
-
Right click the column to be removed and choose Drop Column.
-
A confirmation window appears, click Ok to confirm the drop action.
Freeze/UnFreeze Schema
To make a singleton table a Global Active table, you must first freeze the schema. For more information, see Freezing a table’s schema.
To Freeze/UnFreeze schema, follow the below steps:
-
Right-click on the desired table, click Freeze/Unfreeze schema.
-
A dialog box appears, click Yes, to confirm the action.
Manage Replicas
See Regional Table Replicas to understand what replicas are and how to convert a singleton table to a Global Active table.
Add Replicas
The Visual Studio Code plugin lets you to add a table replica in different regions. It also lets you add replicas to an existing Global Active table.
-
Right-click on the desired table, from the Replicas section, select Add Replicas.
-
From the Add Replica panel, select a region from the Replication region dropdown.
-
Enter Read Capacity, Write Capacity, Disk Storagedepending on your requirements.
-
Click Add Replica.
-
When you receive a notification that replicas have been added, close the panel by clicking ‘x’ or pressing ‘Ctrl+F4’.
Drop Replicas
-
Right-click on the desired table whose table replica you want to delete. From the Replicas sections, select Drop Replicas.
-
From the Drop Regional Replicas panel, select the replica from the Replica Name dropdown you want to delete. To delete many replicas concurrently, click +Add, select the Replica Name.
Note: To remove any replica, you wish not to delete, simply click Remove adjacent to the replica name.
-
Click Drop Replicas.
-
When you receive a notification that replicas have been dropped, close the panel by clicking ‘x’ or pressing ‘Ctrl+F4’.
View Replicas
-
Right-click on the desired table to view its replicas. From the Replicas section, select View Replicas.
-
In the View Regional Replicas panel, you can view a list of regional replicas with their Write Capacity.
-
After viewing the replicas, close the panel by clicking ‘x’ or pressing ‘Ctrl+F4’.
Edit Reserved Capacity
-
Right-click on the desired table and click Edit Reserved Capacity.
-
In the Edit Reserved Capacity panel, you can update either the Provisioned Capacity or the On-Demand Capacity.
-
Provisioned Capacity: You can edit the Read Capacity, Write capacity, and Disk Storage as per your requirements.
-
On Demand Capacity: You can only modify the Disk Storage. The Read Capacity and Write Capacity are in Read-only mode.
-
-
When you receive a notification that reserved capacity has been updated, close the panel by clicking ‘x’ or pressing ‘Ctrl+F4’.
Perform DML operations using Visual Studio Code
You can add data, modify existing data and query data from tables usingVisual Studio Code plugin.
Insert Data
-
Locate the Table Explorer, and click the Refresh Schema to reload the schema.
-
Right click on the table where a row needs to be inserted. Choose Insert Row.
-
In the Insert Row panel, enter the details for inserting a new row. You can INSERT a new ROW in two modes:
-
Simple Input : You can use this mode to insert the new row without writing a DML statement. Here a form based row fields entry is loaded, where you can enter the value of every field in the row.
-
For binary data type, the string typed in should be a valid Base64 encoding of a binary value or select the file to upload in the desired column.
-
For fixed binary data type, the string typed in should be a valid Base64 encoding of a binary value or upload the file according to the size specified for the column.
Note: The file format you upload for binary data type should have the .bin extension.
-
-
Advanced JSON Input : You can use this mode to insert a new row into the table by supplying a JSON Object containing the column name and its corresponding value as key-value pairs. The input can also be a complex data type i.e. array, map, record.
-
-
Click Insert Row.
Modify Data - UPDATE ROW/DELETE ROW:
-
Locate the Table Explorer, and click the Refresh Schema to reload the schema.
-
Click on the table where data needs to be modified.
-
In the textbox on the right under SQL>, enter the SQL statement to fetch data from your table. Click > to run the query.
-
To view individual cell data separately, click the table cell.
-
To perform DML operations like Update and Delete Row, right-click on the particular row. Pick your option from the context-menu that appears.
-
Delete Row : A confirmation window appears, click Ok to delete the row.
-
Update Row : You can update in the separate HTML panel that opens below the listed rows, displaying the column names along with their current value in a form-based entry. The other option to edit is to provide the input as a key-value. You can choose either of the two methods and supply new values.
Note: In any row, PRIMARY KEY and GENERATED ALWAYS AS IDENTITY columns cannot be updated.
-
Executing SQL Queries for a Table
-
Locate the Table Explorer, and click the Refresh Schema to reload the schema.
-
Right click on the table and choose Browse Table.
-
In the textbox on the right under SQL>, enter the SELECT statement to fetch data from your table.
-
While writing a query, the system highlights the syntax and displays a list of possible completions at the insertion point. You can select the desired option to autocomplete the code based on the context.
-
After writing your query, right click anywhere in the textbox and select Prettify SQLto format the code, improving its spacing, line wrapping, and increasing its overall readability.
-
Click > to run the query. The corresponding data is retrieved from the table.
-
Click on any row entry with a JSON data type column to open a dialog box displaying the JSON fields in an interactive tree structure. Click ‘+’ to expand or ‘-’ to collapse the structure.
In addition to the dialog box, a search field appears at the top-right corner. This allows you to search for any value in the JSON tree in real time, even within collapsed tree structures. Use the up or down arrow to navigate to the previous or next search result, respectively.
-
Right click on any row and click Download JSON. The single row gets downloaded into a JSON file. In the dialog box, navigate to the location where you want to save the file and click Save.
-
Click Download Query Result to save the complete result of the SELECT statement as a JSON file. In the dialog box, navigate to the location where you want to save the file and click Save.
-
Click Fetch All Records to retrieve all data from the table.
-
Click Show Query Plan to view the execution plan of the query.
-
Click the Previous Commands dropdown, to view the recently executed SQL statements that had provided an output.
Note: The dropdown will only show SQL statements related to the table you are dealing with.
Removing a Connection
Oracle NoSQL Database Connector provides two methods to remove a connection from Visual Studio (VS) Code.
You can:
-
Remove a connection with the Command Palette, or
-
Remove a connection from the Oracle NoSQL DB view in the Activity Bar.
Note: To remove a connection permanently from the plugin, select the connection from the Connections drop-down. Click Delete Connection. You get a confirmation to delete the plugin, click Yes to remove the connection from the plugin. Removing a connection from Visual Studio Code deletes the persisted connection details from the current workspace.
-
Expand the TABLE EXPLORER pane in the left navigation if it’s collapsed.
-
Right-click the connection you want to remove, then click Remove Connection.
-
Open the Command Palette by pressing:
-
(Windows and Linux) Control + Shift + P
-
(macOS) Command + Shift + P
-
-
From the Command Palette, select OracleNoSQL: Remove Connection.
Note: Enter
oraclenosqlin the Command Palette to display all of the Oracle NoSQL DB commands you can use.
Authorization Requirements for Visual Studio Code
Learn about the authorization requirements needed in Oracle NoSQL Database Cloud Service to use Visual Studio Code.
The Visual Studio Code extension allows you to access Oracle NoSQL database Cloud Service using API-key authentication method. Access to resources in Oracle NoSQL Database Cloud Service such as tables, tablespaces, and APIs is managed through Identity and Access Management (IAM) policies. This ensures that only authenticated users, who are members of groups with the appropriate inspect, read, use, or manage table permissions in a given compartment, can interact with these resources. For more information, see Managing Access to NDCS Tables.
When using Visual Studio Code to manage tables in Oracle NoSQL Database Cloud Service tables, your effective IAM permissions determine which resources you can read from or write to. If a user attempts an action for which they lack authorization, the Visual Studio Code will return the corresponding authorization error as provided by OCI IAM.
For example, the OCI IAM denies any insert operation on an Oracle NoSQL Database Cloud Service table if your user group only has the “read” permission for NoSQL tables. The following error message is displayed in the Visual Studio Code extension:
Error Inserting the row : NoSQLError: [INSUFFICIENT_PERMISSION] Authorization failed or requested resource not found