Configure a List of Values to Populate Related Fields

You can configure a list of values to populate additional related fields (referred to as "driven fields") when a business user selects a value.

Let's suppose you have an Invoices table in your workbook with three related columns for the supplier: Supplier Id, Supplier, and Supplier Number. You may want to configure a list of values on the Supplier Id field that uses a Suppliers business object as the list of value's data source. When you do this, you may also want to map other fields from the source—such as Supplier and SupplierNumber—to the appropriate columns in the layout so that the supplier's name and number are automatically populated when a supplier Id is selected.

Note:

This feature is not supported on row finder variables or custom action payload fields.

To configure related fields for a list of values:

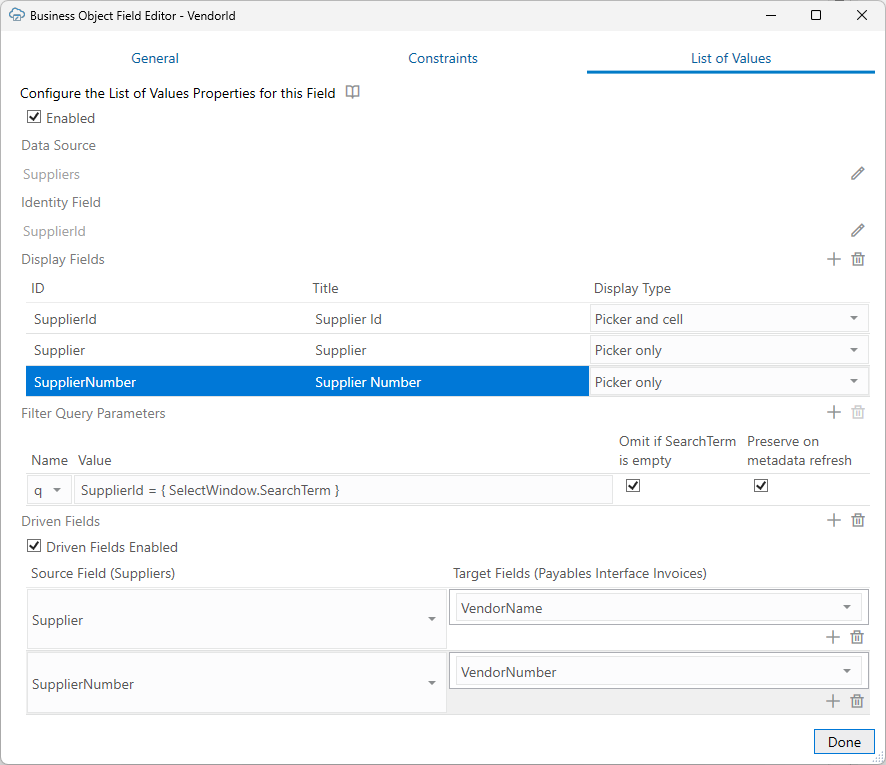
  1. Open the Business Object Field Editor of the field for which you want to configure the list of values—in this example, the VendorId field (the Id for the Supplier Id column in the layout).
  2. Open the List of Values tab and configure the list of values as required.

    In this example, you are going to use:

    • The Suppliers business object for the data source
    • The SupplierId field from the data source as the Identity Field
    • The SupplierId, Supplier, and SupplierNumber fields as display fields. Select Picker and cell for SupplierId and Picker only for Supplier and SupplierNumber.

      Note:

      If you include the additional source fields as display fields (with a display type of Picker only), the business user can preview their values before selecting a supplier Id.
  3. To map the source fields in the Suppliers business object to target fields in your Invoices layout:
    1. Select Driven Fields Enabled.
    2. Click the Add Field icon (Add Field) next to Driven Fields to add a row to the table.
    3. Select a source field from the row's Source Field drop-down list.
      The value in this field will be written to the target fields. In this example, select the Supplier field.
    4. Select a target field in the layout from the Target Fields drop-down list.
      In this example, select VendorName to map it to the Supplier source field.
    5. Click the Add Target icon (Add Field) below the drop-down list to add an additional target.
    6. Repeat steps 3.b to 3.e for any additional fields.
      In this example, map the SupplierNumber source field to the VendorNumber target.
  4. Click Done.

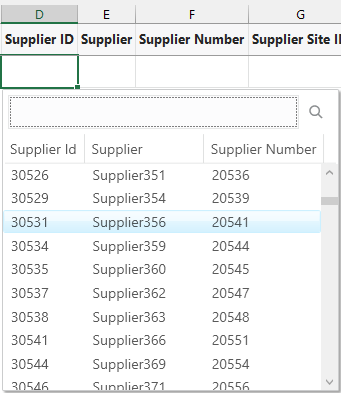
When a business user selects the Supplier Id field from the table, the add-in displays the search-and-select window with values for the three supplier fields.


If the user selects a supplier Id from the list, the add-in populates the Supplier and Supplier Number fields with the related values. Note these values are not populated if the business user pastes a value into the Supplier ID cell instead of selecting one from the list.

If required, the user can change these values from the row.