Add Custom Action Fields to an Action Table Layout

Once you have created an Action Table layout for your integrated workbook, you can add custom action payload fields to the layout from the Layout Designer.

To add custom action columns:

  1. Select the Action Table layout, then click Designer from the Oracle Visual Builder tab to open the Layout Designer.
  2. Click the Columns tab in the Layout Designer.
  3. Click the Manage Columns icon (Manage Columns) to open the Table Column Manager.
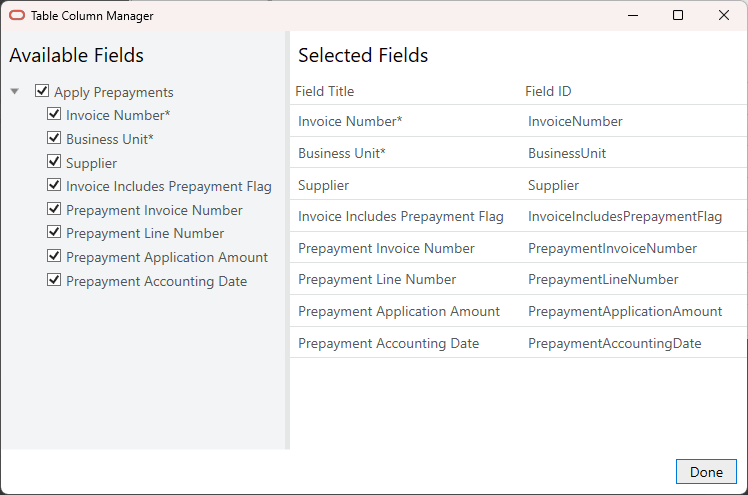
    The Available Fields pane of the Table Column Manager displays the available payload fields for the layout's custom action—in this example, Apply Prepayments.

    Note:

    The Available Fields pane only shows custom action payload fields. You can't add business object fields to an Action Table layout.
  4. In the Selected Fields pane, select the location where you want the payload field columns to be added. The columns will be inserted before the selected field.
  5. In the Available Fields pane, select the payload fields you want to add.
    Use the check box next to the custom action title (for example, Apply Prepayments) to selects or deselect all payload fields.
  6. To change the order in the layout, drag a column in the Selected Fields pane to another location in the list.
  7. Click Done.

Once you add custom action fields to a layout in your integrated workbook, your business users can mark rows for the custom action by entering values in the payload field columns or by using the ribbon command. See Perform Actions in an Action Table Layout in Managing Data Using Oracle Visual Builder Add-in for Excel.

When they click Upload Action Requests, the add-in performs the custom action on the marked rows and sends any relevant payload field values. See Upload Action Requests from an Action Table.