Add a Dynamic Table to a Page

Add a dynamic table component to your application's page when you want to display data in a table and use conditions to determine what's displayed to your users. Once you add a dynamic table to a page, you can use the Quick Start to create a rule set that you can configure with your own layouts and display logic.

Note:

Before you begin, make sure you've defined a data source, such as a business object or an external service that calls a business object through a service connection. See Work With Business Objects or Manage Service Connections.

To add a dynamic table component to a page:

  1. With your page open in the Page Designer, drag the Dynamic Table from the Components palette onto your canvas.


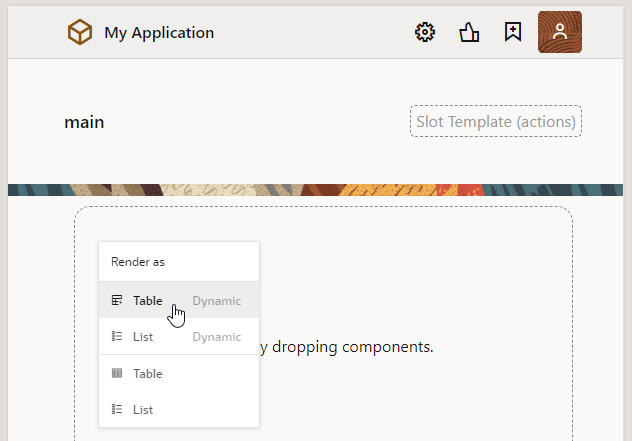
    You can also drag the Get Many endpoint for the data source you want to bind to the table from the Data palette onto the canvas. After dropping the endpoint on the canvas, select Table Dynamic in the Render as menu:


    Selecting the item in the menu will open the Select Rule Set page in the Configure Layout wizard.

  2. Click the Configure Layout Quick Start in the Properties pane.
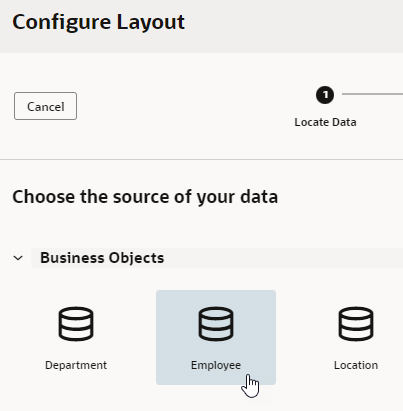
  3. In the wizard's Locate Data page, select the data source to bind to the dynamic component. Click Next.

    This example uses the Employee business object as the data source:


  4. In the Select Rule Set page, select New Rule Set (if necessary) and enter a label, ID, and description to associate the dynamic table with a rule set.

    Let's say you want to show one layout with some employee fields (for example, salary) when the user is a manager, and another layout (without the Salary field) for all other users. To do this, you'd start by creating a rule set (labeled RoleBasedTable for example), then select the fields you want to show by default for all users. This set of fields will be added to your initial layout (labeled default).

    The Fields palette lists all the fields and objects you can add to your layout. You can add a field or object by selecting its check box in the Fields palette or by dragging it from the palette onto the drop target area on the right. The columns appear in the order selected; use the handles to the left of each field if you want to re-order them. You can also remove a field by clicking its Delete icon, as shown here:


    When you are done, click Next.

  5. To limit the number of records returned, define a query on the Define Query page, then click Finish.

The dynamic table is created to use the layout with the fields you selected. You'll also see the newly created rule set under the General tab in the table's Properties pane.
Description of dynamic-components-table-pi.png follows
Description of the illustration dynamic-components-table-pi.png

You can configure the dynamic table's properties much like you would a standard table. For example, you can enable a single table row to be selected and set up an event that triggers an action chain to fetch the data of the selected row.

Click Go to Rule Set to open the rule set in the Rule Sets tab and configure it with your own display logic and layouts. For example, you might configure the display logic to show the default layout when the user has the Employee role. You could then add another rule to show a different layout when the user has the Manager role. See Add Display Logic to Determine What's Displayed at Runtime.