Add a Dynamic Form to a Page

Add a dynamic form component to your application's page when you want to display data in a form and use conditions to determine what's displayed to your users. Once you add a dynamic form to a page, you can use Quick Starts to create a rule set that you can configure with your own layouts and display logic.

Note:

Before you begin, make sure you've defined a data source, such as a business object or an external service that calls a business object through a service connection. See Work With Business Objects or Manage Service Connections.

To add a dynamic form component to a page:

  1. With your page open in the Page Designer, drag the Dynamic Form from the Components palette onto your canvas.


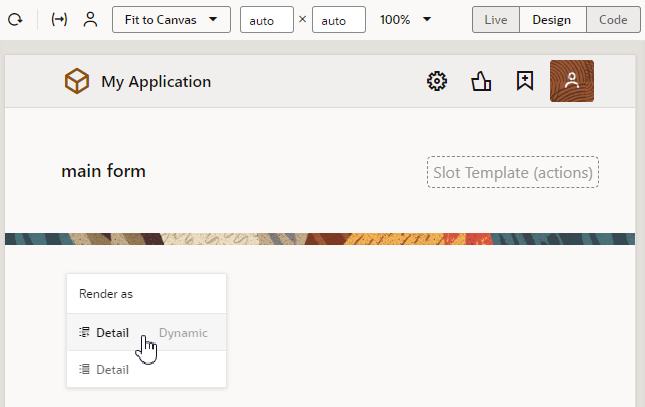
    You can also drag an endpoint for the data source you want to bind to the form from the Data palette onto the canvas. After dropping the endpoint on the canvas, select the dynamic form or list component in the Render as menu:


    Selecting the item in the menu will open the Select Rule Set page in the Configure Layout wizard.

  2. Select the Quick Start you want to use for the dynamic form in the Properties pane.
    • Click Configure as Create Form to create a form that interacts with the CREATE endpoint to create a new field in the data source.
    • Click Configure as Edit Form to create a form that interacts with the GET and UPDATE endpoints to edit a field's details in the data source.
    • Click Configure as Detail Form to create a form that interacts with the GET ONE endpoint to view details of a selected field.

    If you plan to use the Configure as Edit Form and Configure as Detail Form quick starts, you'll be prompted to provide endpoint parameters to be able to fetch and update the data of a particular row in the form. Make sure you create variables that you can map to these parameters before you use the quick start.

    Follow the quick start prompts to select a data source, rule set and fields to display in the form. Depending on the quick start you selected, you might have additional steps to complete.

  3. Select the data source you want associated with the form.
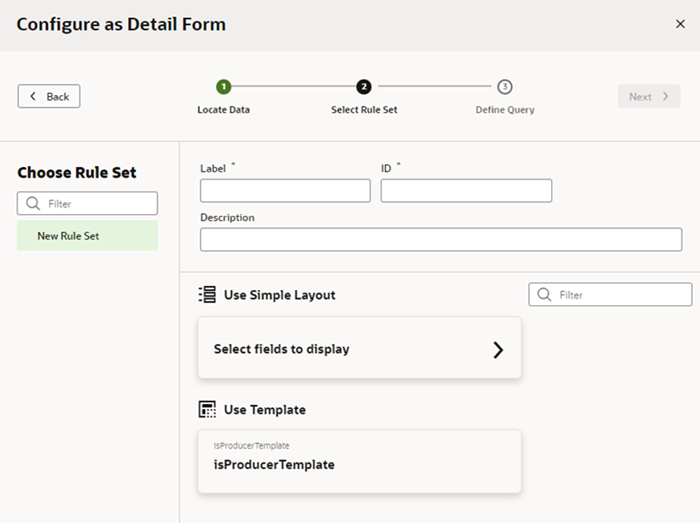
  4. In the Select Rule Set page, select New Rule Set (if necessary) to create a rule set, and provide a label and ID (and optionally, a description) for the rule set.

    You can choose an existing rule set if you've already create one you want to use. If you select an existing rule set, the quick start will open the rule set in an editor where you can add rules for the new form.

  5. Select Select fields to display under Use Simple Layout.

    This example shows the Select Rule Set step in the Configure as Detail Form quick start when a form template is also available. If you choose a template, the quick start will show you the fields defined in the template, and you can then add more fields.


    If you select a template and it isn't right for this form, you can return to this pane and choose a different template, or click Select fields to display to create a layout without a template.

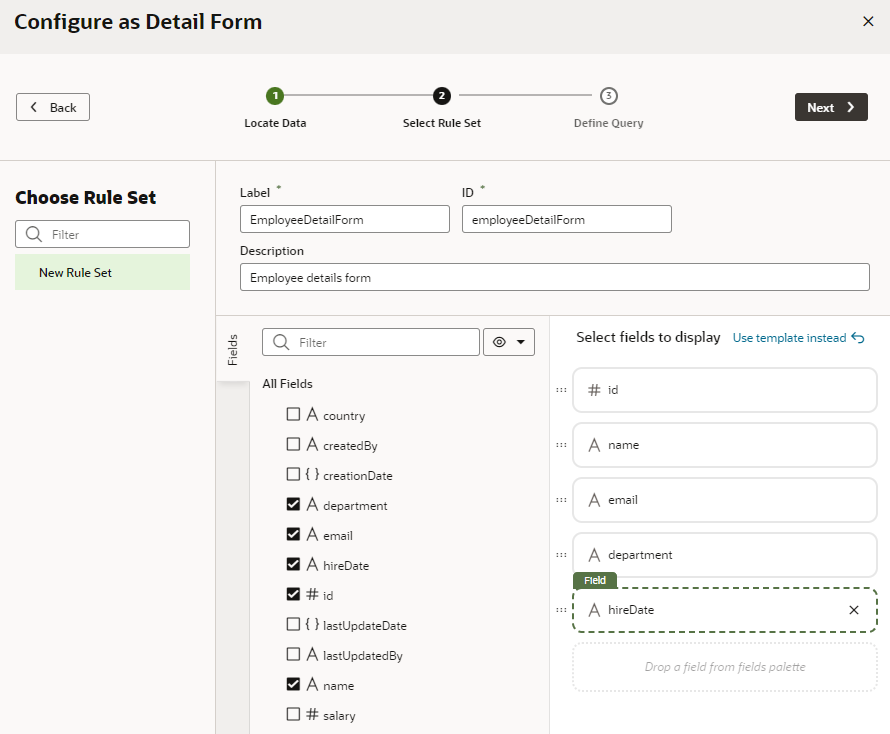
  6. Select the fields to display in the form.

    This example shows the Configure as Detail Form quick start with fields selected from an Employee business object. These fields are added to the form's default layout. The form is also configured to fetch the data of a particular row in the form.


    Click Next when you are done.

  7. Map the sources to the target variables in your form, as needed. Click Finish.

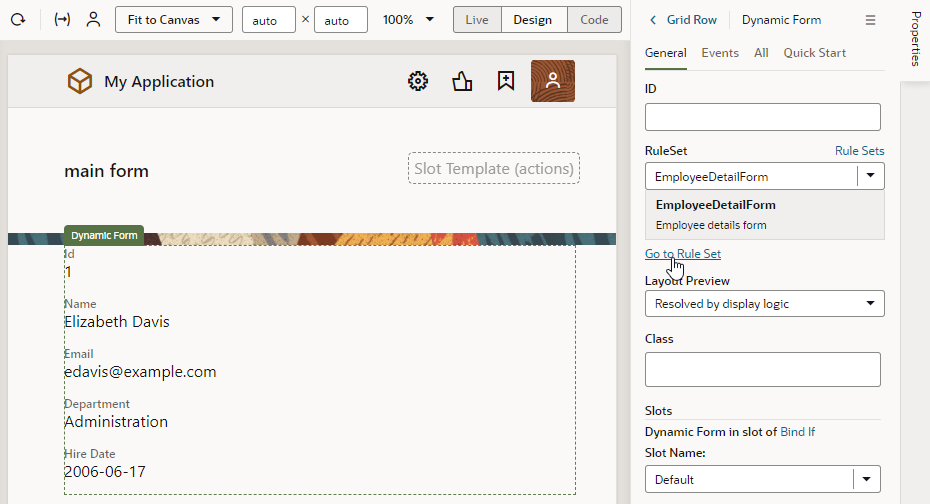
The dynamic form is created with the fields you selected. You'll also see the newly created rule set under the General tab in the Properties pane.
Description of dynamic-components-form-pi.png follows
Description of the illustration dynamic-components-form-pi.png

Click Go to Rule Set to open the rule set in the Rule Sets tab. From here, you can configure your form's display logic and layouts; for example to show employee data to authenticated users viewing the page on a tablet-sized screen or larger.