Create an App UI or Fragment
The steps for creating an App UI or fragment differ slightly, depending on whether you already have one of these assets in your extension. To get started:
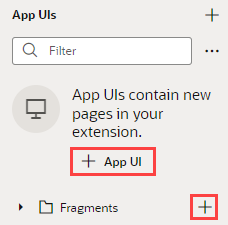
If you haven't yet created an App UI or fragment in this extension, click + App UI or + next to Fragments in the App UIs pane: 
Description of the illustration newfragorappui.png
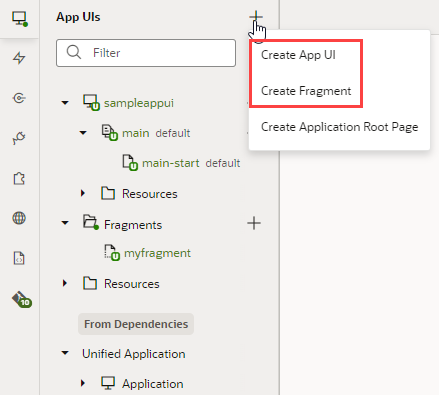
If you already have an App UI or fragment, click + at the top of the App UIs pane: 
Description of the illustration cr8fragorappui.png
Note:
As a best practice, it's a good idea to create only one App UI in each extension for typical scenarios. This can help you isolate each App UI's code and manage deployments more easily.- For a new fragment, enter a Fragment ID. You are immediately placed in the Fragment Designer, where you can start developing your fragment using the chapters in Build an App UI or Fragment to help you.
- For a new App UI, enter a name in the App UI Name field. This name is by default added to your Unified Application's base URL, as in
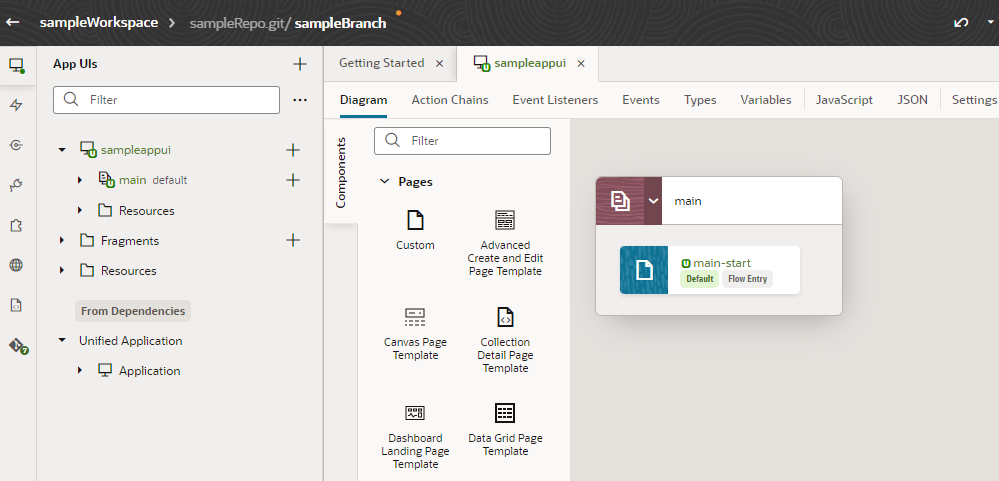
https://UnifiedAppName/redwood/AppUIName, to create the App UI's URL. However, you can use the App UI ID field to override the App UI name and supply your own string for the final portion of the URL, if needed. Make sure you retain thex-prefix, which is used to distinguish customer App UIs from those created by Oracle in case they have the same name.The first thing you'll see is a visual representation of your App UI on the Diagram tab:

Description of the illustration appuidiagram.pngThe Diagram view can be quite handy as your App UI increases in complexity, as it displays your App UI's default pages, navigation flows, and even audit status at a glance. For now, though, you probably want to click
main-startand start dropping components from the Components palette onto your page:
Description of the illustration components.pngUse the chapters in Build an App UI or Fragment to help you build your App UI. When you're done, see Preview, Share, and Publish Your Extension to finish up your work.
Note:
If you're having trouble previewing your page in the Page Designer, you might need to check your browser settings to make sure that the browser isn't blocking your VB Studio instance from accessing your Oracle Cloud Application instance. This can happen when the instances are not in the same host domain and your Chrome browser's settings are set to the default. To resolve this error, open the browser's Cookies settings page (chrome://settings/cookies) and disable Block third-party cookies, if it's not already disabled. You can also select Allow all cookies to disable the "Block third-party cookies" option.