Display SaaS Data In Your App UI
You can create pages that interact with built-in as well as custom business objects in your Oracle Cloud Applications (for example, HCM or Help Desk) and run them directly on your Oracle SaaS infrastructure.
Let’s say you want to show employee information in HCM, you can create a catalog-based service connection to access built-in objects and interact directly with HCM endpoints in the Oracle Cloud Application service catalog. Now suppose you want to track parking spaces for employees in HCM, you’d then use Application Composer to define a custom object for employee parking, then create an ADF Describe-based service connection to access that custom object.
There are, however, some limitations to this approach:
- You can define third-party REST services only if they don’t need authentication.
- You cannot allow users who don’t have access to your production Oracle Cloud Applications environment to access the App UI anonymously.
If your application requires these capabilities, you’ll need access to a separate Visual Builder cloud instance.
Let’s take a look at how you can create App UI pages that interact with custom objects:
-
In your Oracle Cloud Application environment, select a sandbox that allows you to access the Application Composer and define your custom objects. For details on how to create a custom object and add fields to it, see Define Objects and Define Fields in Configuring Applications Using Application Composer.
For example, assume you’ve defined an employee parking custom object, with the Employee Name and Assigned Parking Spot as fields. To use this object in your own pages, you’ll need its Describe file, which can be found via the custom object’s
Describelink, as shown here:
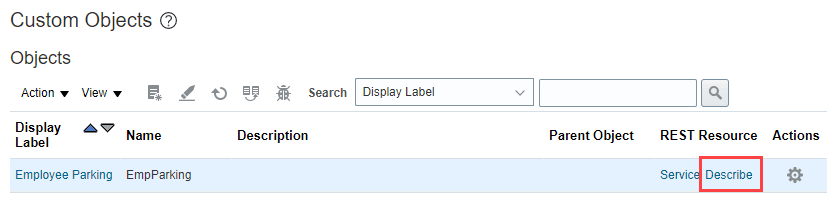
Description of the illustration customobject-describe1.png
Click the link to open the Describe file in a new tab, then copy its URL, something like
https://host-demo1.oracledemos.com/hcmRestApi/resources/latest/EmpParking_c/describe. -
In your VB Studio environment, define a service connection to access the custom object, then use your App UI’s pages to access the object’s data.
- Click Services in the Navigator.
- In the Services pane, click the + sign and select Service Connection.
- Click Define by Specification in the Create Service Connection wizard.
- Enter a name for your connection in the Service name field, select the API Type as
ADF Describe, then in the Web address option, paste the URL to the object’s Describe file that you previously copied. Select your authentication option, then click Next. -
Select the custom object’s endpoints you want to add and click Create.
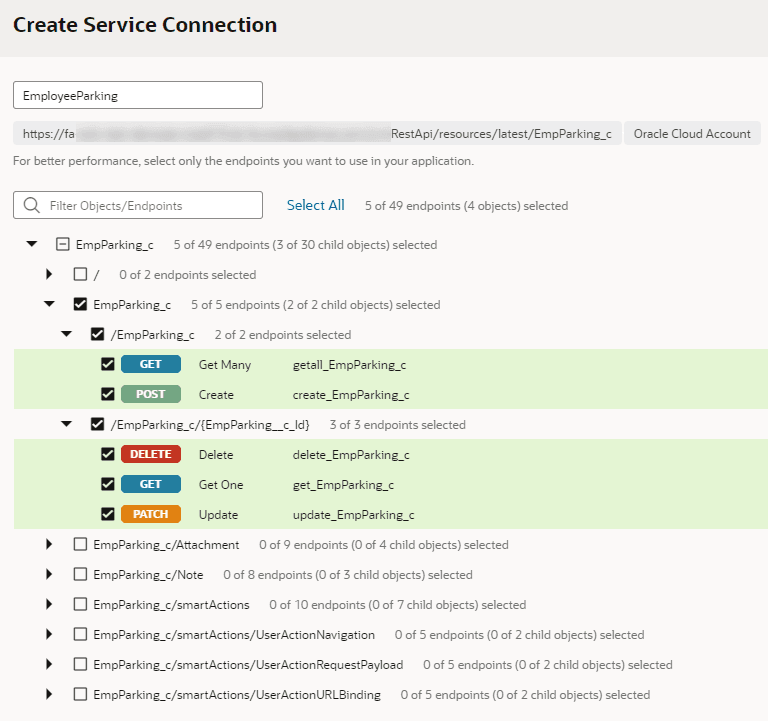
- Switch to the App UIs pane, then select your App UI.
- Create a new page or open an existing one in the Page Designer.
-
Click the Data palette and locate your custom object. The Data palette lists the accessible endpoints from your extension’s dependencies and service connections.
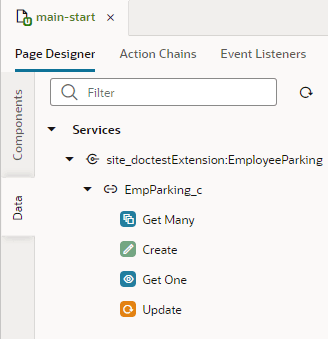
Description of the illustration customobject-datapaletteview.png
-
Drag and drop the object (or a particular endpoint) onto the page canvas, then select the component you want use to display data. For example, you might display the object’s data as a Create Form containing the Employee Name and Assigned Parking Spot fields.
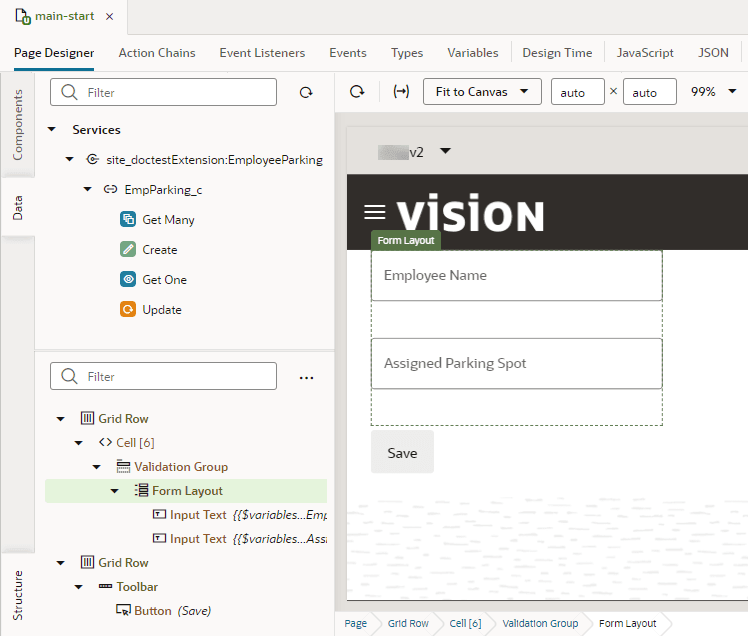
Description of the illustration customobject-displayinpage1.png