Edit an Issue and Associate a Branch with a Merge Request

You can create a branch of the code directly from an issue and associate the two, clearly indicating which code changes relate to the specific issue.

Here's how you create, view, and link/unlink MRs from the Edit Issue page:
  1. In the Issues page, scroll down to the Linked Merge Requests section.
    Initial Linked Merge Requests section before adding a new MR. The page shows one existing closed MR, 82 Merge Request for branch 'branch6' in the test.git repository. The target branch is main and the review branch is branch6.
  2. Click the + Create Merge Request button and display the New Merge Request wizard.
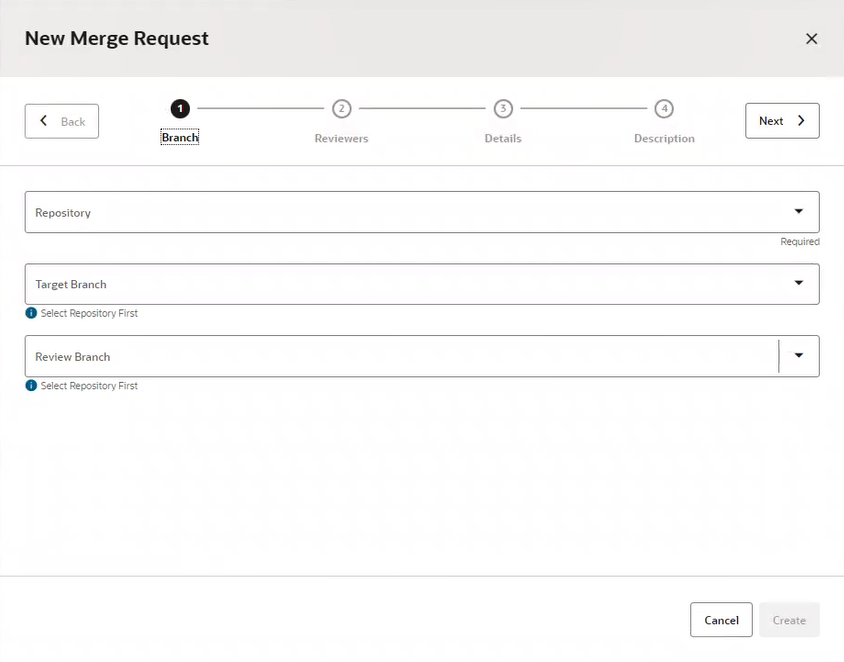
    The Branch page is where you start.

    Branch dialog in the New Merge Request wizard, before anything has been entered. The Repository, Target Branch, and Review Branch selector fields are empty. No selections have been made yet.

  3. Select the repository and the target branch, then click the Review Branch dropdown and select an existing branch or create a new review branch. If you need to create a new branch, type the name of this new branch in the field.
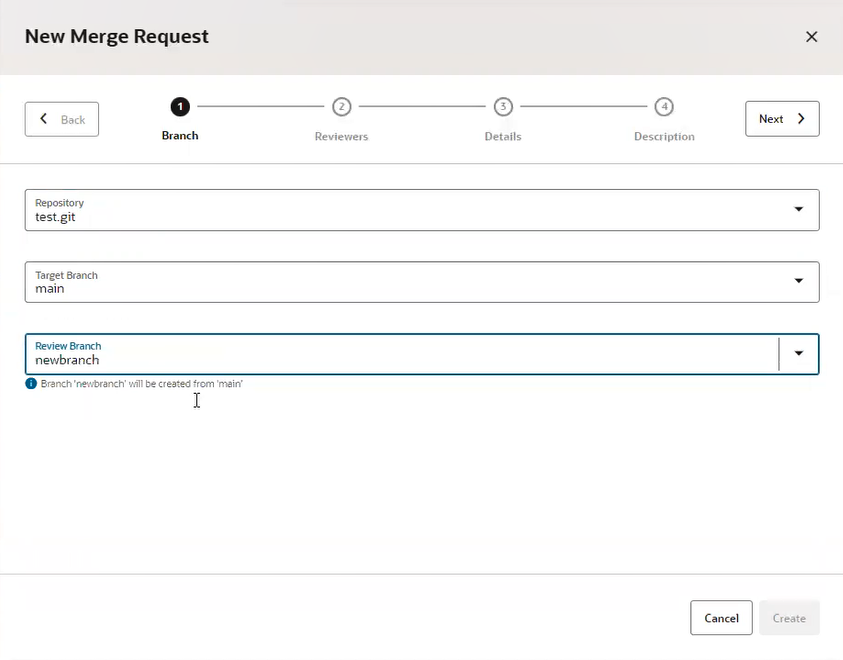
    Let's create a new branch, say newbranch, so we'll type it in the Review Branch field. Notice the message that is displayed under the field:
    Branch 'newbranch' will be created from 'main'

    Branch dialog in the New Merge Request wizard, with all fields completed. The repository is test.git, the target branch is main, and the review branch is newbranch. The message

  4. Click Next to go to the Reviewers page.
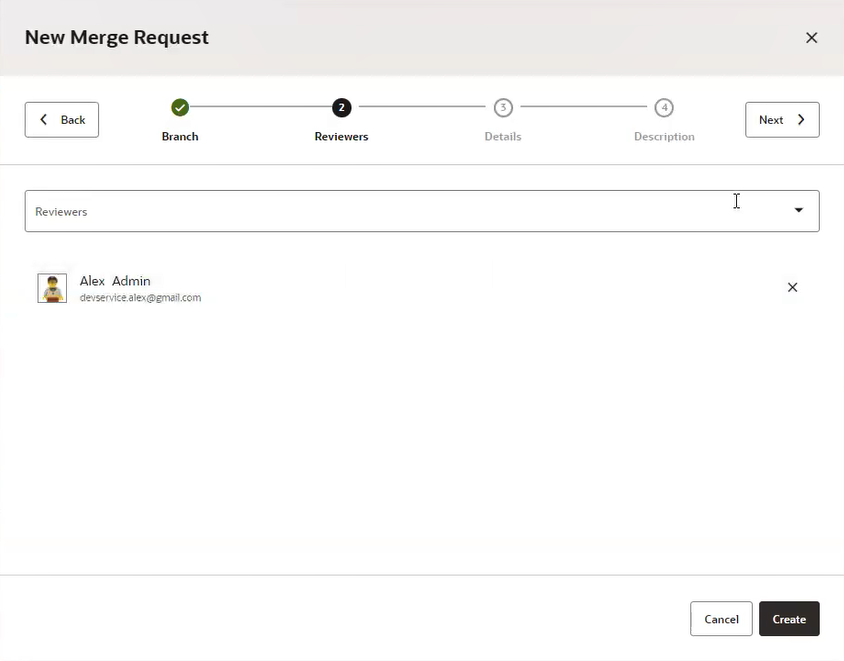
    Notice that the current user is automatically added as a reviewer.

    Reviewers dialog in the New Merge Request wizard, with the current user, AlexUpdated Admin, automatically added. Click the Reviewers selector to add more users or groups as reviewers.

  5. Add more reviewers, as needed, and click Next to go to the Details page.
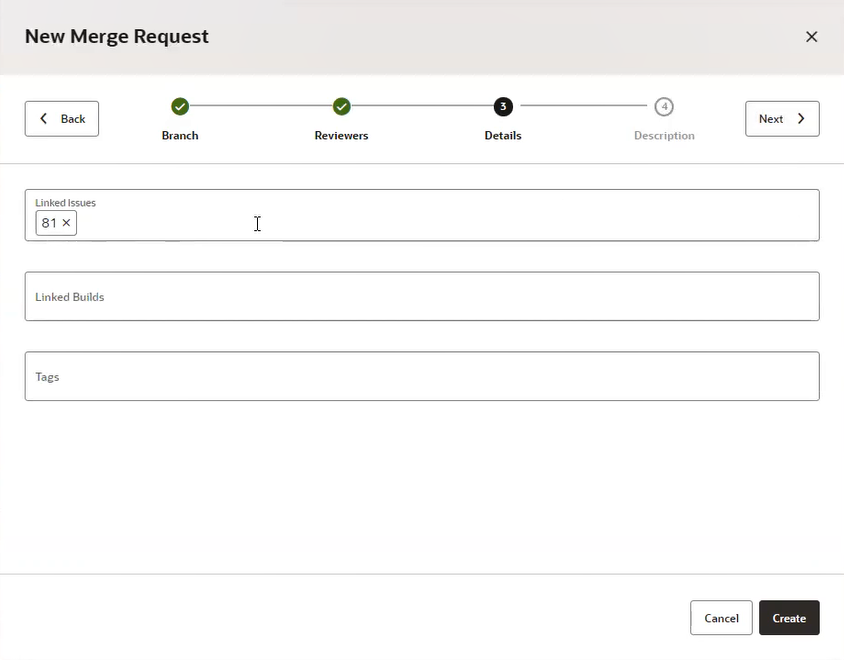
    The current issue is automatically linked to the MR and is added to the Linked Issues field.

    Details dialog in the New Merge Request wizard, with 81 selected as the linked issue. There are no linked builds or tags. The Create button can be clicked if you want to bypass the Description dialog and create the MR without any additional information. Otherwise click the Next > button and go to the Description dialog.

  6. Click Next to go to the Description page.
  7. Enter a summary and optionally a description, then click Create.
    The linked MR you created appears under the Linked Merge Requests section on the Issues page, where you can see the new MR name (link), repository, status, review and target branches, and the unlink Unlink icon action icon.

    Linked Merge Requests section on the Issues page. Two linked issues are shown, the closed MR, 82 Merge Request for branch 'branch6' and the new open MR that you just created, 101 Merge Request for branch 'newbranch'. Both branches are in the test.git repository and the target branch main. The closed MR's review branch is branch 6 and the open MR's review branch is newbranch.

  8. Click the MR name link to go directly to the merge request.
    Linked Merge Requests section on the Issues page with the link for the new open MR, 101 Merge Request for branch 'newbranch', circled in red in the Merge Request column on the left.
  9. Expand "Linked Issues" to return to the Issues page.
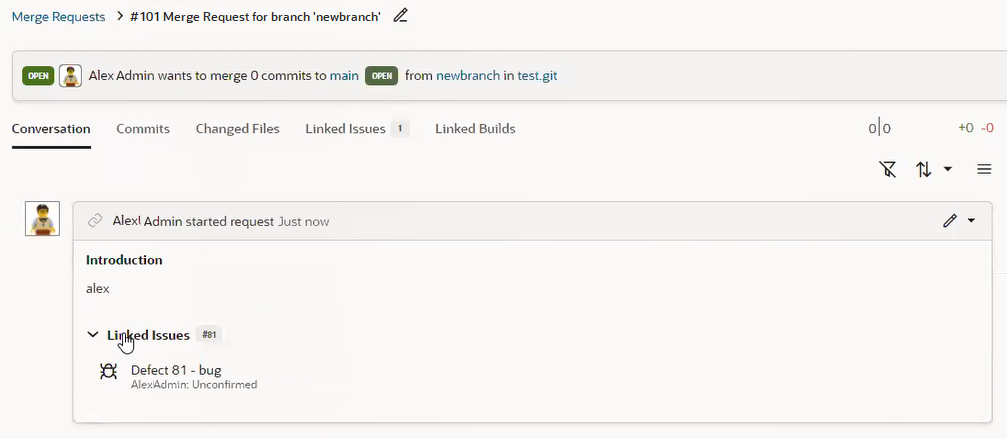
    MR page where you land after clicking the 101 Merge Request for branch 'newbranch' link in the Linked Merge Requests section on the Issues page. The Conversation tab shows that Alex Admin started the request, he had typed some text in the Description for the MR previously and expanded Linked Issues, showing Defect 81, a bug, that belongs to him and is still unconfirmed.
  10. Click the branch link.
    Linked Merge Requests section on the Issues page with the link for newbranch circled in red in the Review Branch column. This is link to click to take you to the Branches page.

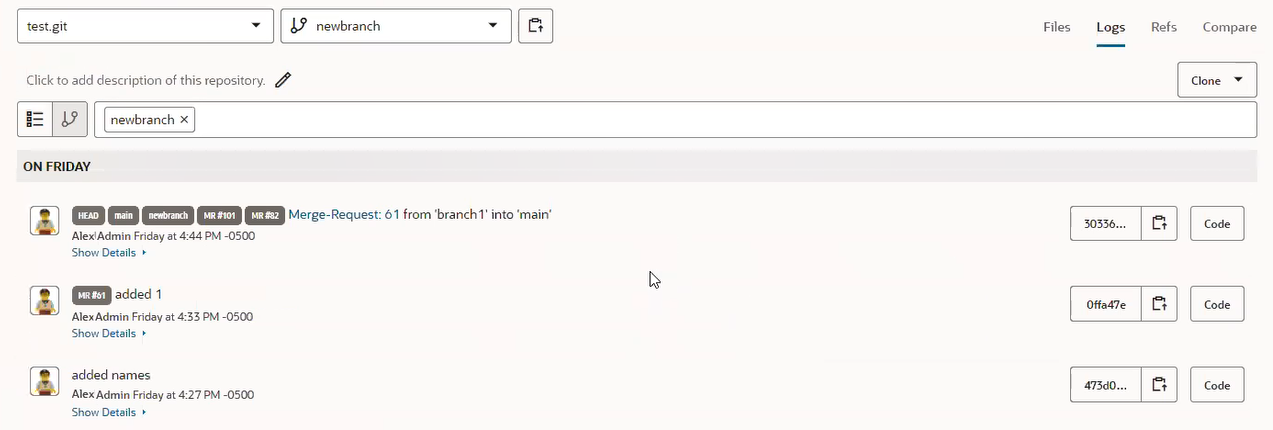
    The Branches page displays. Branches page showing information, including activity, about the branch newbranch in the test.git repository. Three actions are shown.

  11. Return to the Linked Merge Request section on the Issue page and mouse over the branch6 item in the Review Branch column.
    Linked Merge Requests section on the Issues page after mousing over branch6, which has been closed. The branch name has a strikethrough line through it and the message

    Notice that if a branch is remote or was deleted, you'll see a line through its name and you'll see the message like the one shown here.

  12. Click the Unlink Unlink icon icon and unlink the merge request from the issue.
    Unlinking breaks the association between the MR and the issue, but nothing is deleted. The MR is still there after unlinking.
So, you can now show and create the association from both sides, from a merge request as well as from an issue.